Using the RT Bounce plugin for Final Cut Pro X:
After installing, follow these steps to apply the RT Bounce Generator in the Final Cut Pro X timeline:
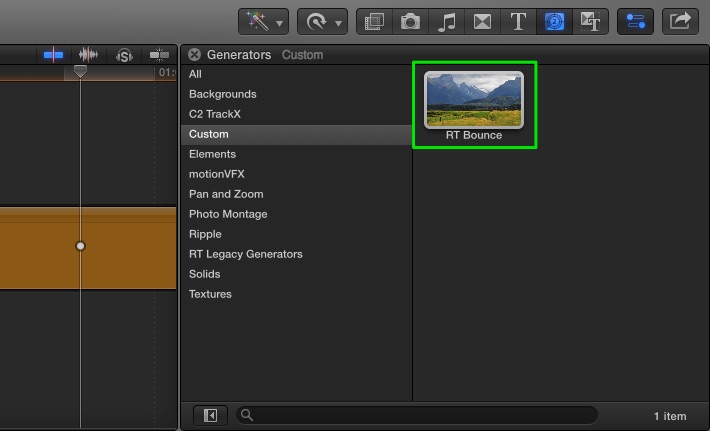
Locate the RT Bounce plugin in the Custom category of the Generators Browser. Drag the generator into the Timeline or press E.
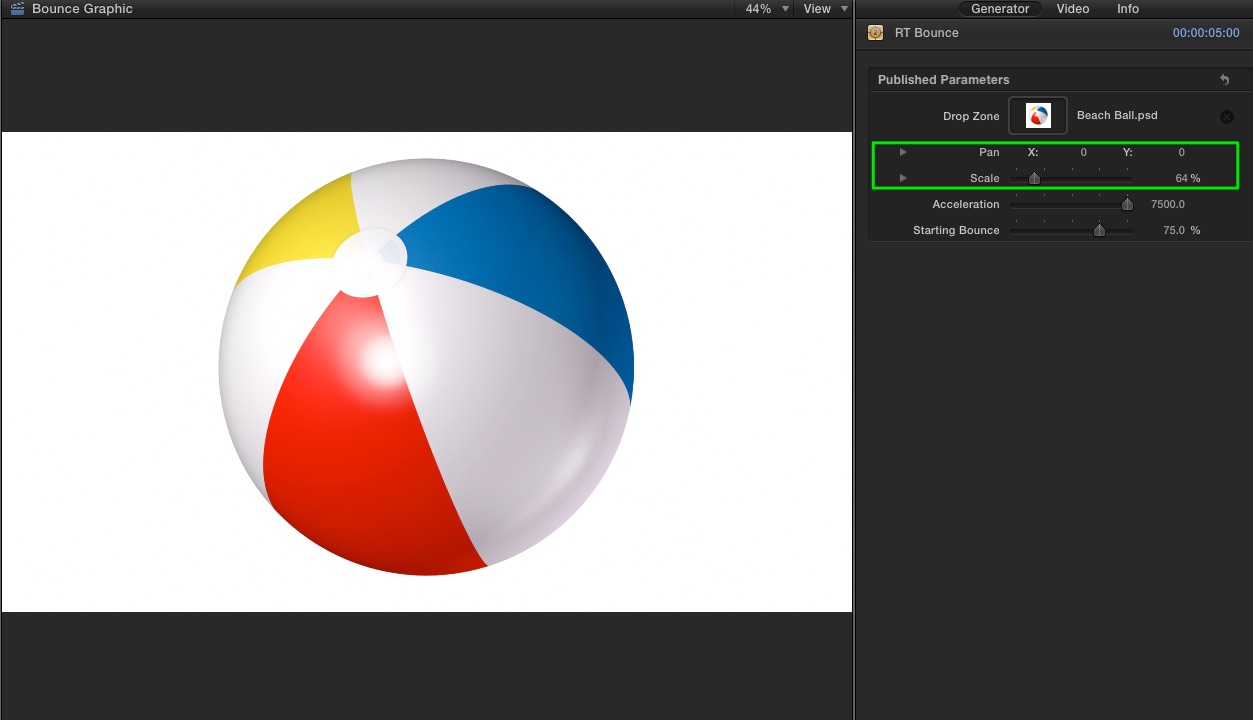
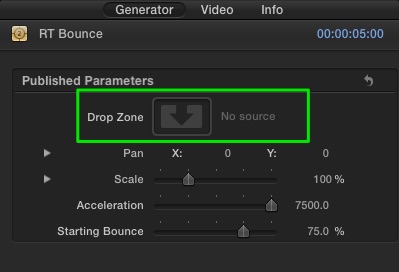
With the Playhead parked over the RT Bounce Generator, press Command-4 to open the Inspector. Click the Drop Zone image well to locate a source image for your animation.
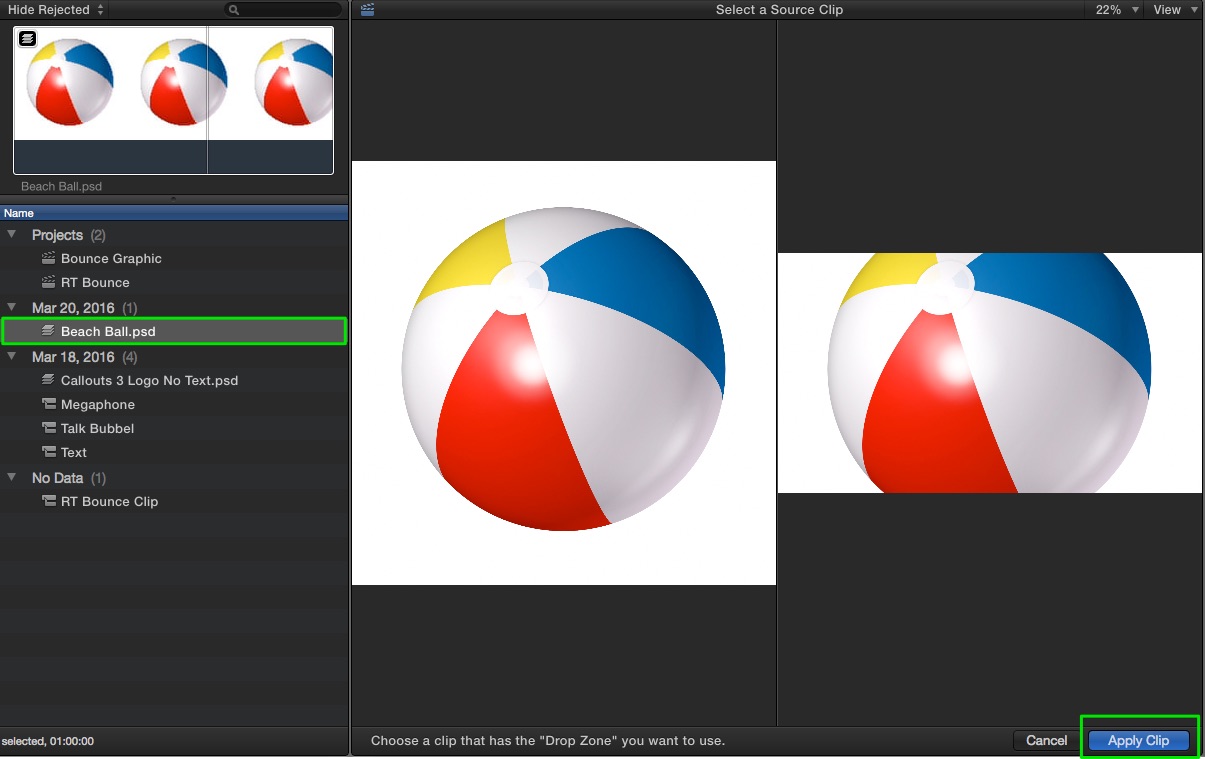
In the Browser, select a video clip, photo or graphic you want animate, then select a frame in the filmstrip area. The image will appear in the right side of the two-up display. Click Apply Clip to confirm your selection.
Use the Pan and Scale sliders to adjust the size and position of the image if necessary. Use the Acceleration and Starting Bounce parameters to adjust the speed and amount of bounce applied. Additionally you can control the speed of the animation by trimming the Generator in the Timeline.