Are you looking for updated movies for the lastest version of Final Cut Pro X?
Click here to see FCP 10.4
Final Cut Pro 10.3 Free Trial Tutorial


Sharing Your Movie in Final Cut Pro X
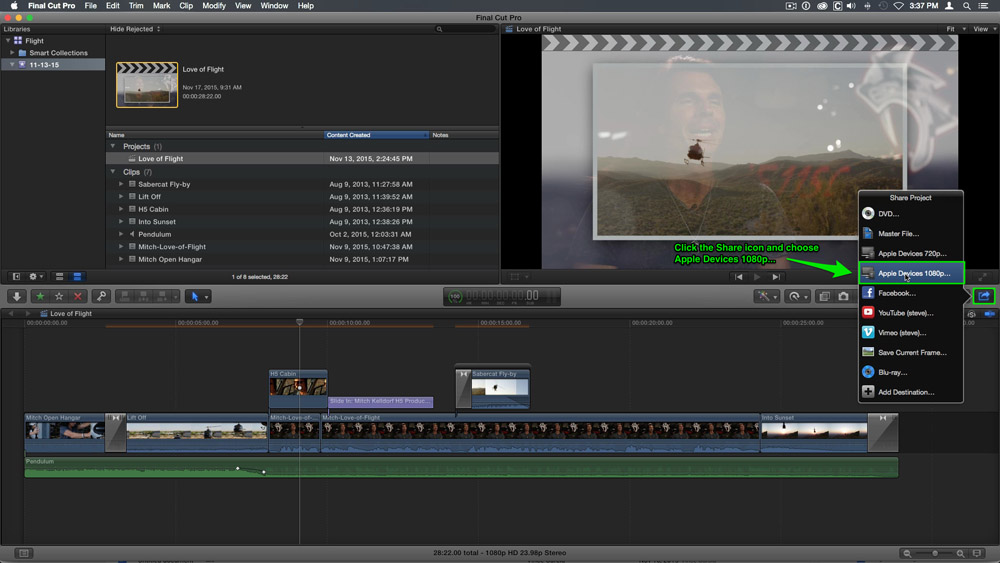
In this final lesson, we’ll look at sharing your movies to specific destinations like Apple iDevice . Final Cut Pro X will allow you to share your movie from the timeline or you can select the project in the Browser. Select the Love of Flight Project, then click the Share Destinations button on the toolbar to bring up the destinations window. Choose Apple Devices 1080p.
The Info Window
You are presented with an info window that gives you a quick overview of your movie name, it’s description and any tags you’ve applied. These tags can be read and embedded by video sharing sites like Vimeo and YouTube.
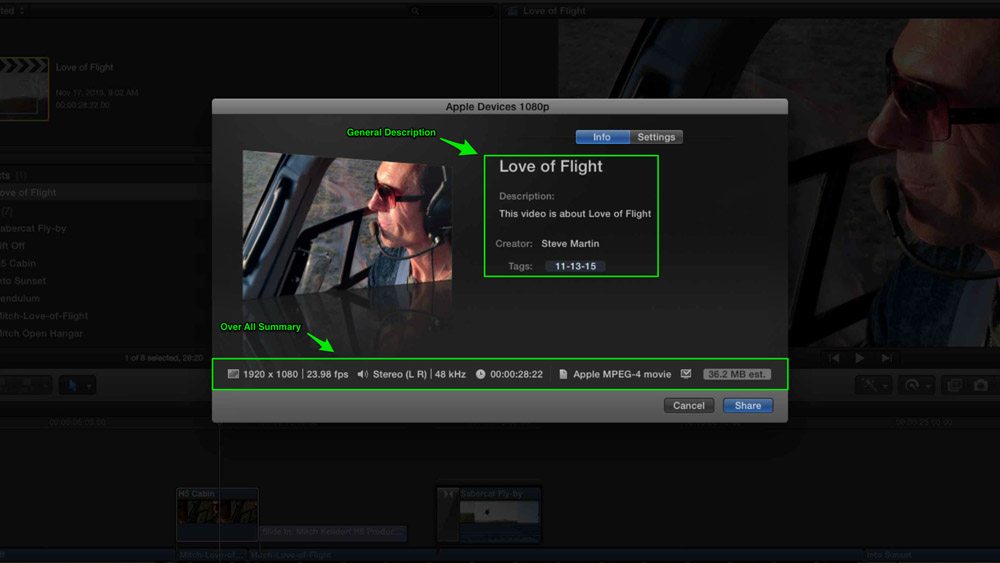
Editing the Tags (Metadata)
Tags are represented by these blue tokens. Let’s remove them and create our own. Type out “Helicopter” and a comma, then type “H5 Productions”. Now anyone searching YouTube can use these tags to search for your video. These tags can also be read by the Mac OS if you use Spotlight.
Info Summary
Looking horizontally along the bottom of the window, you’ll see a summary of the video format, the audio channel count, duration and final delivery codec. You’re even given an estimated file size. But here’s what’s really cool:
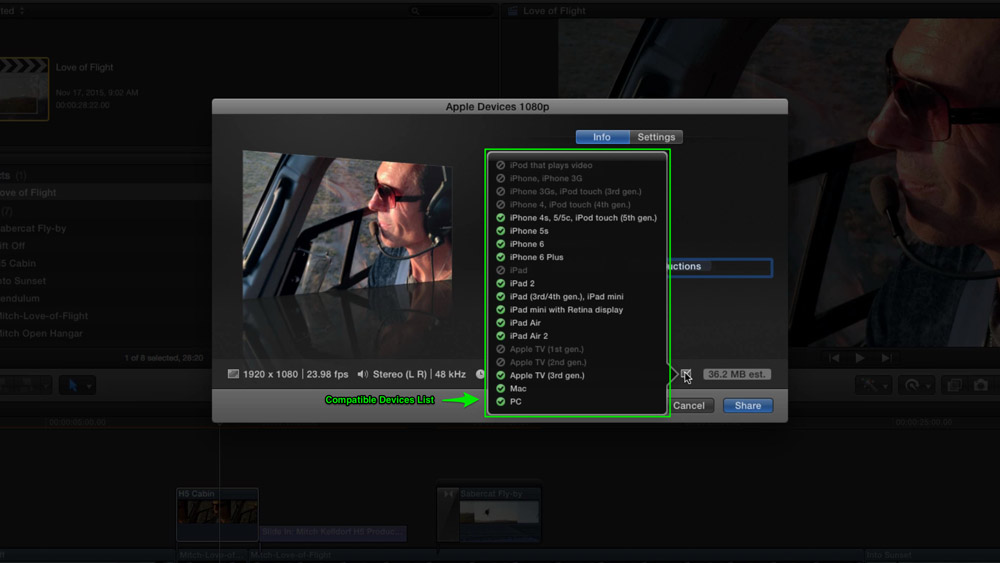
Compatible Devices
If you hover your mouse pointer over the devices icon, a window will appear showing you what specific computers and/or devices your movie export will be compatible with. You can change the sharing options by clicking the Settings button at the top of the window. In most cases however, you won’t need to change anything.
Monitoring Export Progress
Click Share to begin exporting. To monitor the progress of the export, press Command-9 to bring up the Background Tasks window. Your movie’s progress will appear in the Sharing section. You can continue to work on your project while your movie exports.
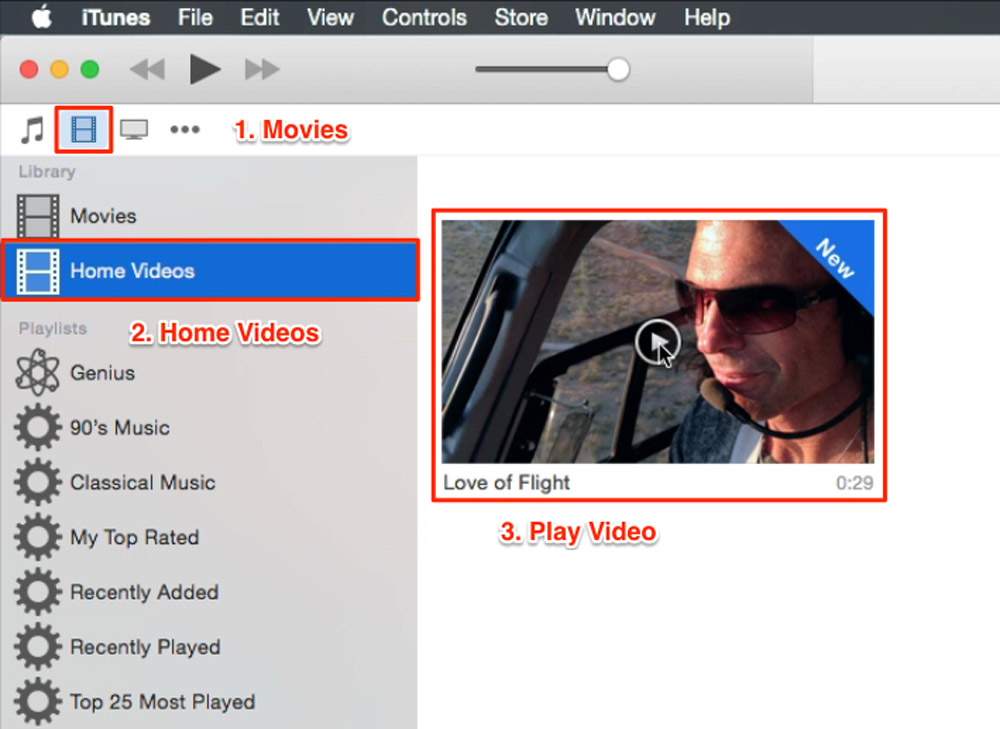
Locating Your Movie in iTunes
Once the movie has exported, OSX will notify you. Because we chose Apple Devices from the destinations menu, the movie was automatically saved into your iTunes Library. Click iTunes in the dock, then select Movies > Home Videos. Your movies will appear with a thumbnail and the word “new”. The next time you sync your iPhone or iPad, your movies will automatically appear on those devices.
So that’s it. Thank you for joining me on this short 8 lesson journey on how to get started using Final Cut Pro X. If you want to go further, be sure to check out our Core Training in Final Cut Pro X tutorial at Rippletraining.com.
If you enjoyed this 8 lesson journey, that was just a small taste of what we have packed into our Final Cut Pro X Core Training. We dive deep into the advanced editing tools of Final Cut Pro, and teach the core fundamentals of editing that will take your videos to the next level.
This is Lesson 8 of our free Final Cut Pro X tutorial. If you are enjoying this tutorial, show us your appreciation by sharing!
- Lesson 1: Getting Started with the Final Cut Pro X Free Trial
- Lesson 2: Importing Media into Final Cut Pro X
- Lesson 3: Adding Clips in Final Cut Pro X
- Lesson 4: Trimming in Final Cut Pro X
- Lesson 5: Working with Sound in Final Cut Pro X
- Lesson 6: Adding Titles & Transitions in Final Cut Pro X
- Lesson 7: Adding Effects in Final Cut Pro X
- Lesson 8: Sharing your Movie in Final Cut Pro X