Creating a Live Text Template in After Effects to use in Premiere Pro
There comes a time in every editor’s life when they need to create graphics for a project with the same style and motion, but different text. One common instance is the need to create lower-thirds for a project. Let’s say you have a long video and you need to design and animate a sweet lower third. Then you have to create 20 or 30 lower third graphics for the people that need tagged in your video. Sounds like fun don’t you think? Not.
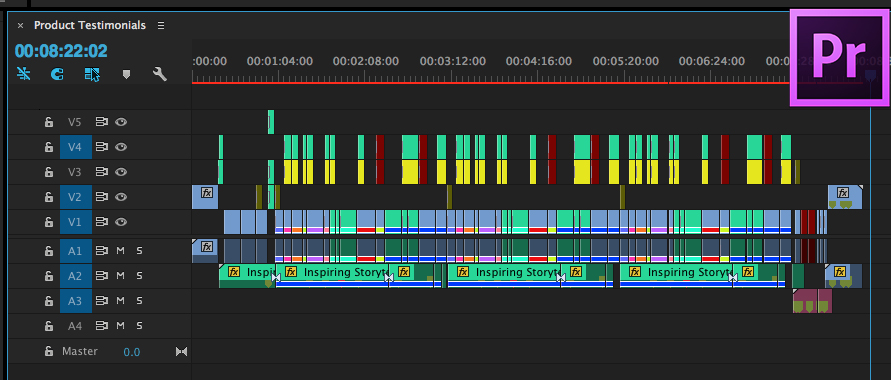
Don’t do this anymore. Please. It hurts to look at it.
Start by creating the lower third in After Effects
You can design and animate the basic graphic but in the past you would have to copy that comp, change the text in each one, render out each movie with alpha channel, and then import and edit those 20 movies into your timeline. With the advent of Adobe’s dynamic linking, at least the render step was bypassed as you could bring those AE comps right in as footage.
Well, the day of making separate compositions in After Effects is over. One of the most under used additions to the powerful Adobe After Effects arsenal of tools is Live Text Templates. As a video editor, this has changed the game for me. Let’s jump in a see how Live Text templates work.
We’ll create a lower third in After Effects, convert it to a Live Text template, and import it into Premiere Pro. The first step is to create a graphic in After Effects. This can be animated or static.
After you have created any background elements you’d like, you now need to add some text. Like many lower-thirds, we’ll create two layers of text for name and title. Use any font you think looks good.
Now let’s add some animation to the text to reveal the name and title.
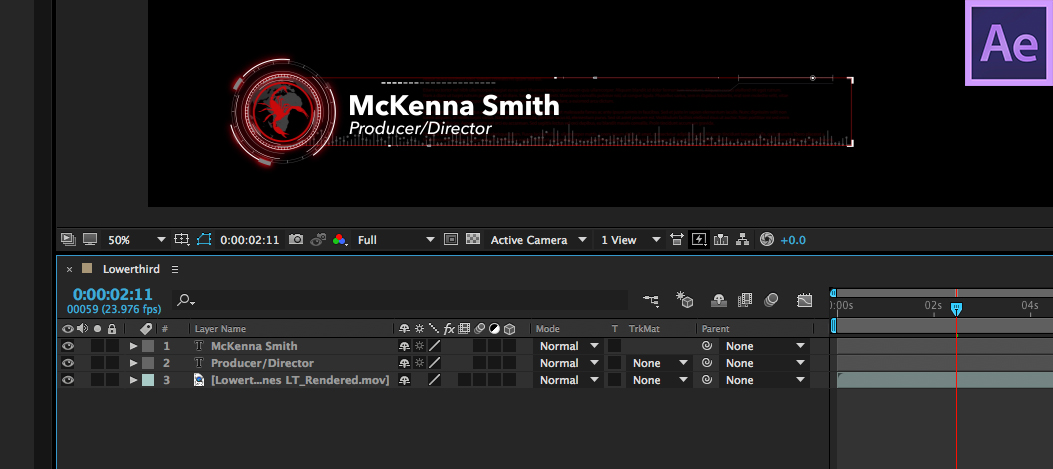
Creating the lower third using Live Text templates in After Effects
Activating the Live Text templates behavior in After Effects
One last step. For Premiere Pro to let the text be editable we need to add the Live Text Template behavior. With your comp timeline selected in After Effects, hit command K on your mac (option K on Windows) to open the Composition Settings dialog box. Select the Advanced tab and check the Template option. This will tell Premiere Pro to make all the text layers editable. For any text you don’t want to be editable, lock the layer in your composition timeline.
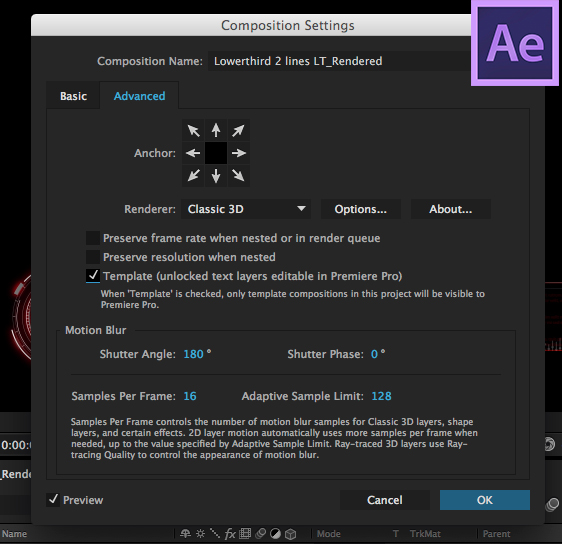
Applying the Live Text Behavior in After Effects.
Import from After Effects into Premiere Pro
That’s it. Save your AE project and open Premiere Pro. Activate the import command and choose your project from the Live Text templates that you built in After Effects. You’ll be shown a list of comps from your project to import. Choose the lower third comp.
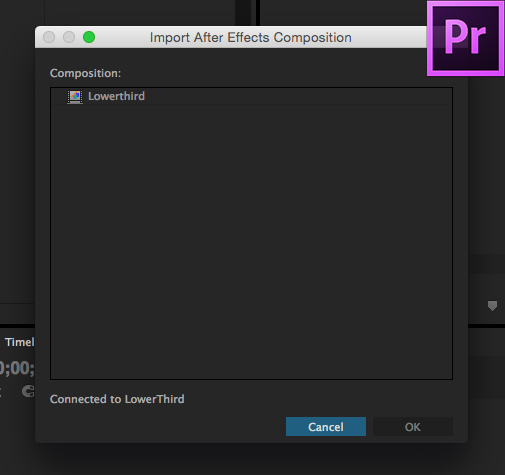
Importing Live Text templates we created in After Effects into Premiere Pro
The beauty of dynamic linking between Premiere and After Effects
If you’re new to using dynamic linking, the idea is brilliant and a huge-time saver. Your After Effects comps come in as a footage clip. You edit with them just like any other footage, no pre-rendering needed. In fact, depending on your hardware and the complexity of the comp, this graphic might play in real time on your timeline. Not only is pre-rendering not needed, you also have easy access to the original comp to quickly make any changes that you or your client need to make. Simply right click on the clip, choose edit original, and the AE project will open up. Make your change, save your project and voila…the dynamically linked clip in Premiere Pro is automatically updated. This is a lifesaver when you’re under a tight deadline and tweaks need to be made to your After Effects comps.
Making changes to your lower third in Premiere Pro
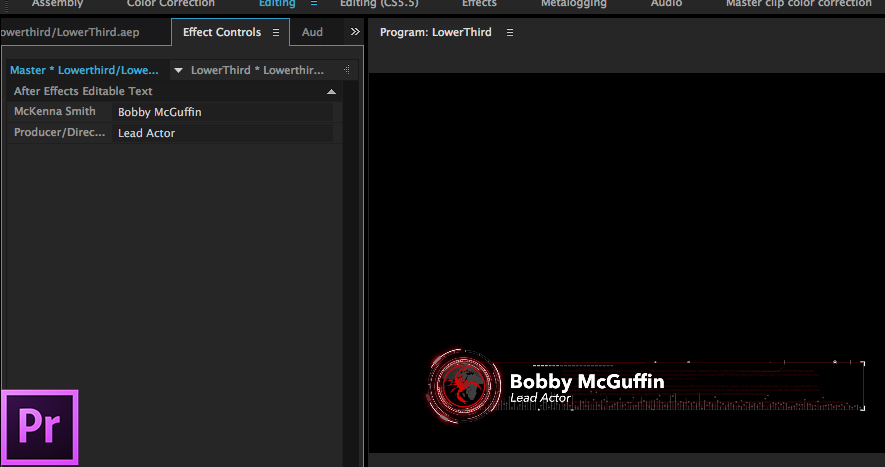
Back to our lower-third. When you double click the imported comp in Premiere Pro, it will load in the source monitor. Click on the effects control panel and you’ll see the fields to edit the live text.
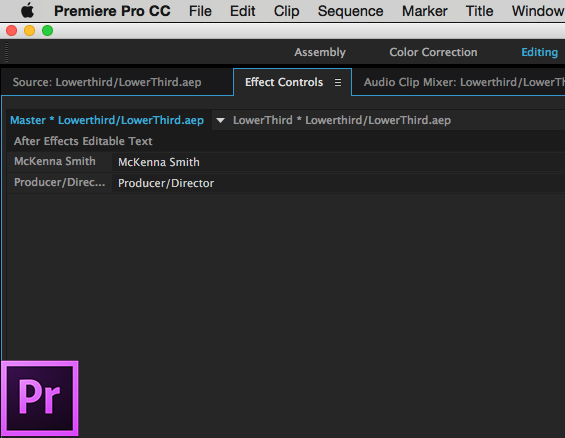
The Effects Control Panel where you can make quick changes to the text in your Live Text templates
When you edit this text, it will update in your imported comp, keeping all the styling and animation you applied in After Effects.
Magical. This is the way to do it kids.
Using Live Text Templates to speed up your workflow in Premiere Pro
That’s great but here’s the thing. You can copy the comp in the project panel to the timeline to create a new instance of that clip. Repeat the process: open the new clip in the source monitor, change the text in the effects control panel and there you have it. A new lower third with custom text, which retains the style and motion of the original comp. No need to go into AE for this change. If you have an After Effects comp selected in your timeline, you can put the playhead over that clip and choose sequence > match frame or press F to load the clip into the source window for editing the text of that clip.
Using Live Text templates instead of a text comp has saved me countless trips to and from After Effects (which is always a good thing).
If your enjoyed this article on Live Text templates, you will love the tips and tricks from my After Effects Quickstart tutorial, available through Ripple Training. Feel free to share this article and let me know what you would like me to write about next in the comments below!

