Using the Color Balance plugin for Final Cut Pro X:
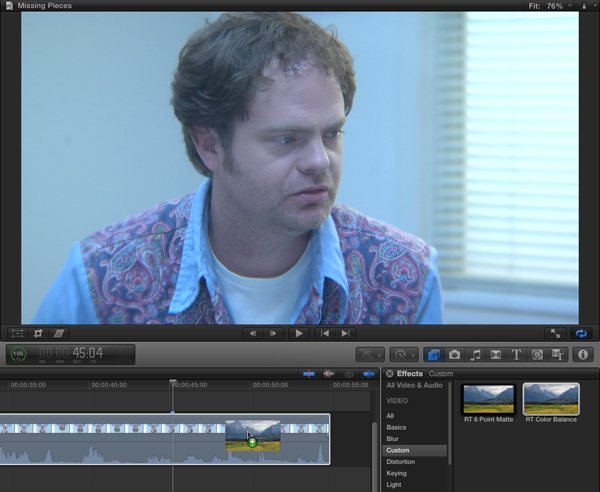
In the Effects Browser, select the Custom category, then locate the RT Color Balance Effect. Drag the effect onto any clip (or clips) in the Timeline; or if the clip is selected, double-click the effect thumbnail.
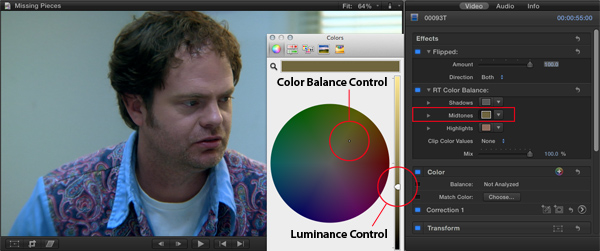
With the clip selected, press Command-4 to reveal the Inspector window. The Color Balance Effect and its parameter controls appear at the top of the inspector. As you can see in the screenshot below, we’ve given you independent control of the Shadows, Midtones and Highlights. To bring up the Color picker for any of the tonal ranges, click the color chip next to the range you want to affect. Use the vertical slider to alter the brightness (luminance) and use the color wheel to alter the hue and saturation (color balance).
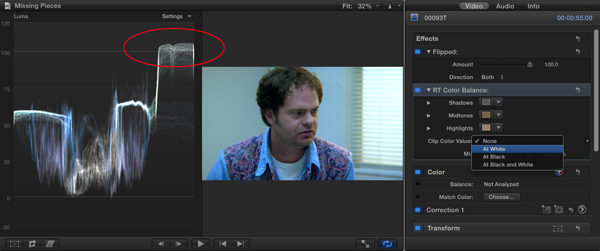
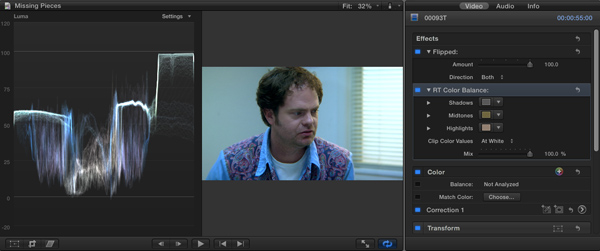
This effect also includes a clip color value control. For example, if your white levels exceed legal limits you can use this pop-up menu to clip the values at white, black or both. Below is a before and after image of the Waveform monitor showing the result of the “At White” clipping control.
Using this simple effect you can manipulate 3 tonal ranges to neutralize the color balance, create looks, tints and anything else you you might want to use it for.
Image courtesy of Samah Tamagachi