Using the Glint plugin for Final Cut Pro X:
After installing, follow these steps to apply the RT Glint effect to any 3D title in Final Cut Pro X’s timeline:
This glint effect is the most dramatic when applied to animated 3D titles. You can use FCP X’s built-in 3D animated presets but for even more animation options we suggest downloading our free Ripple 3D Animations plugin from FxFactory.com.
In the 3D Titles Browser, locate the Super Rotate preset and add it to your project.
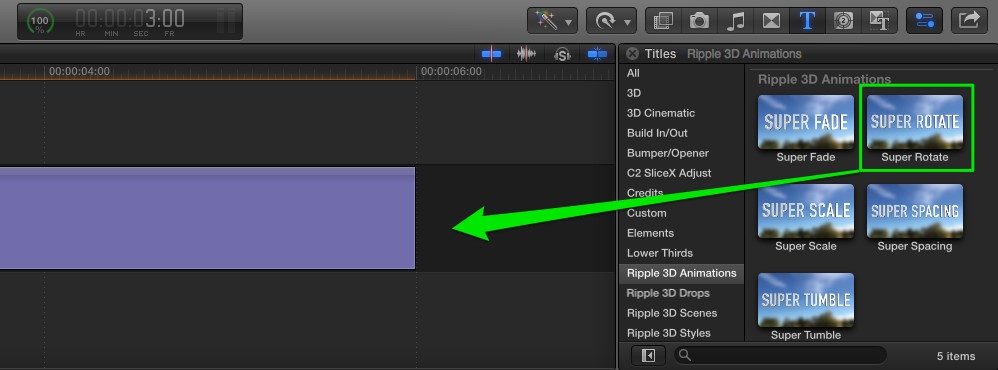
Open the Effects Browser, select the Custom category, then drag the RT Glint effect onto the 3D title.

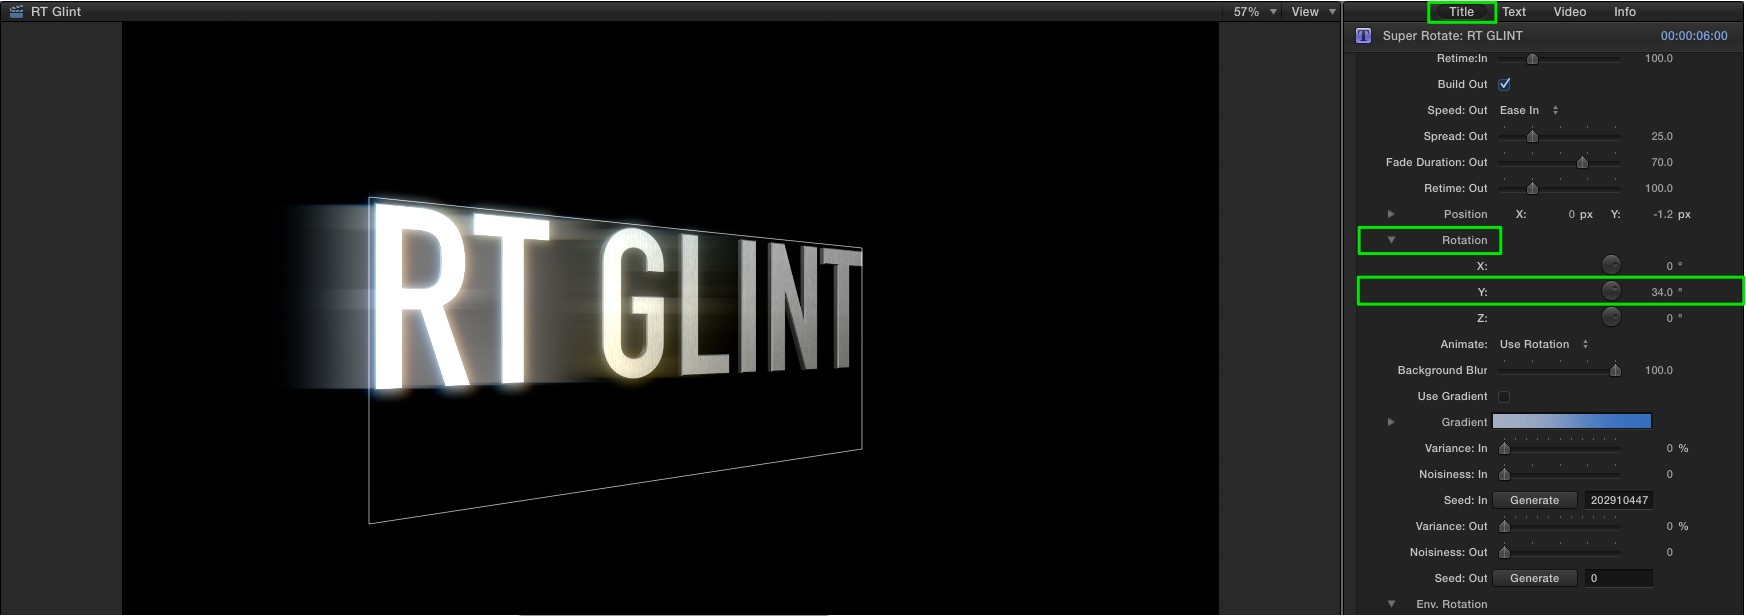
With the Playhead parked over the title, open the Inspector and click the Title tab. Spill open the Rotation controls then drag the Y-Rotation scrubber to see the effect of the Glint on the rotating title. You can animate the Rotation value to have the glint move across the text.
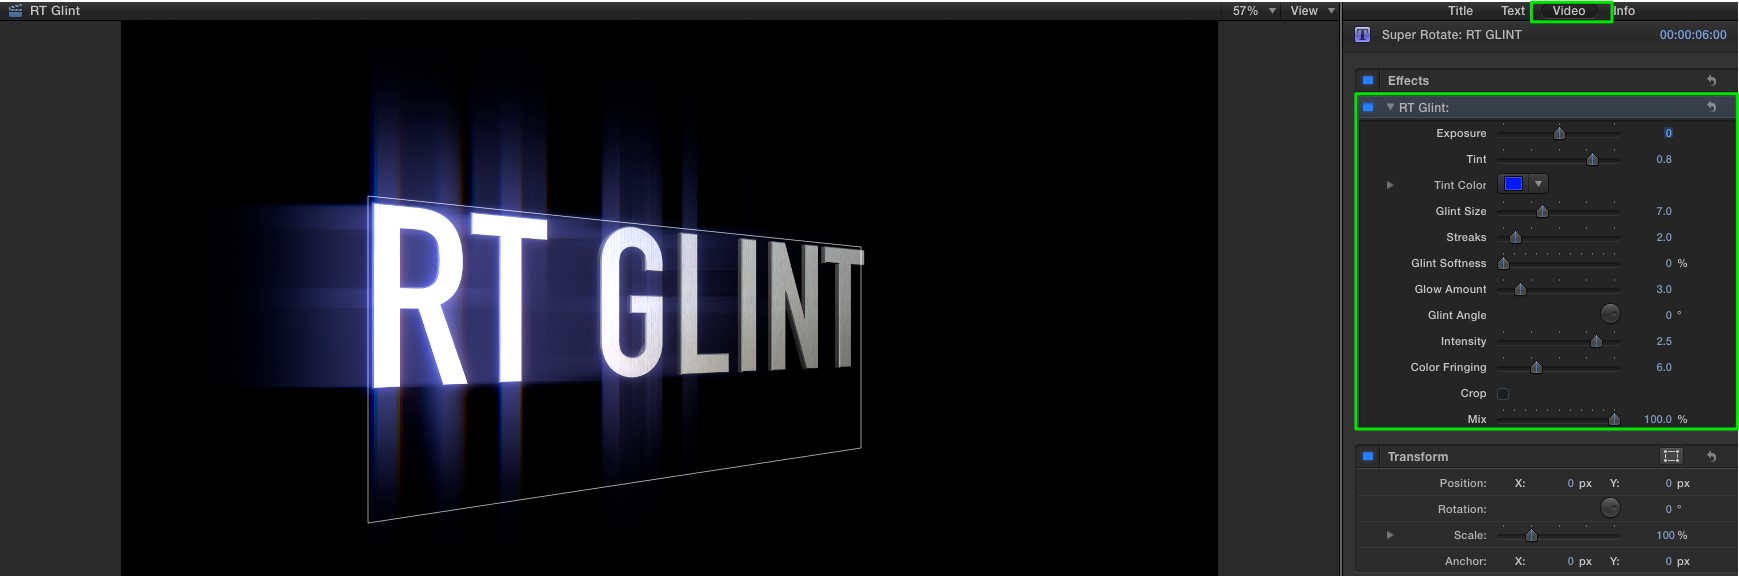
To change the look of the Glint, click the Video tab then use the parameter controls. Most of the parameters can be animated to create different looks.
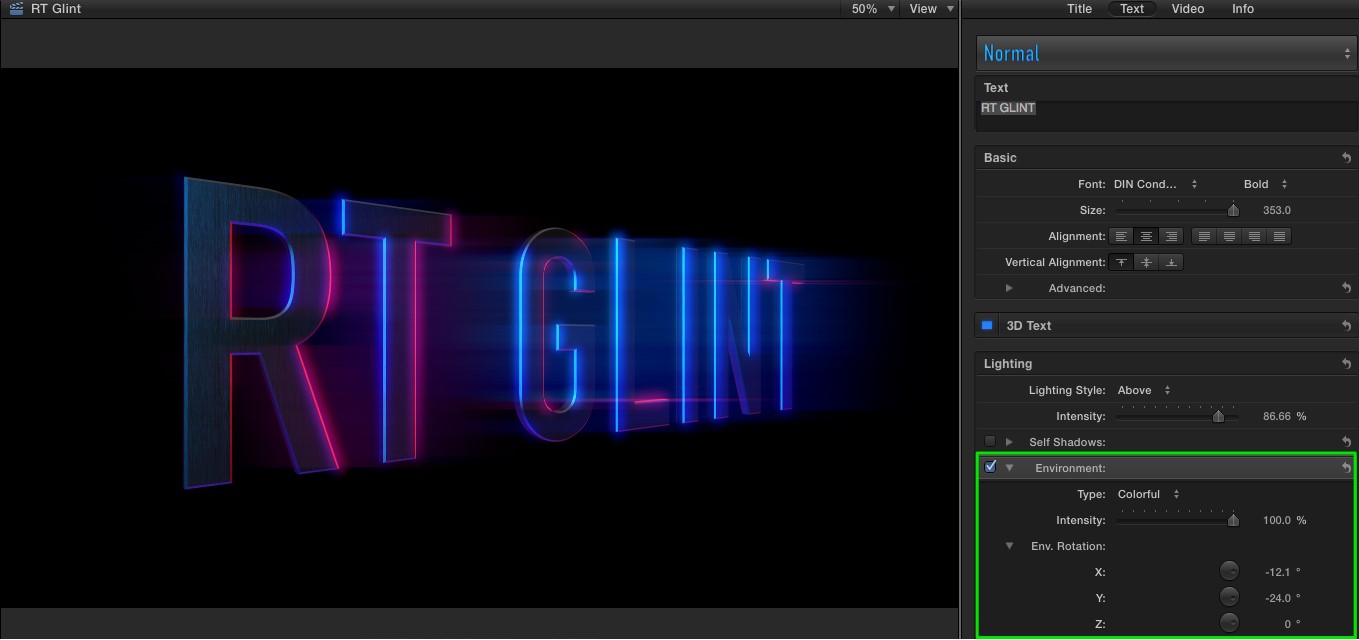
For really dramatic titles, change the 3D environment for your title, then use the Environmental Rotation controls to animate the environment. This will produce an animated light pass across the letters. Make sure you use a material with a reflective surface. You can create many interesting light effects and visuals for your 3D text using RT Glint.