Using Ripple Steps
There are three steps to using Ripple Steps: choosing the appropriate transition to apply, configuring the transition, and customizing.
Step 1: Choosing a Step Transition
Ripple Steps are Transition effects and are located in the Transitions Browser in Final Cut Pro X.
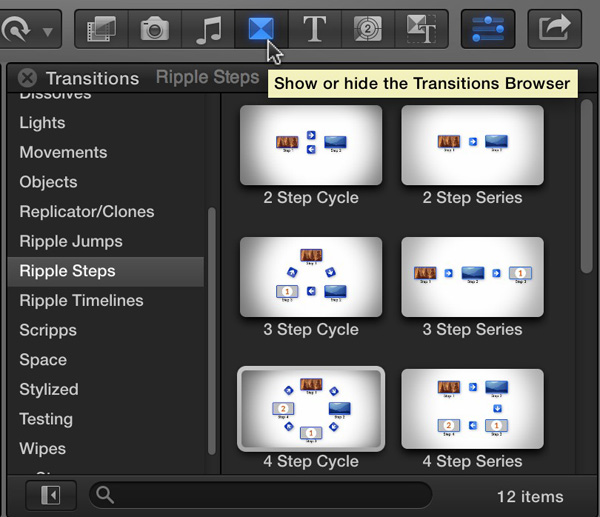
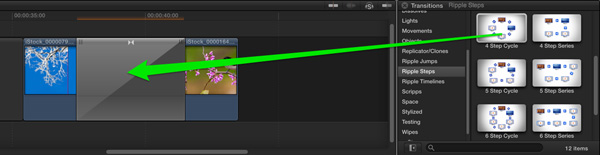
There are two types of Step transitions: Cycles in the first column, and Series in the second. Is your project about a “cycle” of steps like the seasons in the year or the lifecycle of a frog? Or is it about a “series” of steps, like how to bake a cake or do a fitness routine? Choose the appropriate column. Now, how many steps are there in your project? Ripple Steps come in two-step through seven-step versions – scroll down to see them all. Choose the appropriate number for your project, and then drag it onto the edit point between two clips.
Or, select the edit point between two clips, then double-click the appropriate transition to apply it.
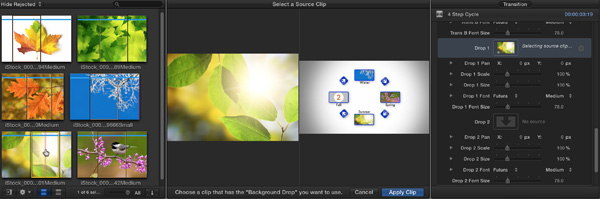
Step 2: Configuring the Transition
Configuring just means making the basic changes needed to set up your transition.
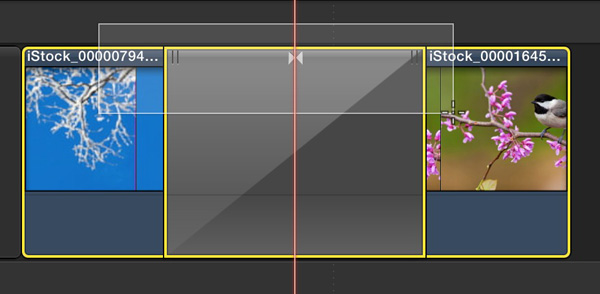
By default, the transition will last for four seconds if you have enough extra media, called handles, on the outgoing and incoming clips. You can change the duration of the transition by dragging an edge.
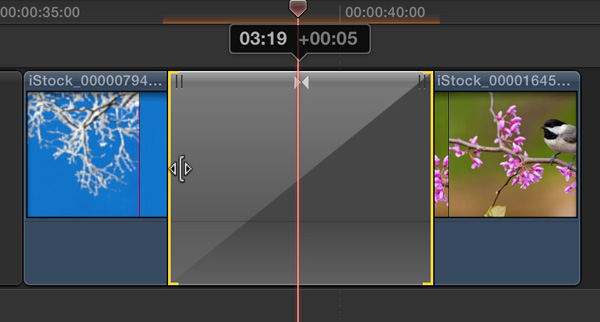
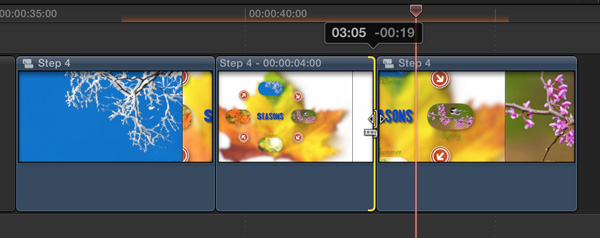
Move the playhead to the middle of the transition and select it. In the Viewer, you’ll see all steps in your process, along with titles for each step. Double-click each one to change their names if needed. You can also move them anywhere you like.
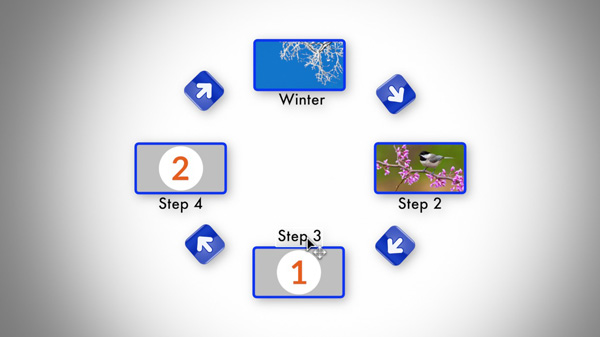
Open the Inspector by clicking the Inspector icon or pressing Command-4. If your transition is not between the first two steps in your process, then choose the appropriate “Active Steps” setting at the top of the Inspector. This action will move all the images to the correct locations.
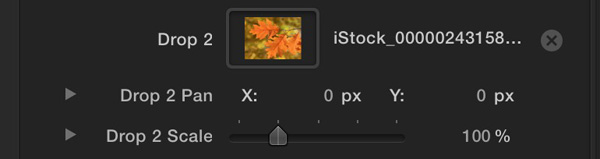
Now scroll to the bottom to locate the Drop Zone wells. The Drop Zone numbers correspond with the numbers in the Viewer. Click each well, then choose a clip, image, or graphic from the Event Browser (you can also choose clips from your project).
Step 3: Customize
This step is optional – you can customize the look of your transition in all kinds of ways using the Inspector. Specifically:
You change the font, size, and color of the step names.

You can add a title, move it anywhere, and change its font, size, color, and drop shadow.

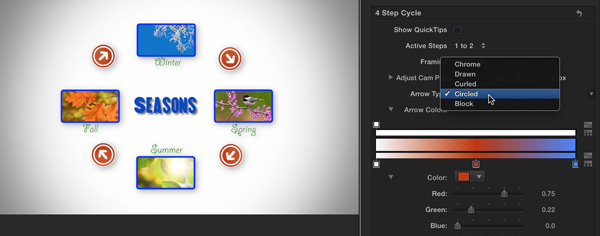
You can choose a different arrow style, and change its color.
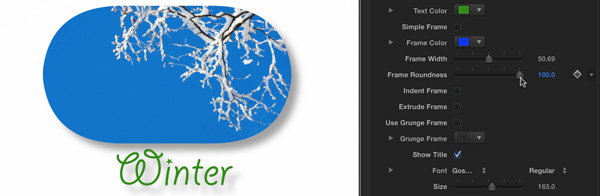
You can modify the frame color, width, and roundness; you can indent and/or extrude it – or turn it off completely. Or, use the “Grunge Frame” option.
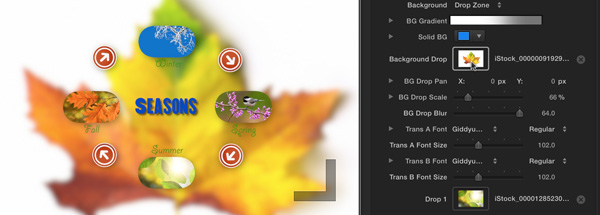
The background is a radial gradient by default – you can change the colors or make it linear. You can also choose a solid color or select the Drop Zone option to add your own graphic to the background which can can scale, pan, and blur. VERY IMPORTANT NOTE: DO NOT double-click the Drop Zone in the Viewer in order to move or scale it! Due to a bug in FCP X (as of 10.0.9), panning or scaling the background drop zone in the Viewer will make it disappear when exported. Instead, use the Inspector controls.
You can adjust the position and size of the drop zone contents.
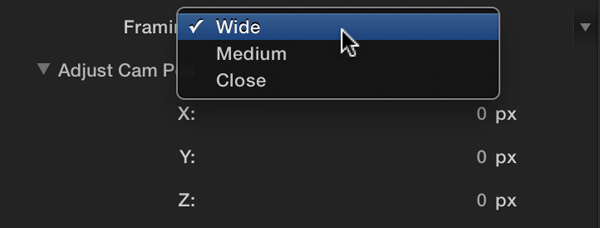
And finally, you can change the animation by selecting from one of three different “Framing” options. You can even adjust these options further using the “Adjust Cam Pos” parameters to create just the movement you like. For example, by default, the camera pulls out to reveal the full set of steps – which is great the first time you show them. But as you move to each next step, it may not be necessary to see the entire view each time. So you can choose a closer view to just reveal the current and next step. After selecting a new framing option, make sure the playhead is in the middle of the transition, and use the “Adjust Cam Pos” controls to adjust where the camera flies to between the transitions. For example, have it fly right over the incoming transition before landing on it.
A Few Tips
Here are few additional tips to make working with Ripple Steps easier.
Your Second Step
After you’ve applied, configured, and customized your first step (that will probably show moving from Step 1 to Step 2), you can copy and paste it for the next step (going from Step 2 to Step 3). This way, you don’t have to start from scratch to customize everything. After pasting the transition to the new location, you will need to modify it in two ways: first, change the Active Steps (in this case, choose “2 to 3”) to move the images to the correct locations, and second, change the drop zone content. To make this task easier, remove the current content by clicking the “x” next to each drop zone well in the Inspector.

This action will replace that content with a number in the Viewer, making it easier to tell which drop zone’s content you are changing.
Freezing A Step
If you’d like the camera to stop moving after pulling out to reveal all the steps, it’s easy to do. First, with the playhead centered on the transition, select the clip on either side of the transition and the transition itself.
Next, from the File menu, choose New Compound Clip. Name the clip and press OK.
Finally, Edit > choose Add Freeze Frame, or press Option-F. This command inserts a 4-second freeze frame at the playhead location, which you can then trim to the duration you want.
Note that you can still edit the transition by double-clicking either side of the compound clip. Your edits will be applied to both compound clips and the freeze frame.