Are you looking for updated movies for the lastest version of Final Cut Pro X?
Click here to see FCP 10.4
Final Cut Pro 10.3 Free Trial Tutorial


Sound Editing Basics in Final Cut Pro X
In the previous video we learned about trimming clips and how to cleverly hide a jump cut from the audience. Now it’s time to add music and address some common audio problems. Let’s begin by playing back the portion of the interview where we cut to the shot of the Sabercat Fly-by…
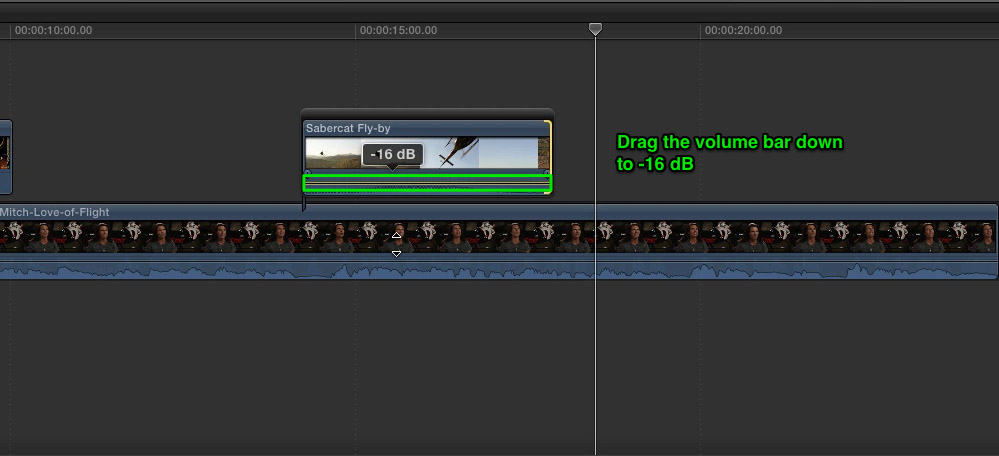
Lowering a Clip’s Volume
You’ll notice that the volume of the Sabercat Fly-by clip is way too loud, and we can’t hear what Mitch is saying. Luckily, this is an easy fix. Look just above the audio waveform of the clip, you should see a thin horizontal bar. Simply click that bar and drag it down until the tooltip reads -16dB. Play it again.
Trim the Clip
Much better. Now, the clip is a little bit too long, so we’ll trim it back until the tail of the helicopter just leaves our view. Because we have shortened the clip we’ve lost the Doppler effect. The Doppler effect is how we perceive sound as it passes by and the frequency changes. This also causes the sound of the helicopter flying away to end abruptly, but we can add a fade to smooth that out.
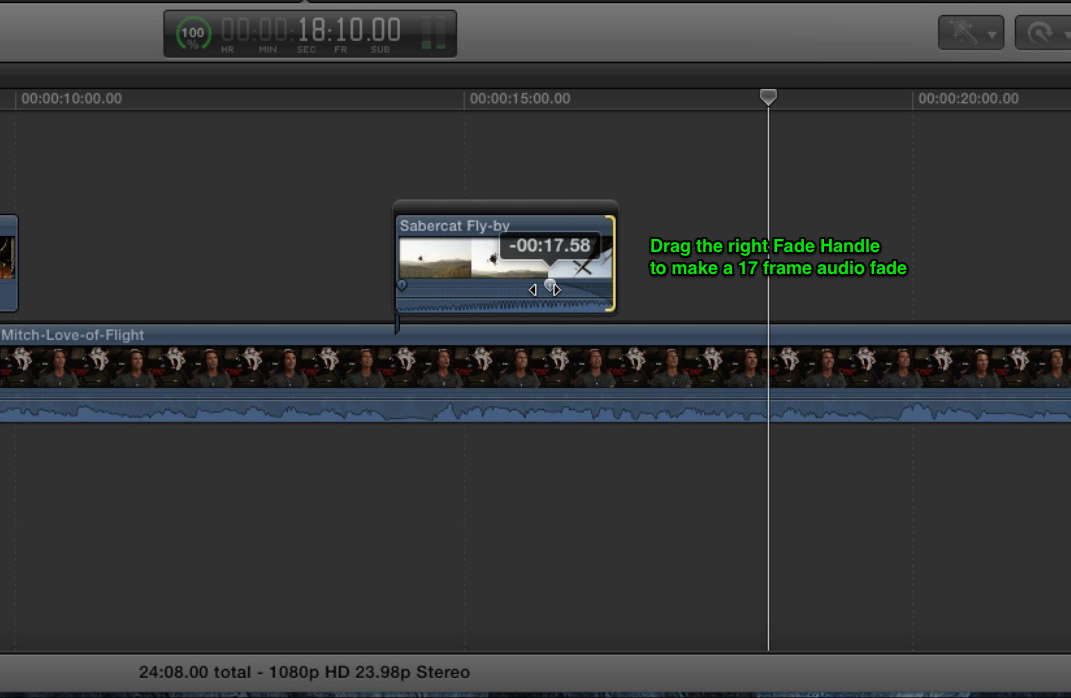
Using Fade Handles for the Doppler Effect
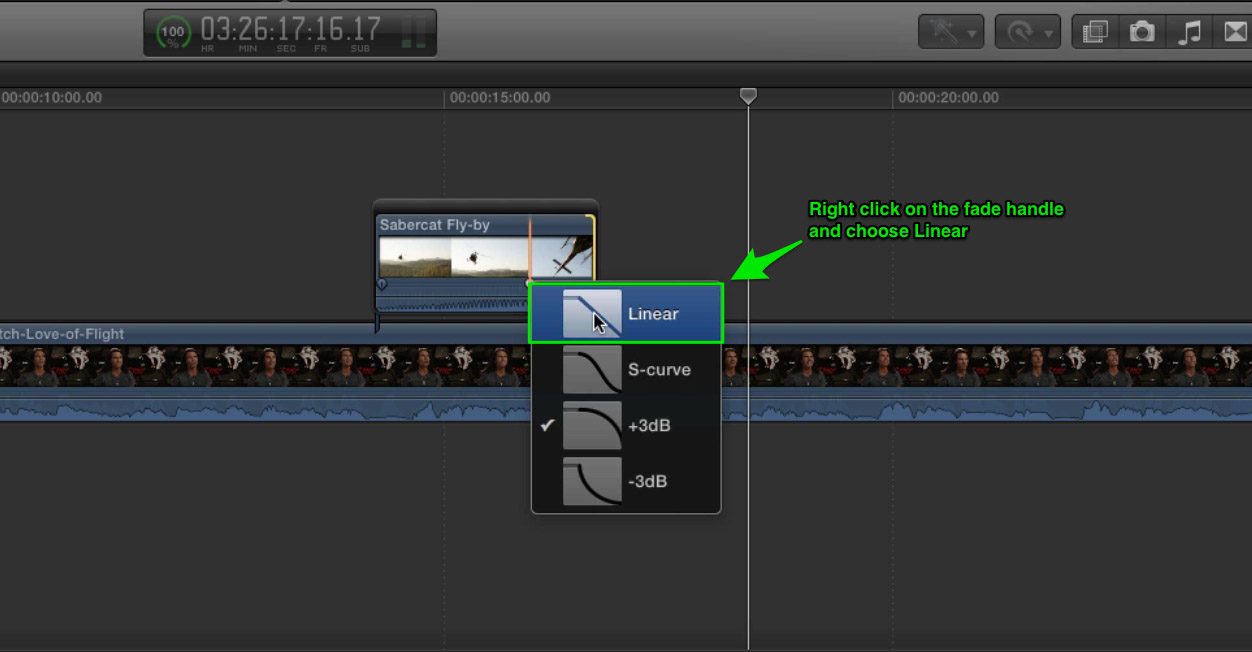
When you hover your mouse over a clip, you’ll see two fade handles appear between the video thumbnails and the audio waveform of the clip. Click the right fade handle and drag it 17 frames to the left to create an audio fade. Then right click on the fade handle and select linear fade. Now the clip’s audio steadily fades out to the interview with Mitch.
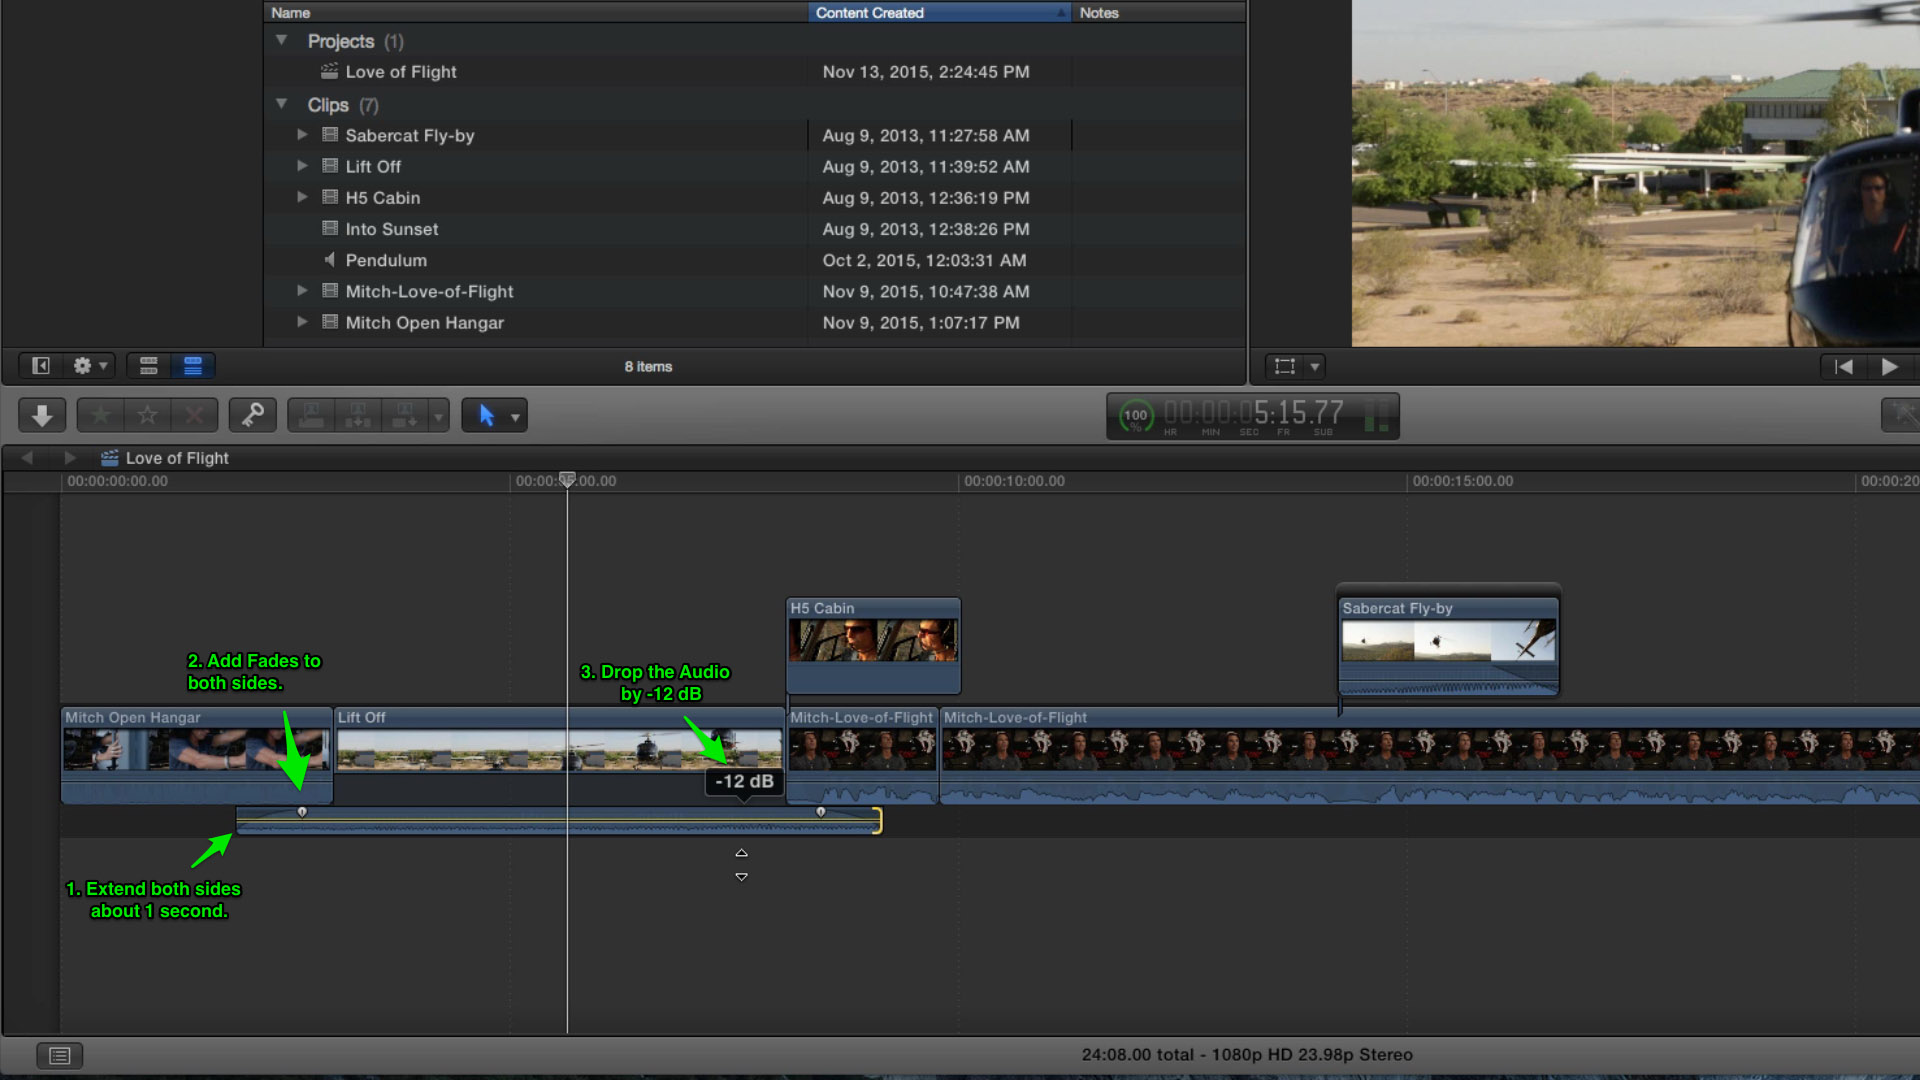
Creating a Split Edit
Let’s go back to the Lift Off clip to try a more subtle way to fade the audio and video clips. This one is called the Split Edit. Split edits are great because they are very subtle. The transition begins on an almost subconscious level. Your audience will hear the change coming before they see it happen.
To create a split edit, double-click the audio waveform of the Lift Off clip. The audio is now expanded beneath the other clips in the primary storyline.

Click the left edge of the audio and drag it out (about 1 second long) beneath the clip to the left. Then use the fade handles to add a fade to the beginning. Now drag out the tail of the audio beneath the H5 Cabin clip, and fade that end as well. We’ll also bring the audio down by -12db to prevent the rotor sounds from stepping on the interview. Let’s play that and see how it sounds…
Adding a Music Track to the Timeline
Good. The beginning of our story is a little too quiet, let’s see if we can’t spice the whole project up with some music. In the browser you’ll find the music clip called Pendulum. Go ahead and drag it below the main storyline and line up the left edge of the music with the start of the project, then release your mouse.

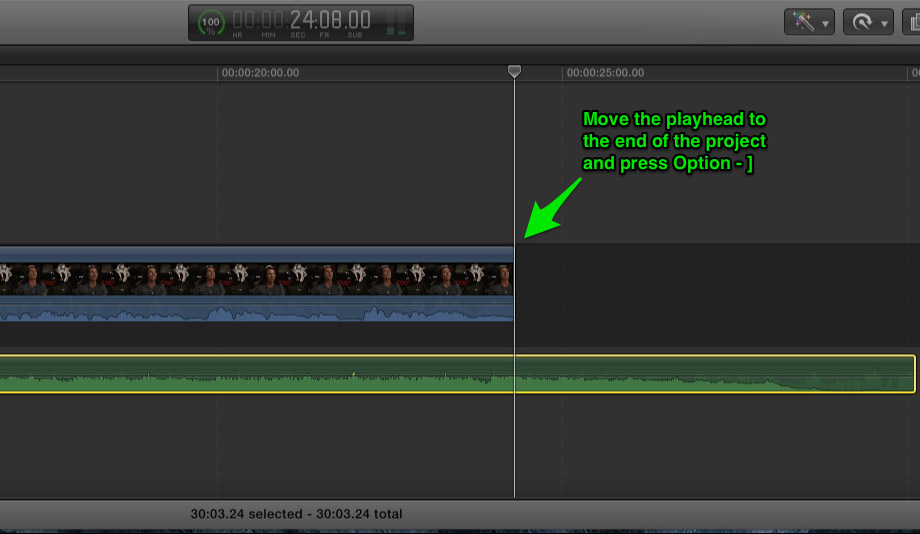
Trim the Clip
Because the music clip is too long we’ll trim it back to the end of the video. Move the playhead to the end of the Mitch-Love-of-Flight clip and select Trim End from the Trim menu, or press the Option Right Bracket button. Play through and see how that sounds.
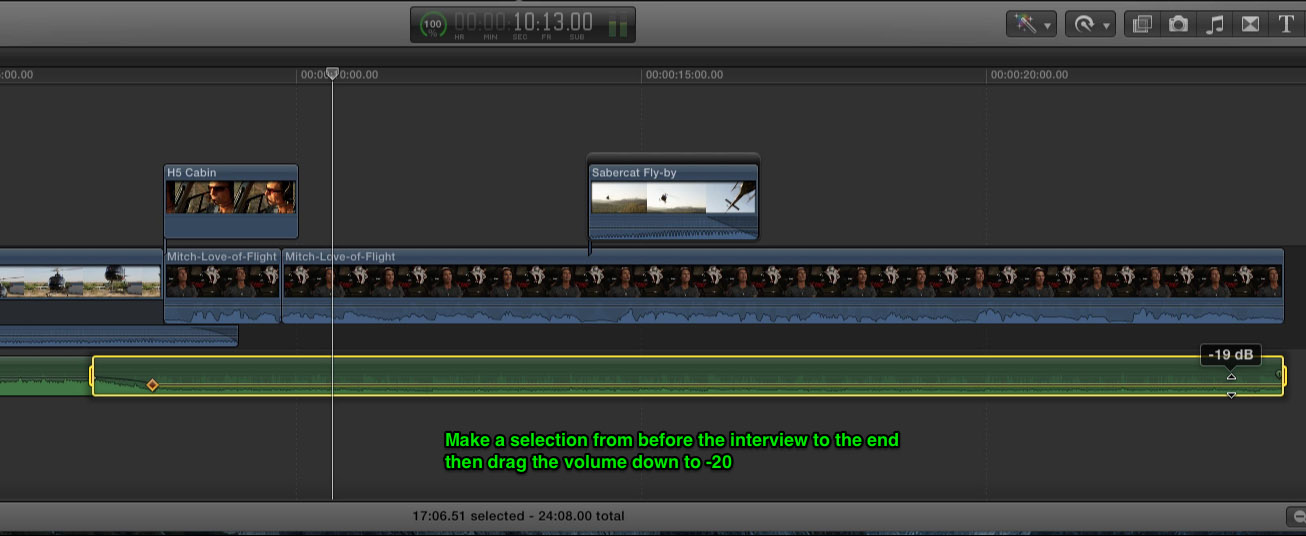
Ducking the Audio
The music starts out great, but it really overwhelms Mitch. Select the Range tool from the tools menu, l and in the timeline, drag out a range in the music from about a second or so before Mitch begins speaking to the end. Now lower the volume inside the range to -20dB. Play it again, isn’t that much better?
Cleaning up the Timeline
To clean up our timeline a little bit, switch back to the Selection tool and double-click the audio from our split edit to collapse it back into the primary storyline. The split edit is still there, but now it’s hidden to keep the interface clean. In our next video we’ll be adding Titles and Transitions to give our project a more polished appearance.
This is Lesson 5 of our free Final Cut Pro X tutorial. If you are enjoying this tutorial, show us your appreciation by sharing!
- Lesson 1: Getting Started with the Final Cut Pro X Free Trial
- Lesson 2: Importing Media into Final Cut Pro X
- Lesson 3: Adding Clips in Final Cut Pro X
- Lesson 4: Trimming in Final Cut Pro X
- Lesson 5: Working with Sound in Final Cut Pro X
- Lesson 6: Adding Titles & Transitions in Final Cut Pro X
- Lesson 7: Adding Effects in Final Cut Pro X
- Lesson 8: Sharing your Movie in Final Cut Pro X

Thanks for the information, it really comes in handy. Only issue is that you didn’t include the shortcut button commands.