

How to Get the Final Cut Pro Free Trial in 2026 (and Learn it before it Ends)
updated September 2026 by Ripple Training
Getting the Final Cut Pro Free Trial
If you’re searching for the Final Cut Pro free trial, you’ve probably noticed things have changed. Apple retired the old 90-day trial in January 2026. Final Cut Pro is now part of Apple Creator Studio, and the free trial is shorter. The good news: you can still use Final Cut Pro free for a month, or three months if you just bought a Mac or iPad. Here’s exactly how, and how to get editing confidently before the clock runs out.
The Quick Answer
Will it run on my Mac?
Before downloading the free trial you should check the minimum system requirements for Final Cut Pro X page at the Apple website and compare them with your system to make sure you will be able to run Final Cut Pro X correctly.
You will need:
- OS X version 10.10.4 or later
- At least 4GB of RAM
- An OpenCL-capable graphics card or an Intel HD Graphics 3000 card
- 256MB of VRAM
- 4.15GB of Disk Space
You can find your system’s specs by clicking the Apple icon in the top left corner of your Mac and selecting “About This Mac”.
Download the Free Trial of Final Cut Pro X from the Apple site
Once you have checked that your hardware meets the minimum requirements, go to the Final Cut Pro X free trial page, fill out the fields on the form, and click Download free trial. A .dmg file will begin downloading to the folder you have set in your browser. The file is 2.82 GB and may take some time to download based on your internet speeds.
Installing Final Cut Pro X
Once downloaded, double click on the Final Cut Pro Trial .dmg file. After mounting the virtual disk image, double click on the Final Cut Pro Trial pkg. A dialogue box will open to walk you through the installation process. Make sure to agree to the license agreement, and then click install. You will be asked to enter your User Password. Type your password and click Install Software. When the installation has finished, close the window, and navigate to your Applications folder. Scroll down and double click on the Final Cut Pro Trial.app to launch it. A dialogue will inform you that you are starting your 30 day trial and give you the option to purchase the app. Click ok.
Next, Final Cut informs you of changes that have been made to the software in the latest version. Click continue.
The Final Cut Pro X User Interface
Now that you have the free trial installed, let’s take a quick look at Final Cut Pro’s User Interface. The main window is divided into three separate work areas. The area in the upper left is for organizing your media, the area to the right is for playing back your media, and the area below is for editing your media.
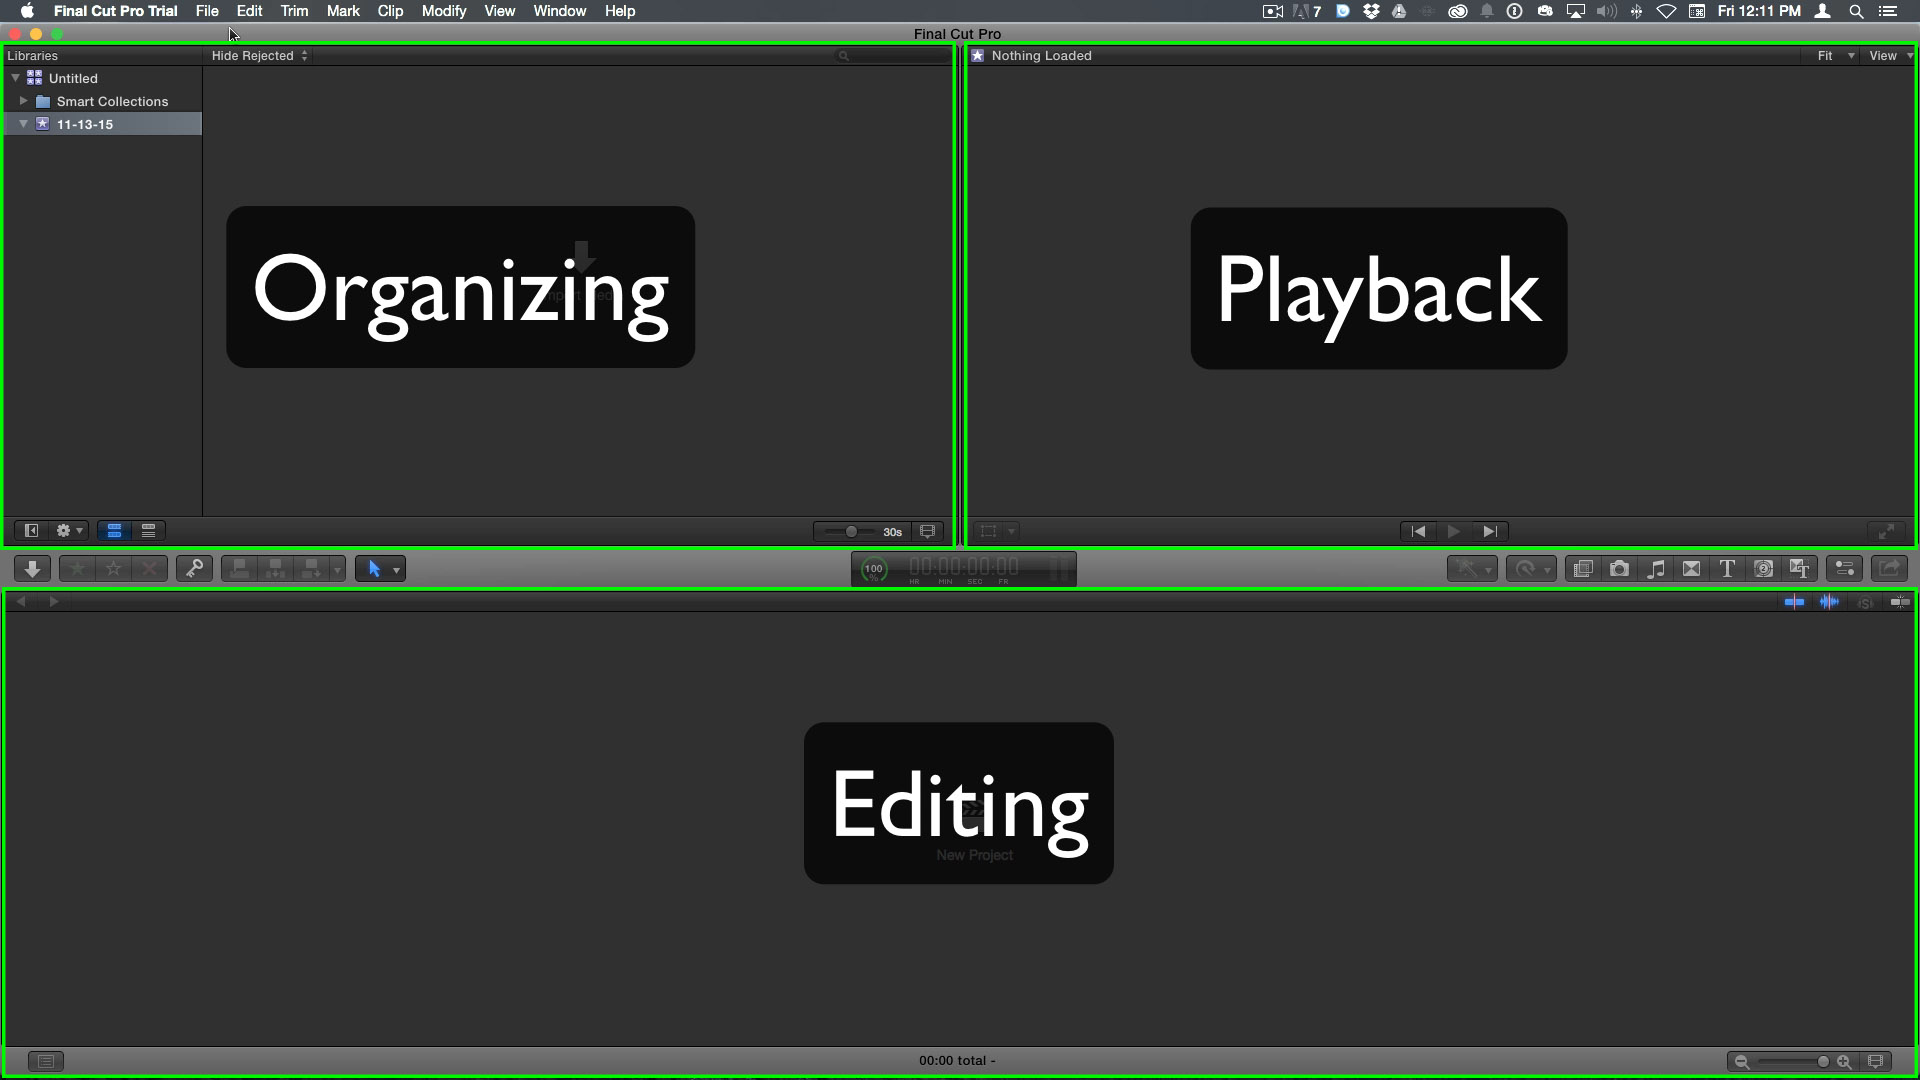
The Final Cut Pro X Free Trial User Interface
The Libraries Pane, Media Browser, Viewer, and Timeline
In the top left is the Libraries Pane. This is where you organize and manage your Libraries and Events. Final Cut Pro opens with an empty Library when launched for the first time. We’ll talk more about Libraries in our next video. To the right of the Libraries Pane is the Media Browser. This is where you can skim through your imported media looking for content to add to your movie. As you skim, the media appears in the Viewer to the right. The Timeline is where you assemble your movie clip by clip. Clips appear sequentially in the timeline, but they can be reorganized and trimmed.
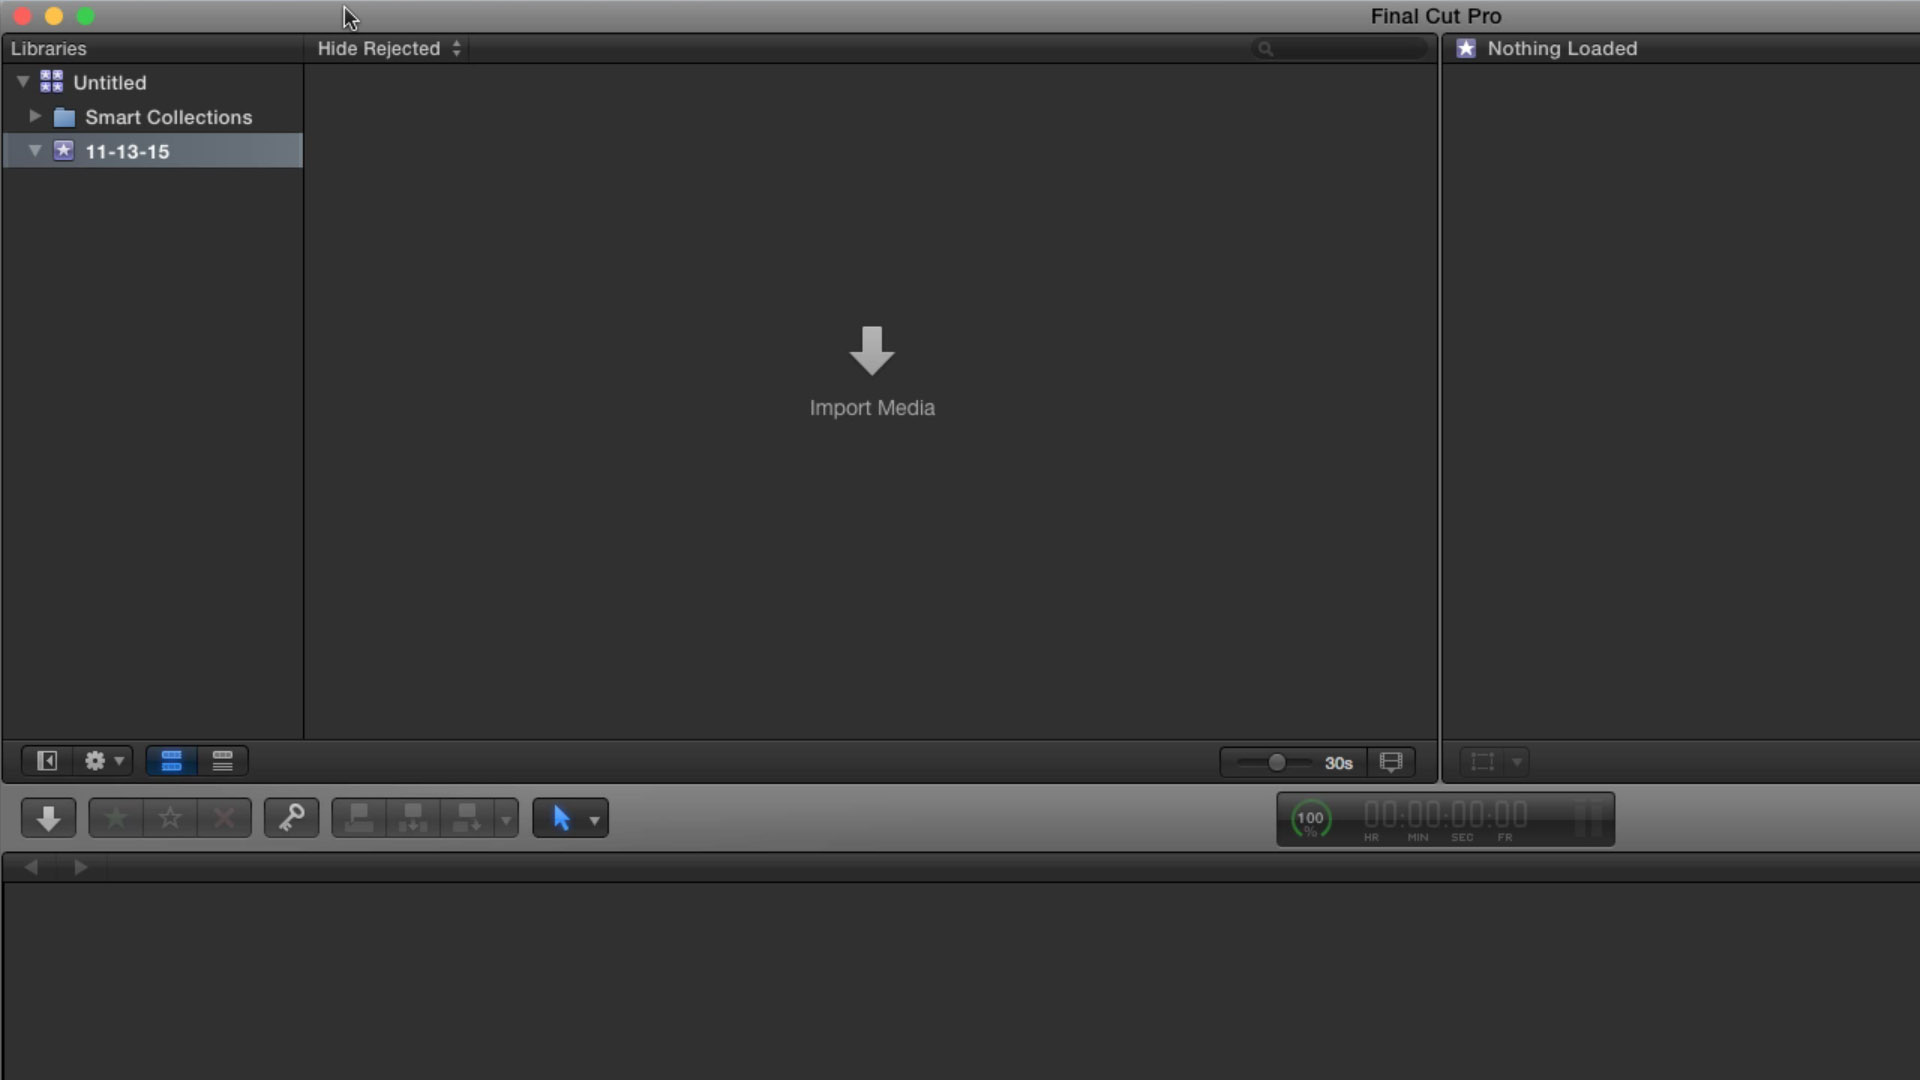
The Libraries Pane, Media Browser, and Timeline in the Final Cut Pro X Free Trial
The Inspector
There are two other things I would like to point out before wrapping up. Clicking on this button opens the inspector. When a clip is selected, the Inspector gives you options for making changes to it – like scaling, or repositioning a clip.
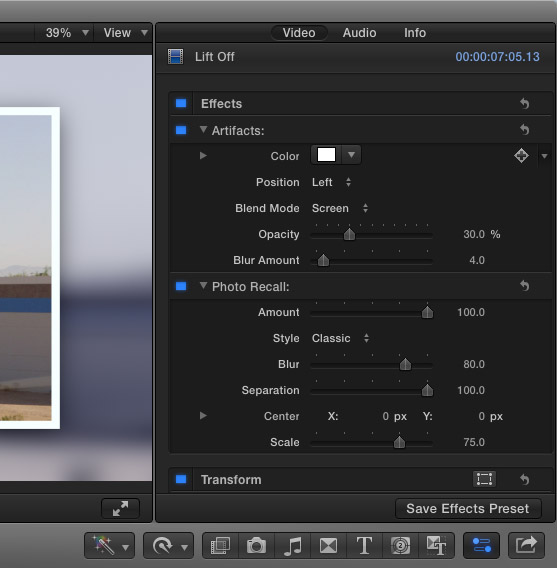
The Inspector Window in the Final Cut Pro X Free Trial
The Effects, Music, and Titles Browser
Lastly, clicking the buttons to the left of the inspector button reveals the various media browsers such as Effects, Music, and Titles. These browsers give you access to different resources you can use to enhance your project. We will cover these in a later video.
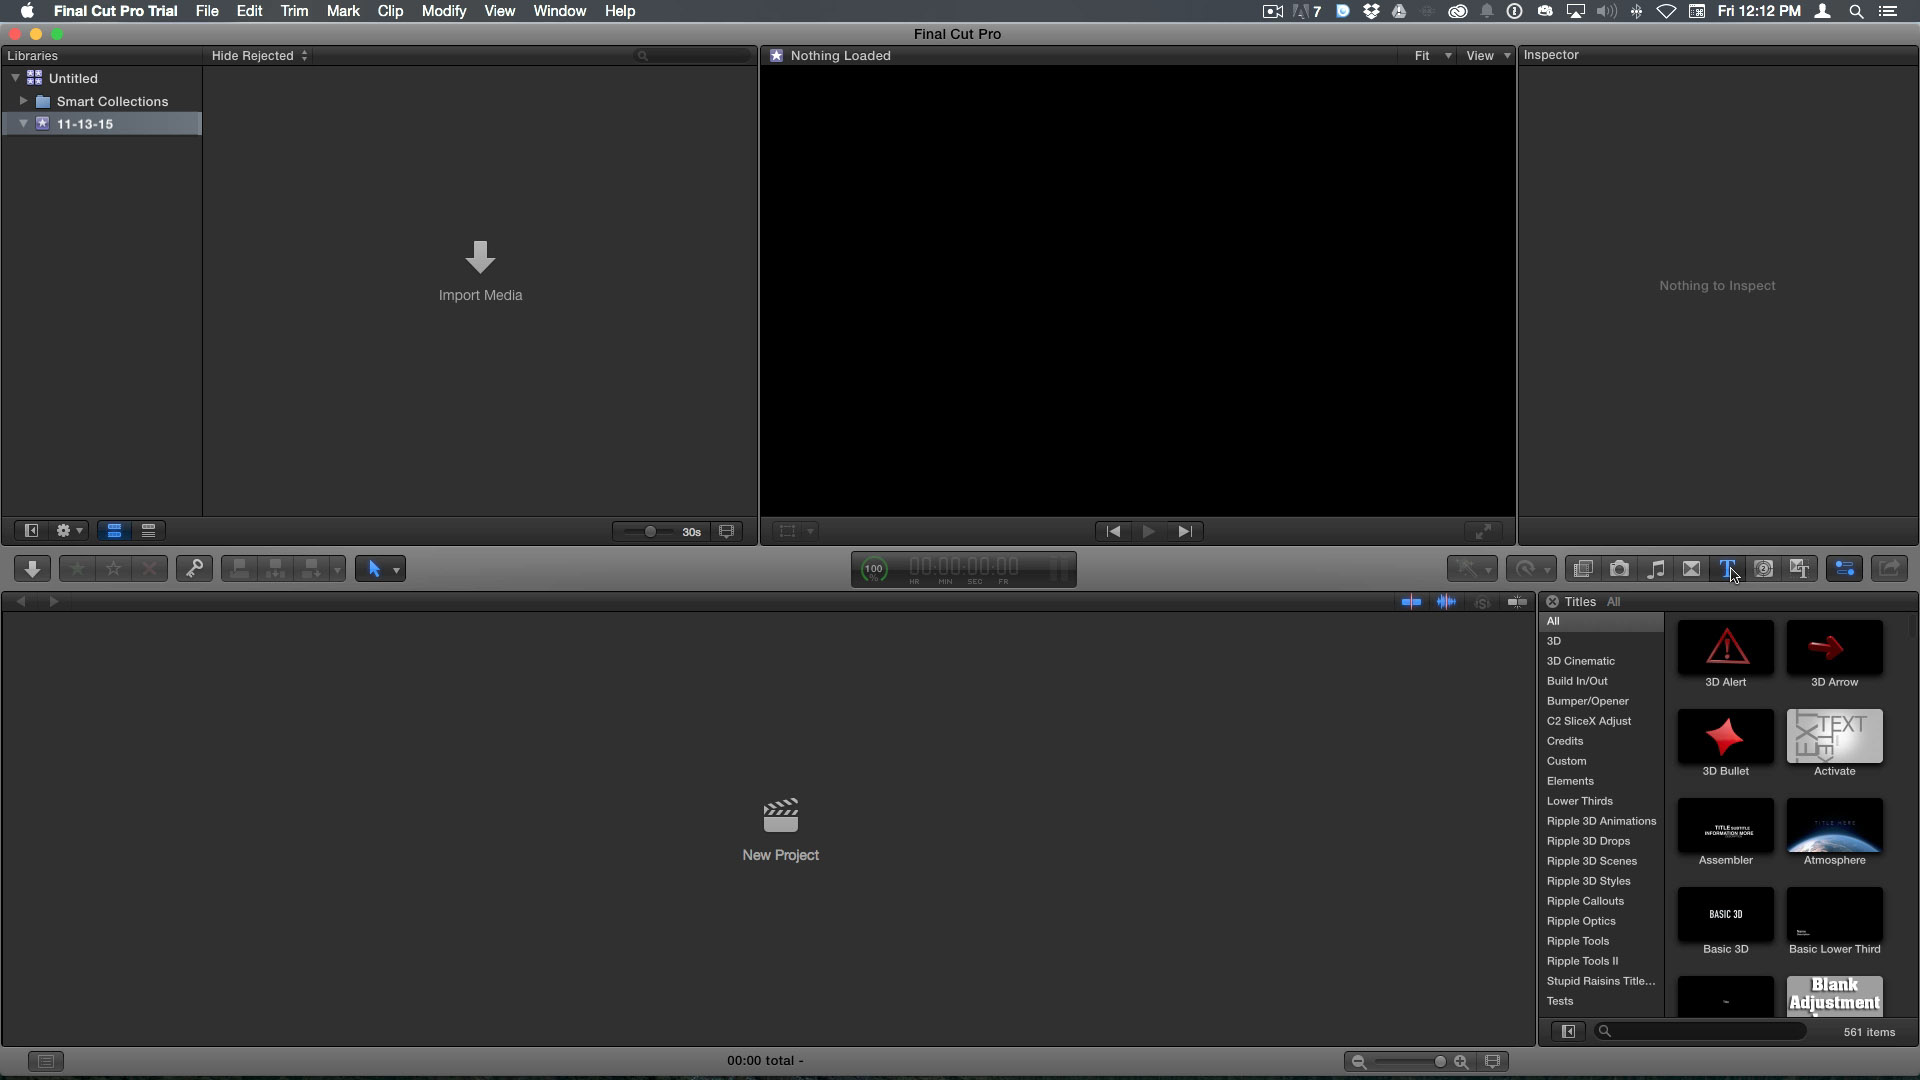
The Effects, Music, and Titles Browser in the Final Cut Pro X Free Trial
Watch: edit your first video
You’ve learned how to install the free trial and some basics about the user interface, but now it’s time to start importing your media and editing your video. We’ve provided project media you can use to start on your first edit when you sign up below, as well as the first two lessons for free from our Core Training.
Follow along with this free lesson from Steve Martin.
The real challenge: learning Final Cut Pro in 30 days
A month goes fast. Most people open Final Cut Pro, poke around the interface, get stuck on the timeline, and the trial ends before they’ve finished a single video. You don’t need to learn everything. You need to learn the right things in the right order.

This Final Cut Pro X is pretty disgusting though. I’m thinking of buying Adobe Premiere Pro like thousands of other video editors.