Step-by-step instructions: Creating Mask Transitions in Final Cut Pro X
There are a couple of beach related clips here, and I’m going to use a Starfish clip and a mask to create a wipe transition between them. First, move the playhead over the beach clips, then Press X on your keyboard to mark a range for the clips.

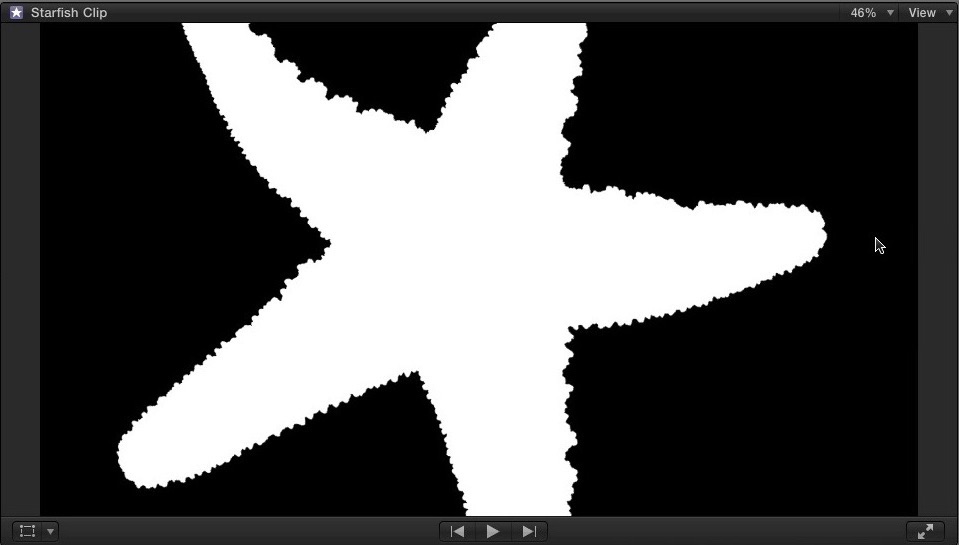
In the Browser locate the Starfish Clip. Then, to quickly determine if a clip contains an alpha channel choose Alpha from the View menu. An alpha channel determines areas of transparency and opaqueness within a clip. The black pixels represent the transparent area, and the white area are treated as opaque.
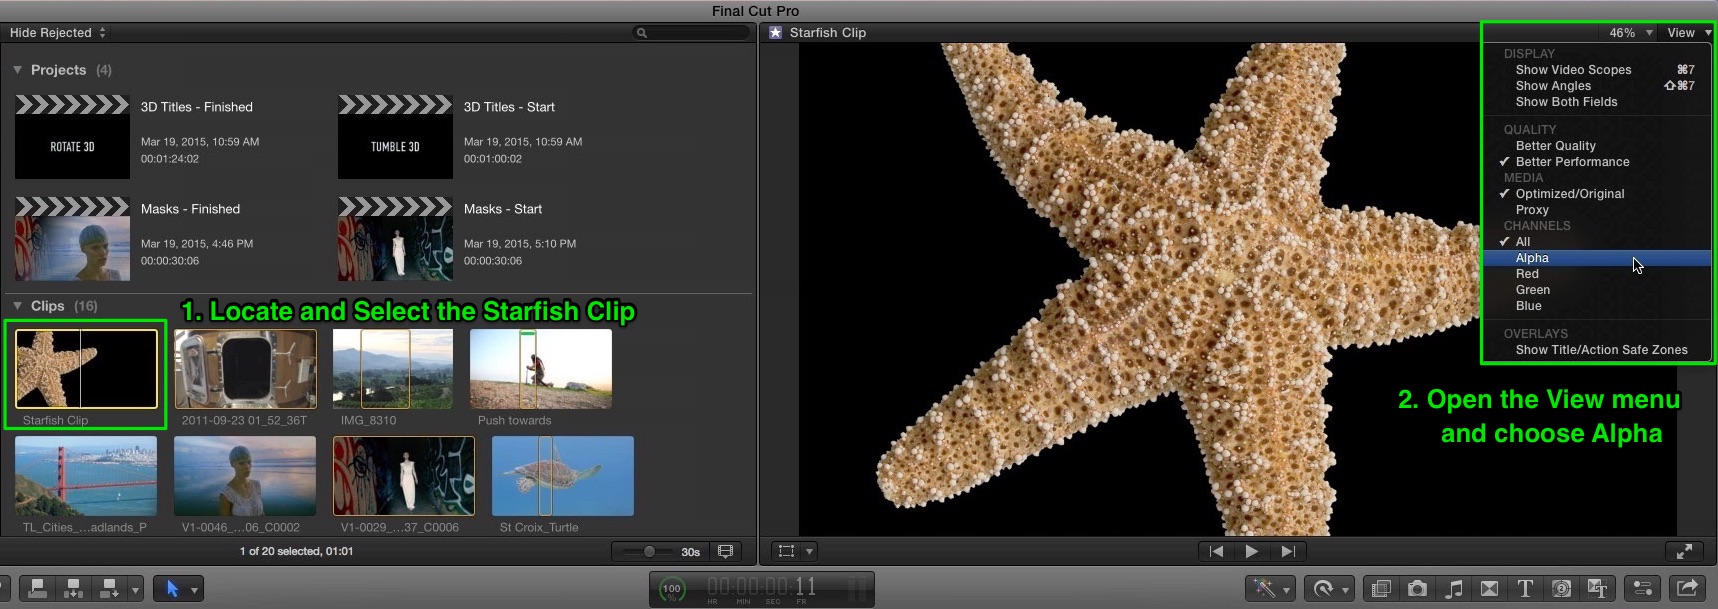
Alpha channels are embedded when a movie is exported from Motion or After Effects using a codec that supports Alpha Channels – either Apple’s ProRes 4444 or the older Animation codec. Set the channel view back to All.
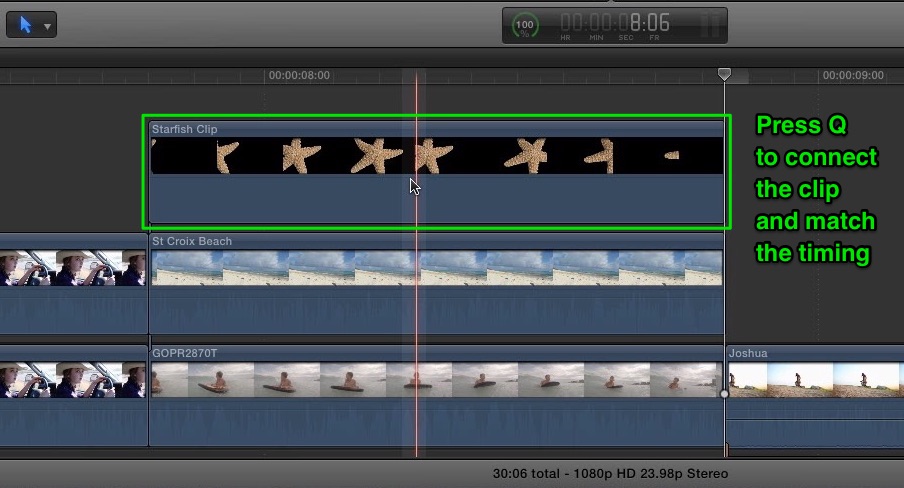
Press Q to connect the Starfish clip to the stack of beach clips in the timeline. Because we set a range on the clip, the connected clip matches the duration of the clips beneath it. Skimming over the Starfish clip reveals the clip directly below it in the areas of transparency defined by the alpha channel.
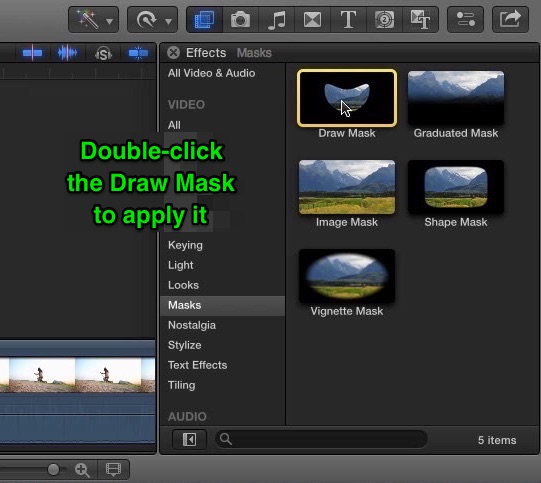
We want to use the Starfish as a wipe to reveal the bottom clip as it passes from left to right through the frame. We’ll do this using an animated mask. Move the playhead to roughly the mid-point of the animation where you can see most of the Starfish. Then select the Beach clip directly below it, and double-click the Draw Mask thumbnail to apply it.
Creating Linear Shapes
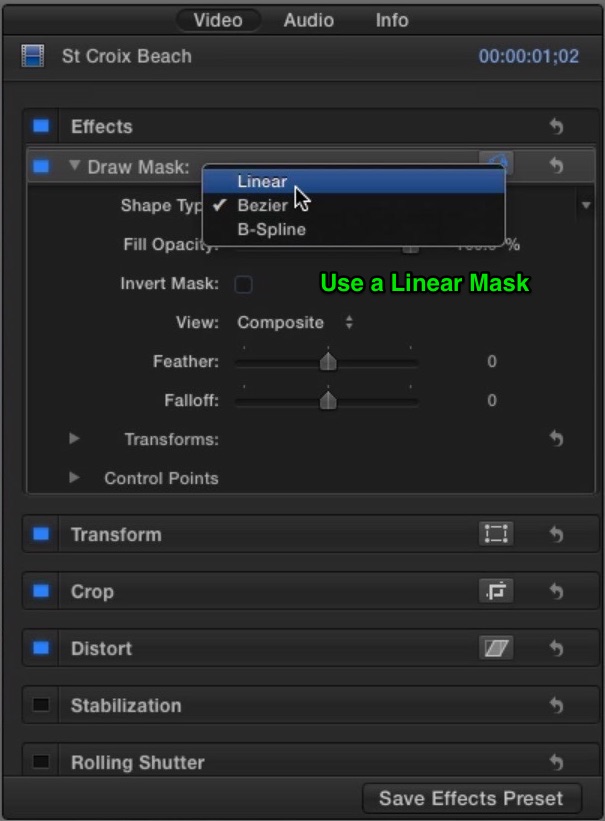
From the Shape Type pop-up, choose Linear. Linear masks do not have any splines that allow you to create a curve at the control point. They are great when you need a mask that’s angular in nature. Before you begin creating the mask you’ll want to zoom out a bit so you can see the gray area around the image.
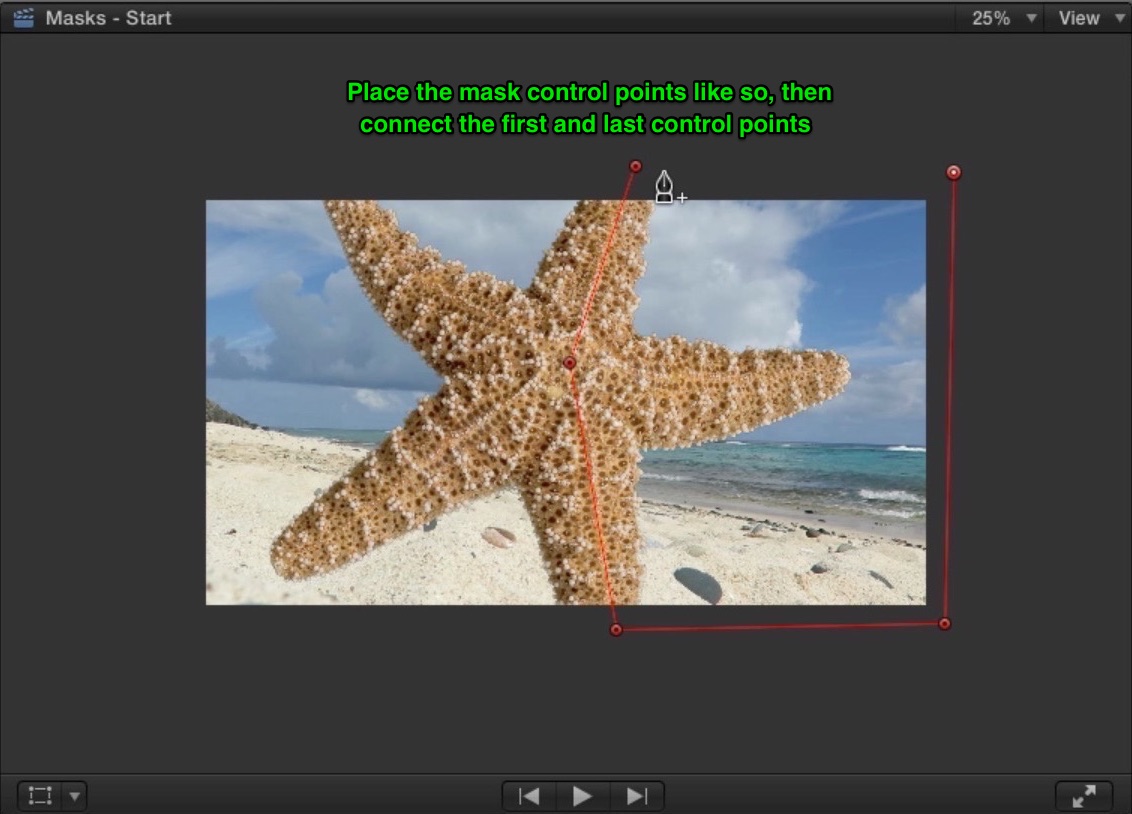
Set the first control point by clicking in the area above the top arm of the starfish, then click in the center of star, followed by a third control point in the area outside the lower arm. Continue clicking in the gray area outside of the frame then close up the mask by clicking the first control point. Now the mask is roughly shaped like an arrow.
Animating the Shape Mask
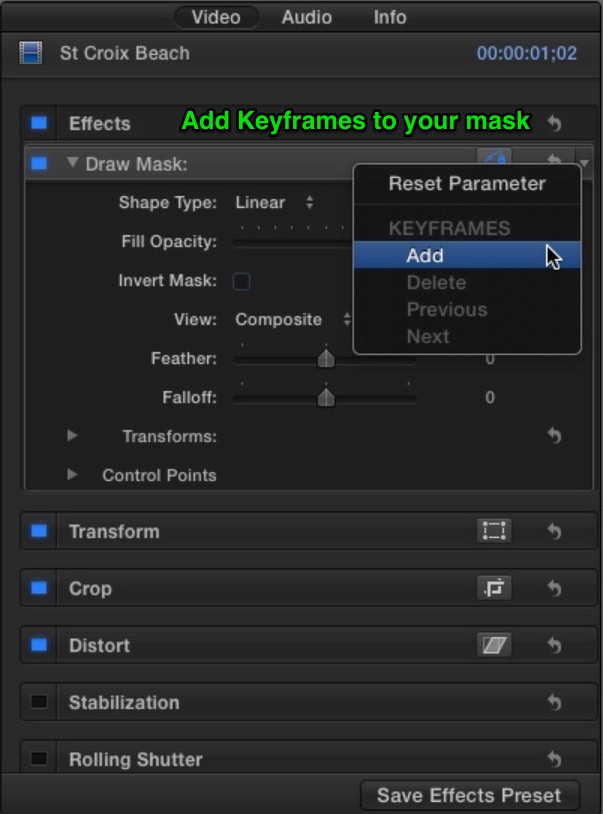
Next, go into the inspector and add keyframes for all the Draw Mask properties, then close the Inspector to give more screen real estate to the Viewer. Move the playhead to the frame where the Starfish has made a complete exit.
Drag the mask to the right until the point is touching the right edge of the frame. Step through the clip using your left arrow key until you clearly see a frame where the mask is off it’s mark.
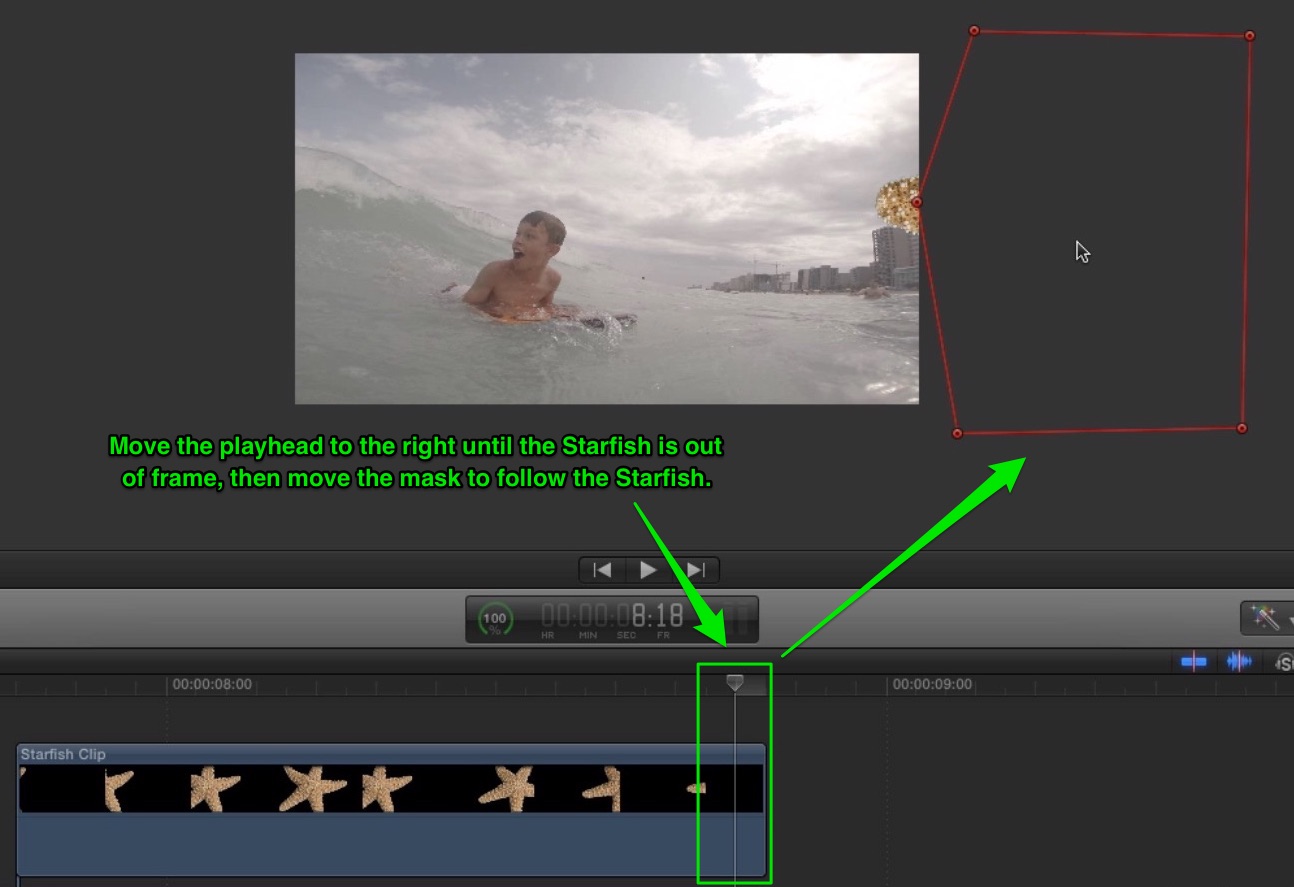
Correct the mask position by dragging it, then adjust the control points to account for the fact that the starfish is doing a slight rotation as it leaves the frame. Now step through the clip frame by frame and adjust the mask position and control points as necessary to keep the mask centered on the starfish.
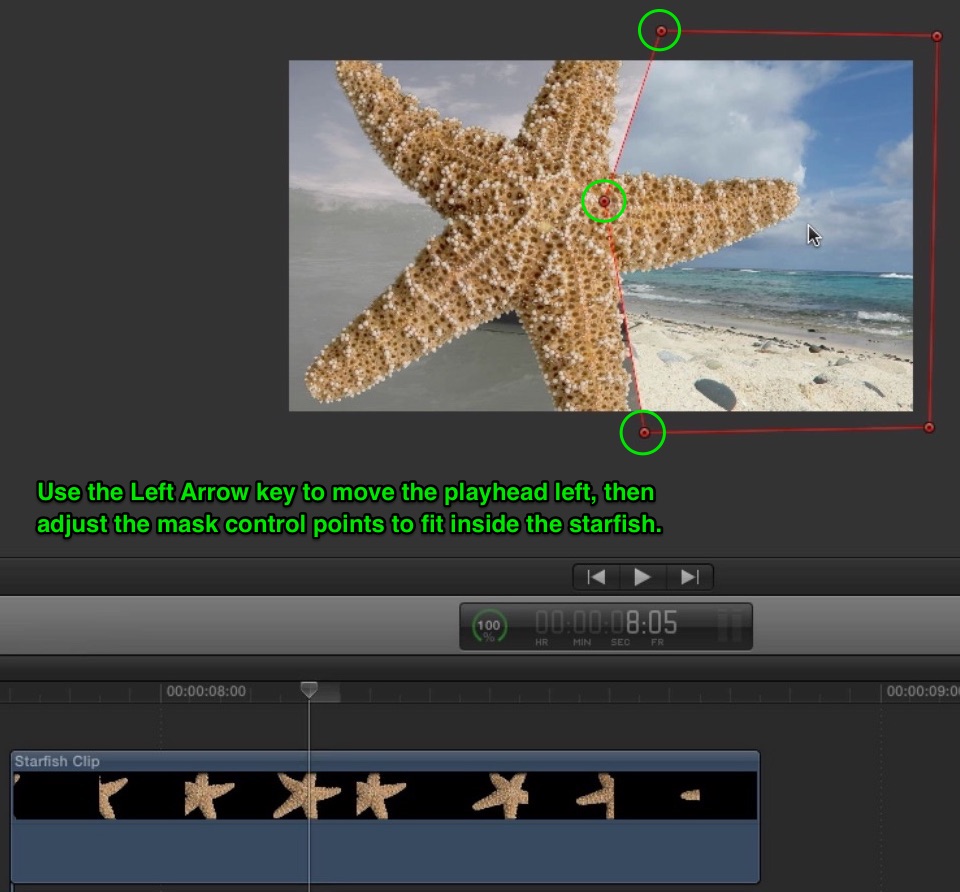
Useful Tip: You can manipulate controls points as a group. Drag a rectangle over the 3 control points over the starfish. A white dot in the center of each control point lets you know they’re grouped. Moving one, now moves them all. Drag the center control point until the mask is re-aligned with the starfish.
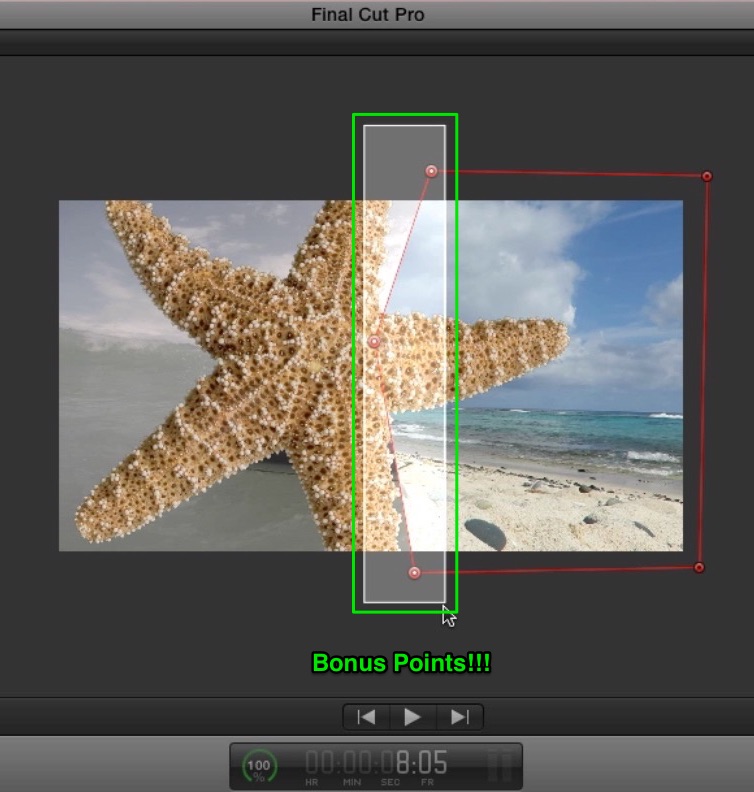
Keep stepping backward, adjusting control points to keep the mask centered. To return to individual point manipulation, click in the gray area to deselect, then adjust any control point as needed.
Continue adjusting the mask shape until the starfish is no longer visible on the left side of the frame. Use your arrow keys to step through the animation checking for any area where the mask needs refinement.
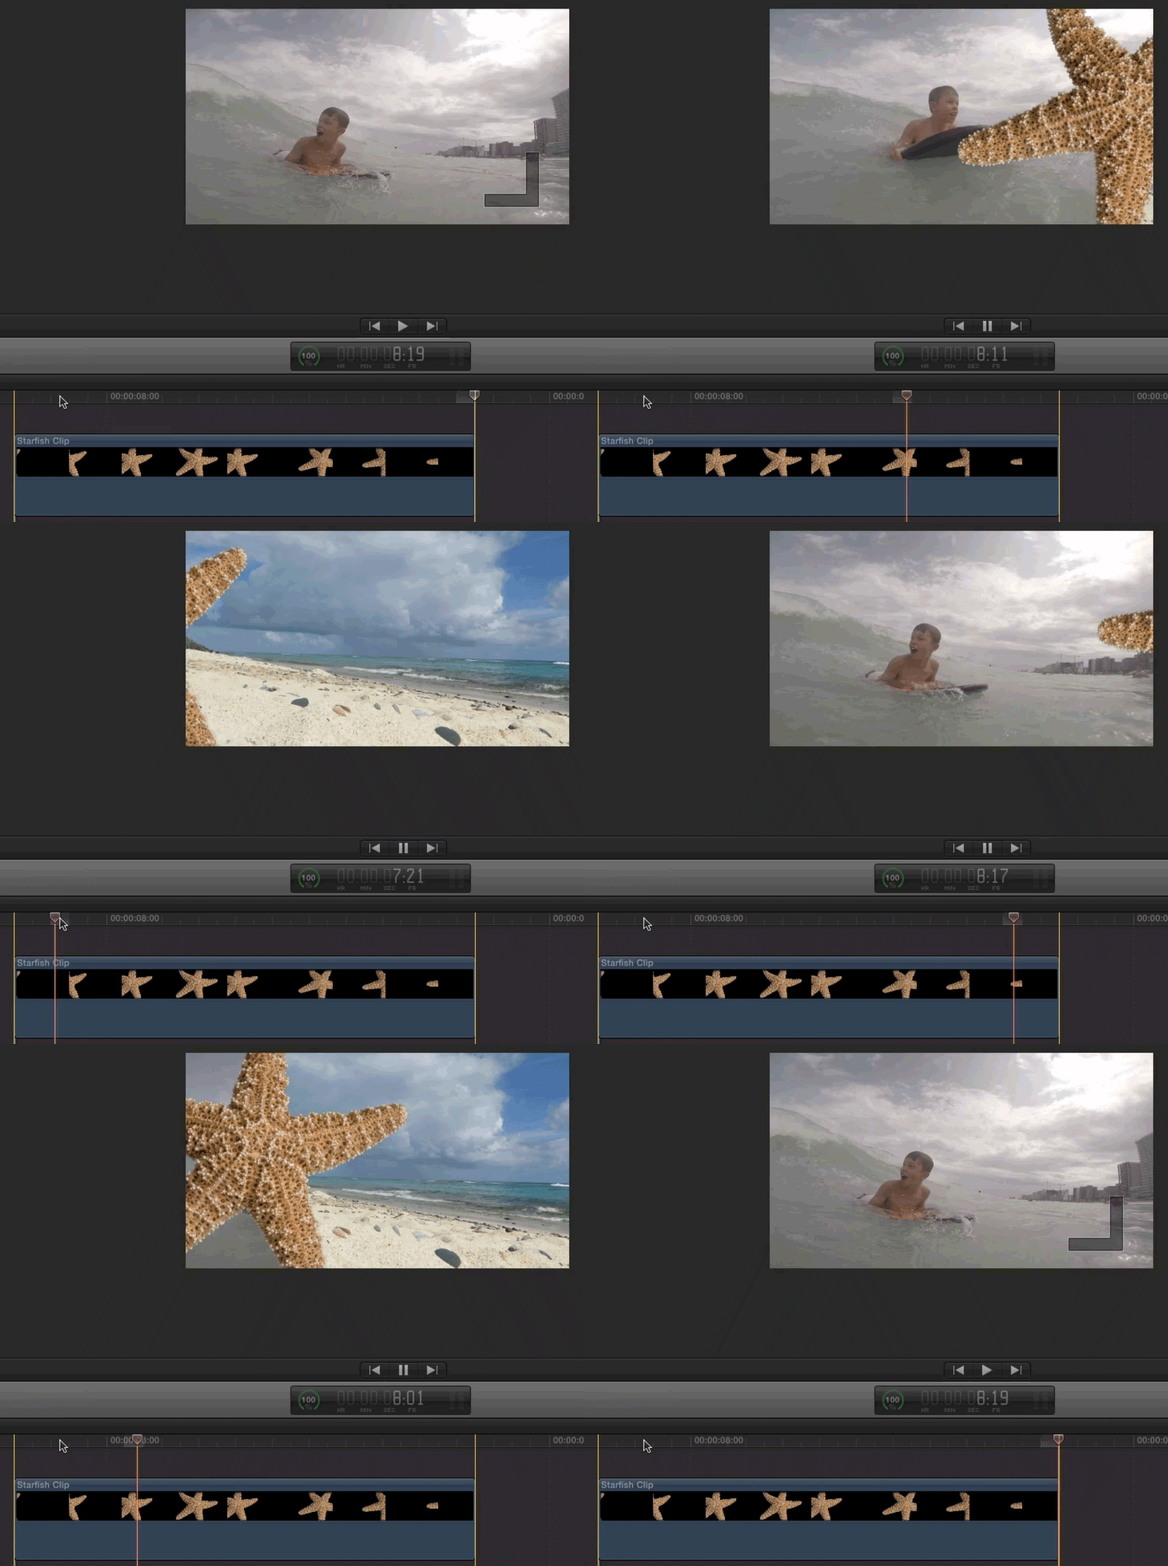
Go ahead and play that back to see how it looks. Press X to set a range, then press the forward slash key to play back. Very cool. Now you can create transitions from any clip containing an alpha channel.
If you’re interested in learning Final Cut Pro, we have some great training that will make the entire experience easy and enjoyable. Check out our Final Cut Pro X learning path, where we have tutorials that work in a planned series working from beginner to advanced.


