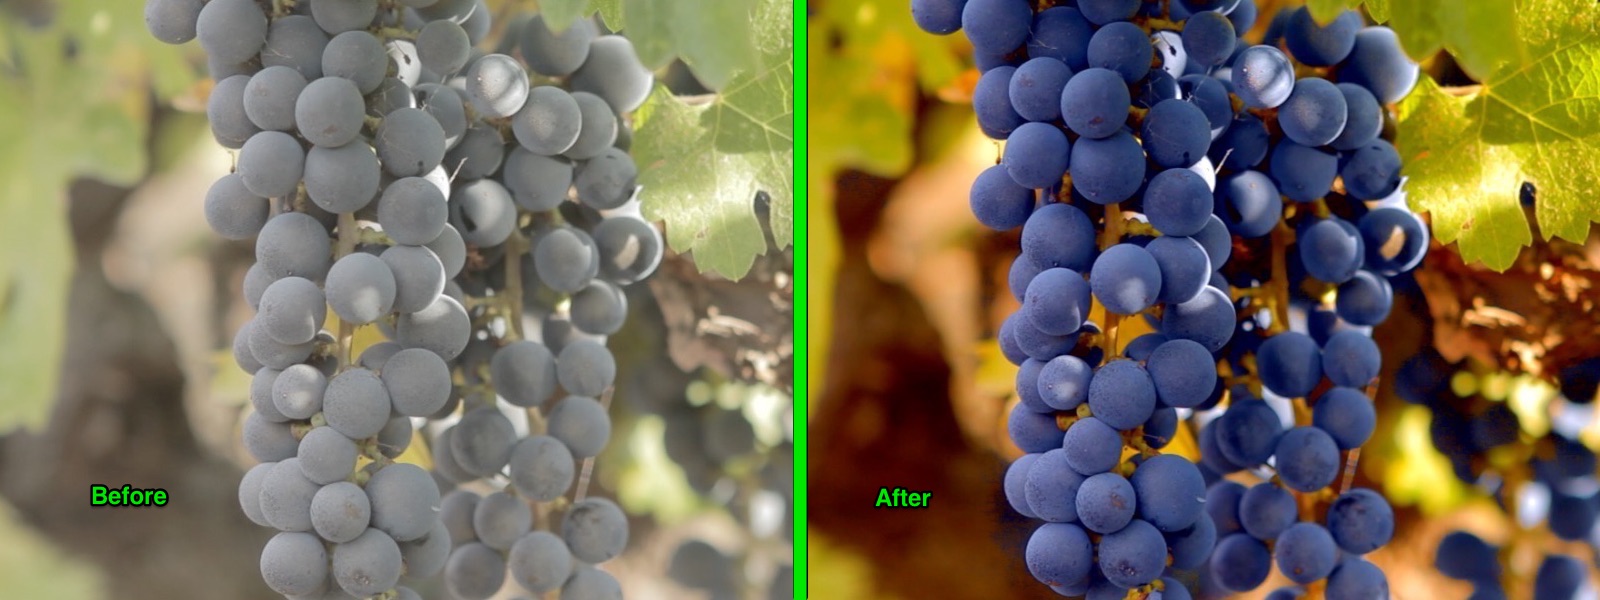
In this short lesson, I’m going to show you how to punch up a shot using a mask to perform primary and secondary color corrections. The idea is to take the image on the left and make it pop like the image on the right.
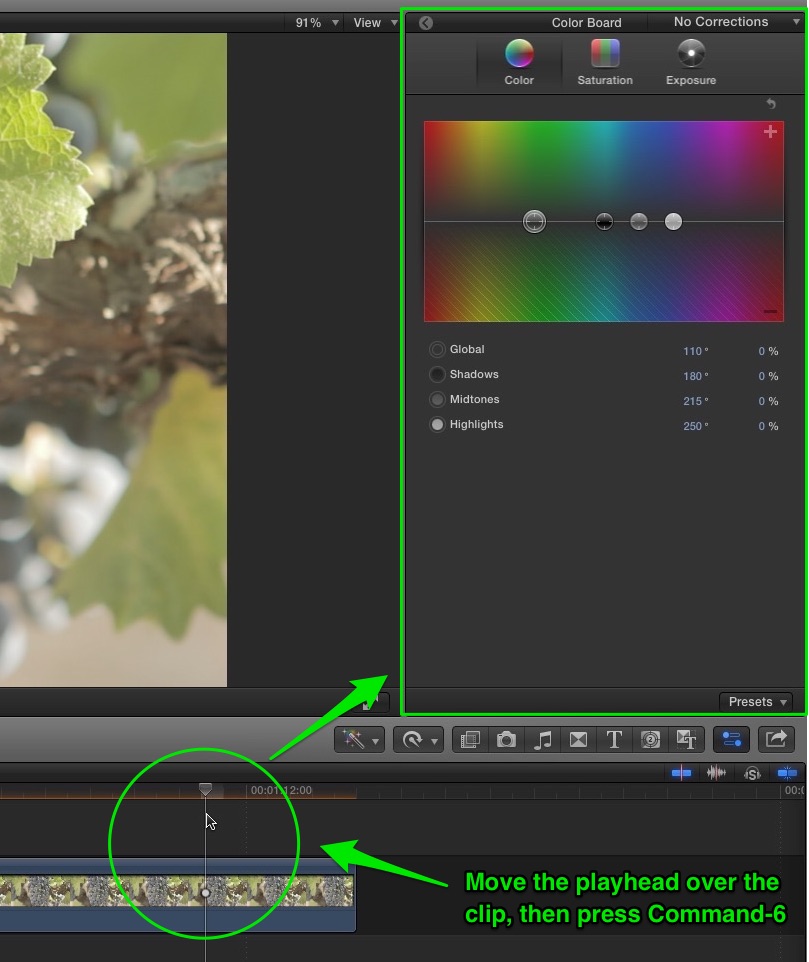
Start by placing the playhead over an uncorrected clip, then press Command-6 to automatically add the Color Correction effect and open the Color Board.
Increasing Dynamic Range
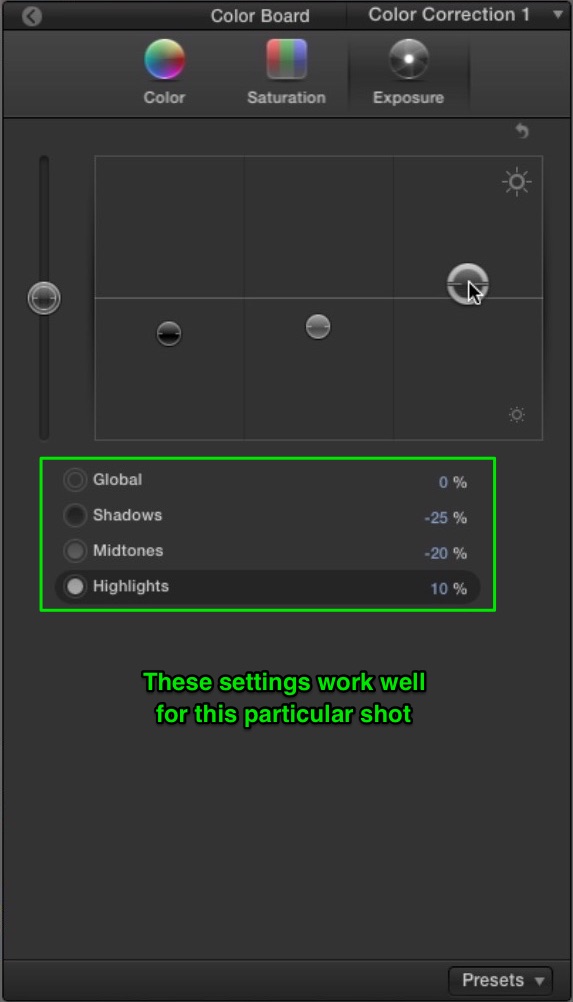
This shot is kind of flat and washed out. To stretch out the dynamic range, I’ll reduce the Shadows to about -25%, the Midtones to about -20%, and raise the highlights about 10%.
Increasing Saturation
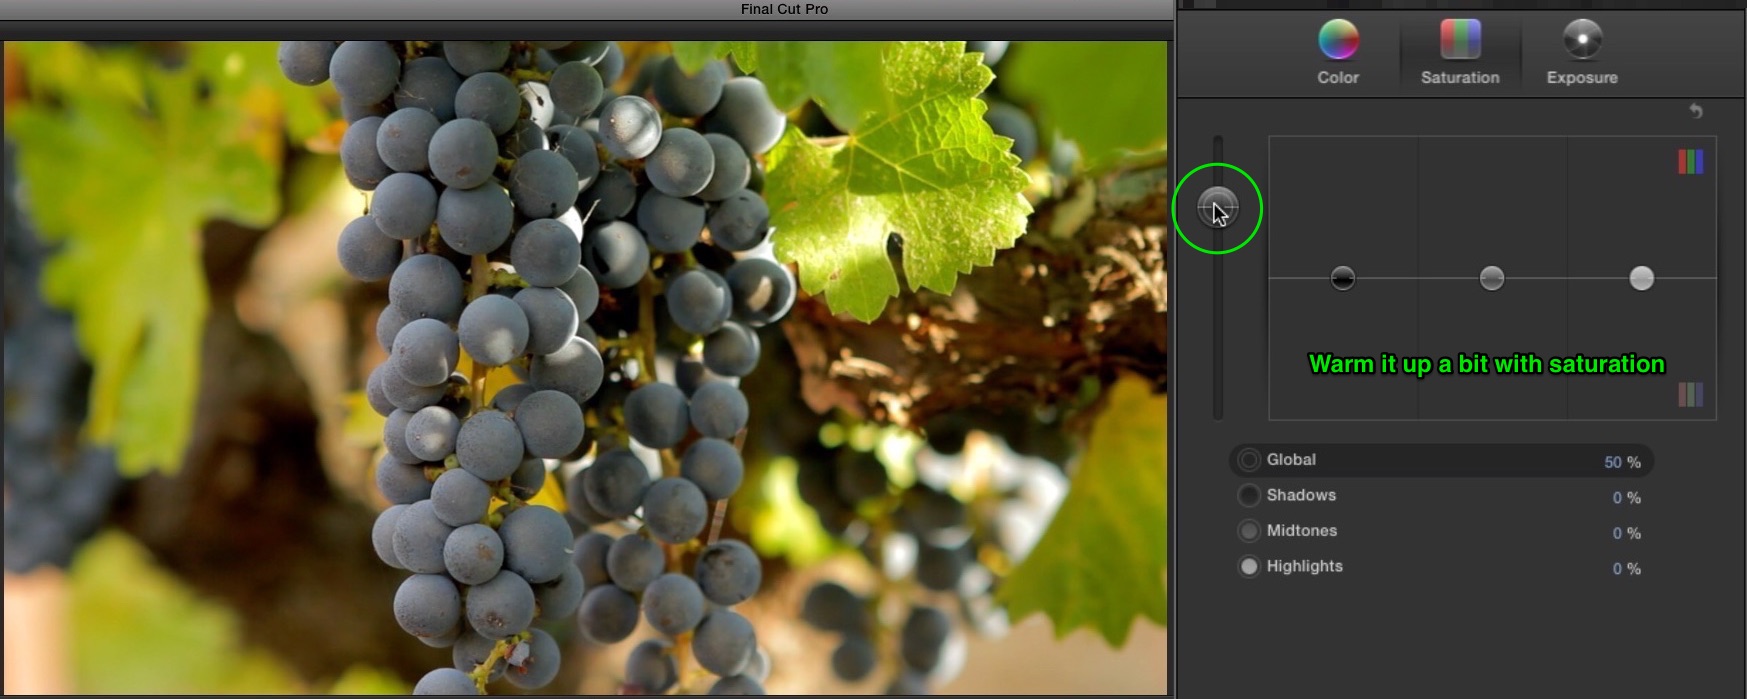
Now that there’s more contrast, it’s time to make the shot more vibrant. With the saturation pane open, I’ll increase the global saturation to 50%.
Isolating the Subject
To warm up everything except the grapes, I’ll add a second color correction then return to the Video Inspector to add a Color Mask to Color Correction 2.
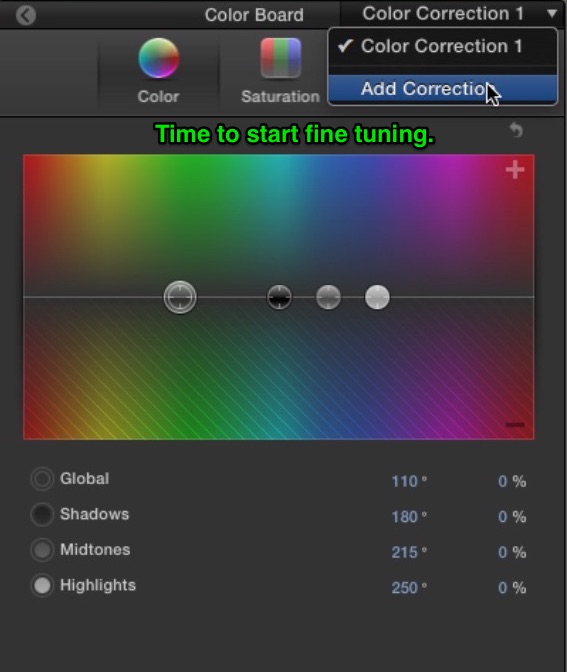
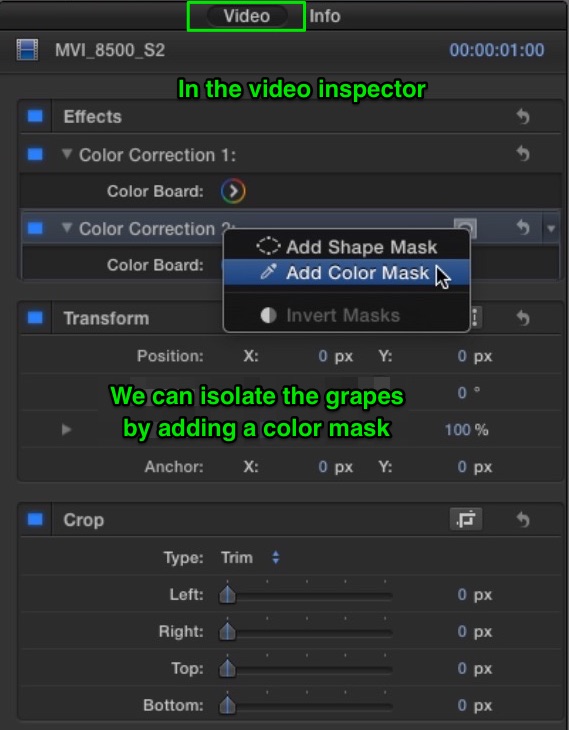
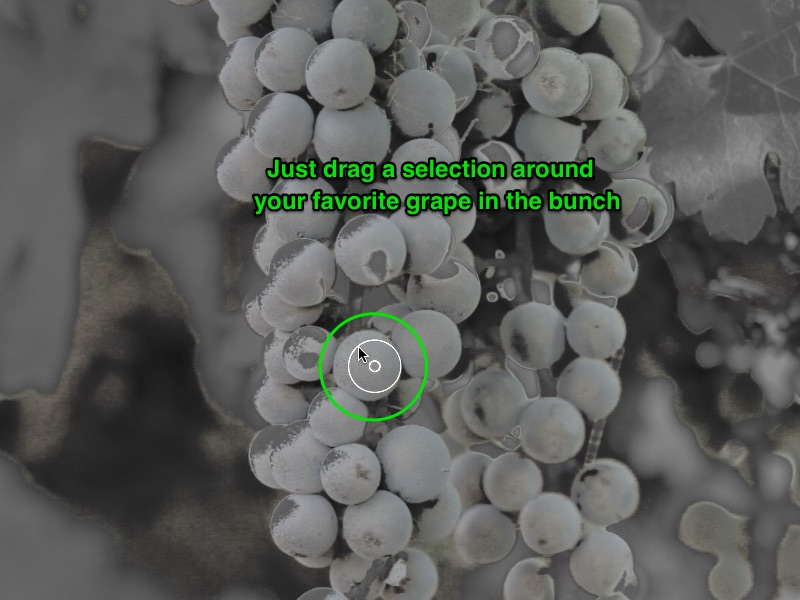
Next, I’ll sample the grapes by clicking and dragging to add to my selection. Hold down the Command key and drag the Softness slider to adjust the mask.

Warming up Outside the Mask
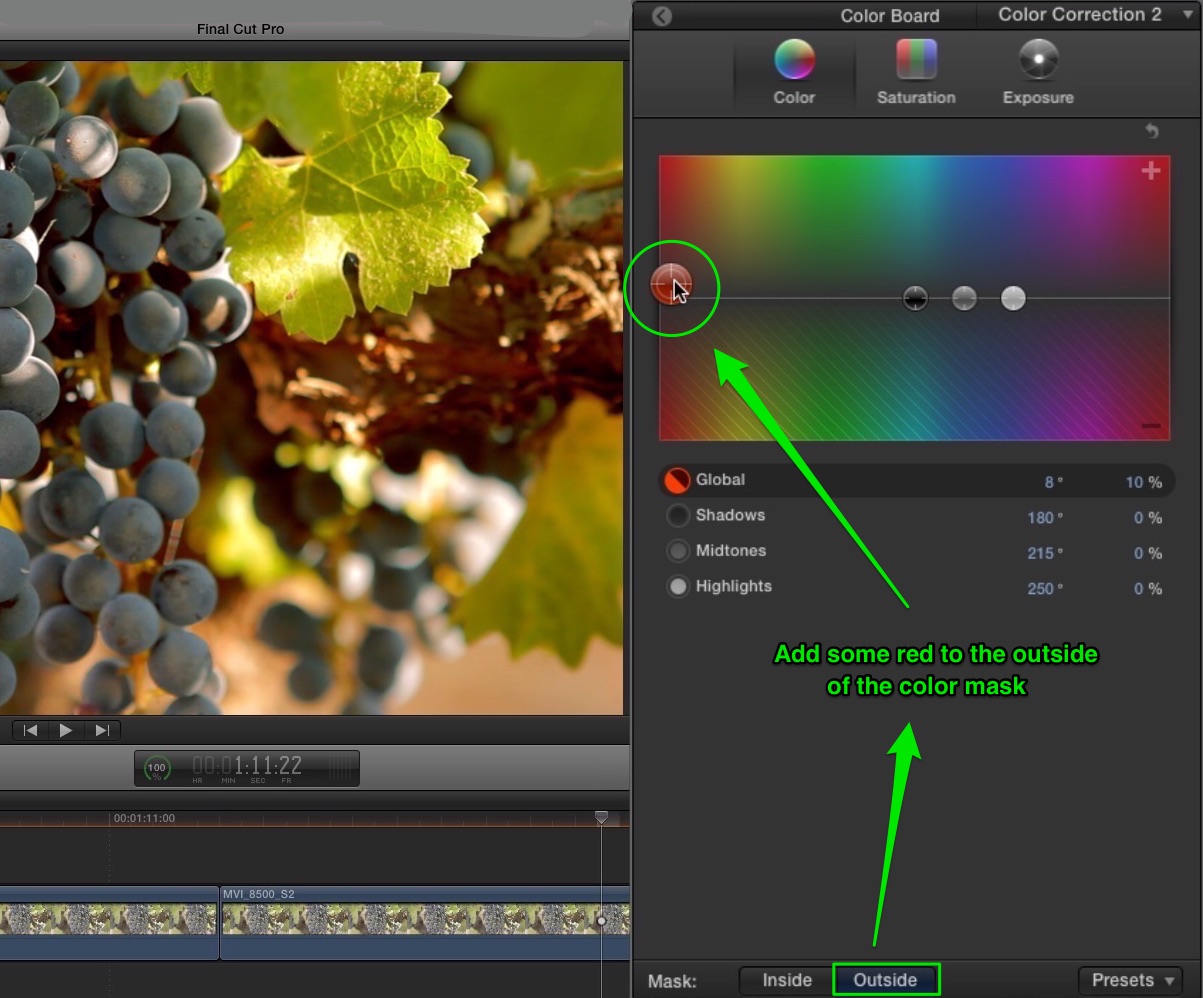
Go back to the Color Board for the second correction, then select the Color pane and with the Outside Mask button selected, warm up the everything except the grapes.
Cooling off Inside the Mask
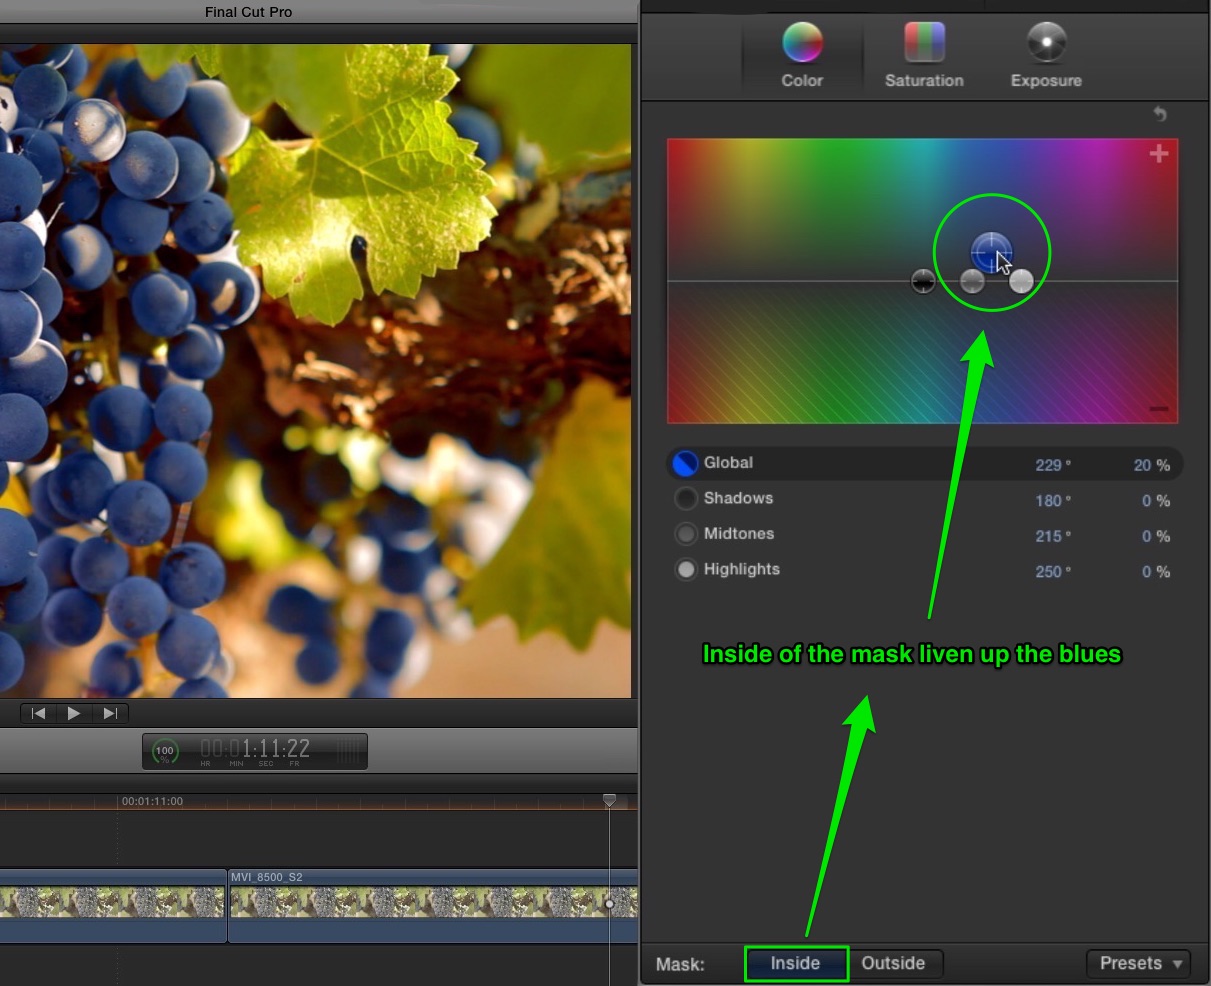
I’ll then select Inside, which allows me to correct just the grapes, and use the global puck to make them a deep blue.
Adding a Shape Mask
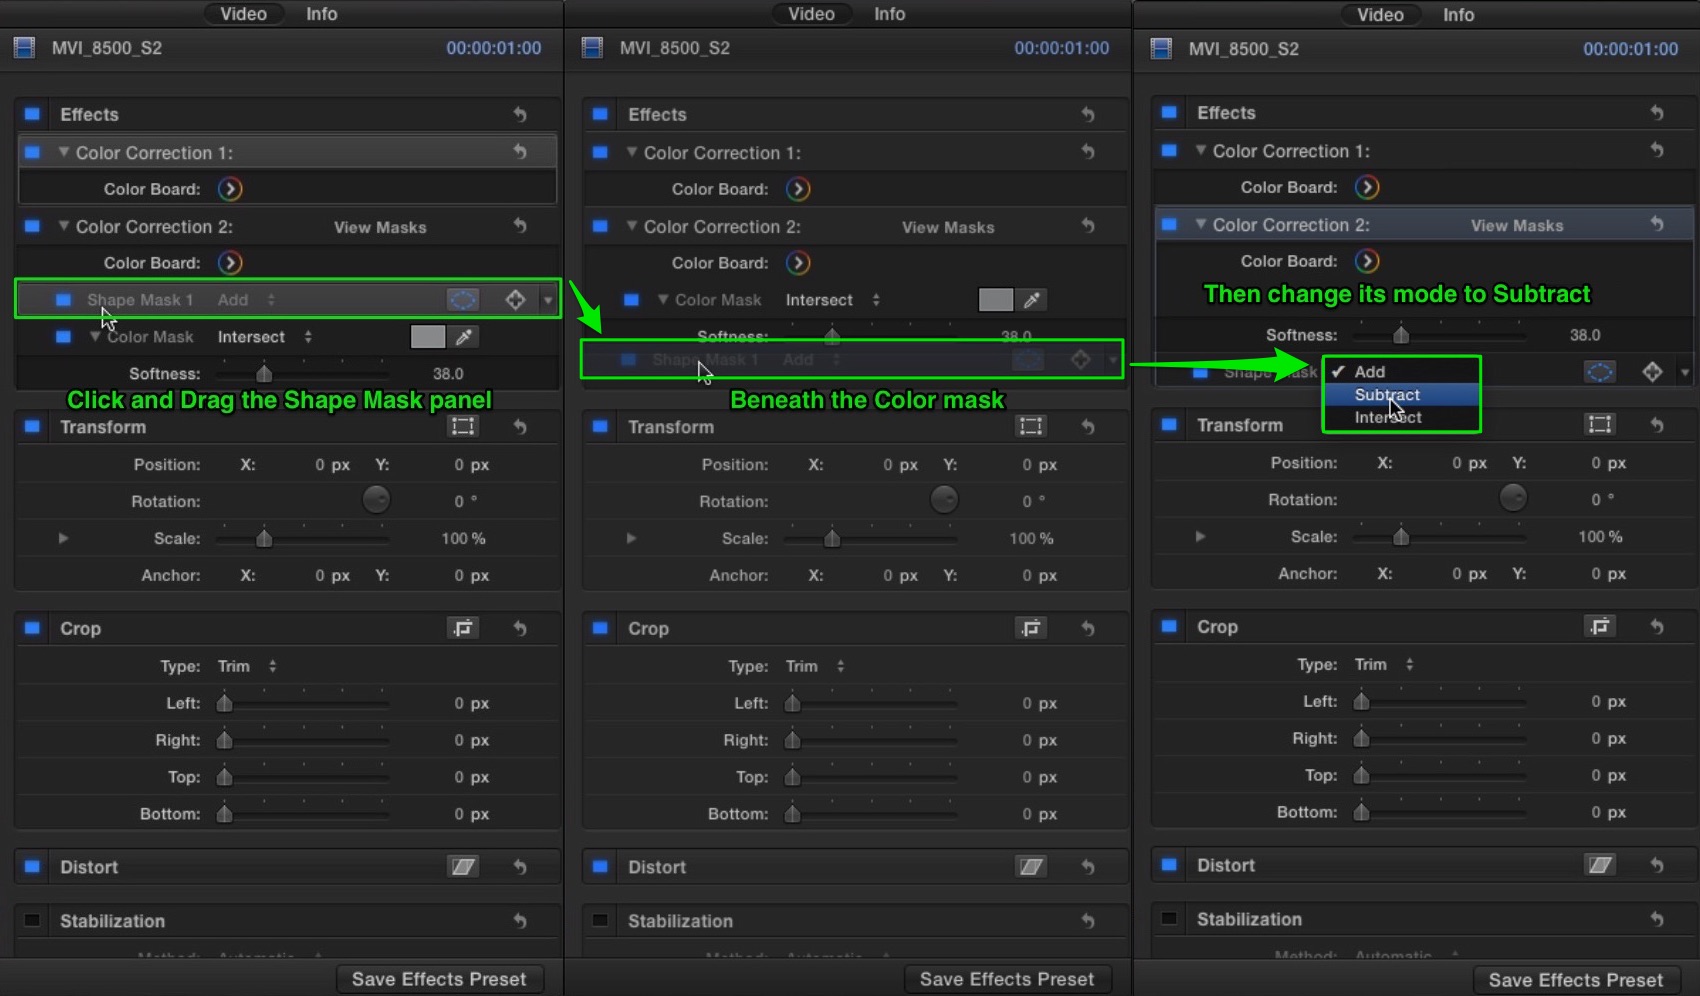
The color mask has included some of the out-of-focus grapes. To exclude them from the grade, go back to the Video Inspector and add a second mask to this Correction – a shape mask. Move it over this area and adjust its shape feather.
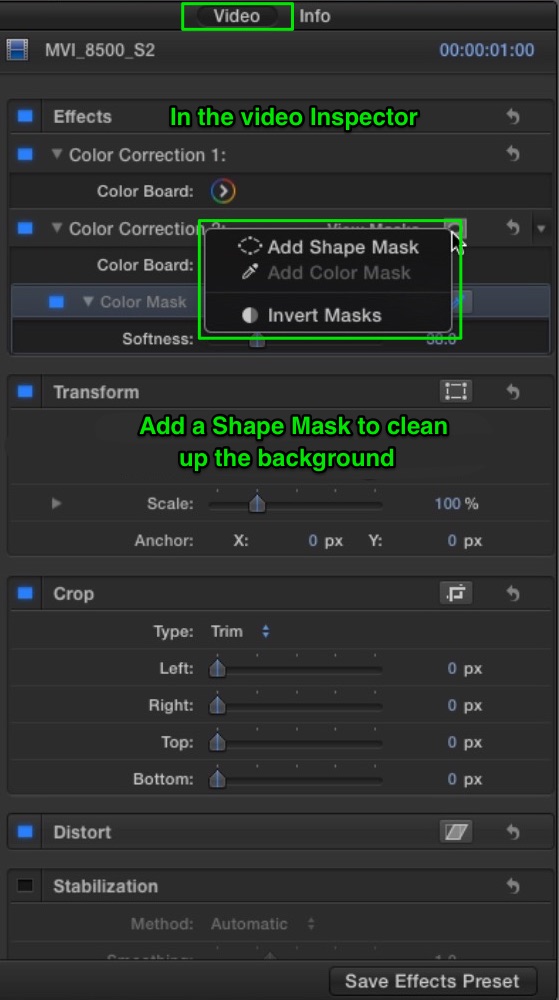
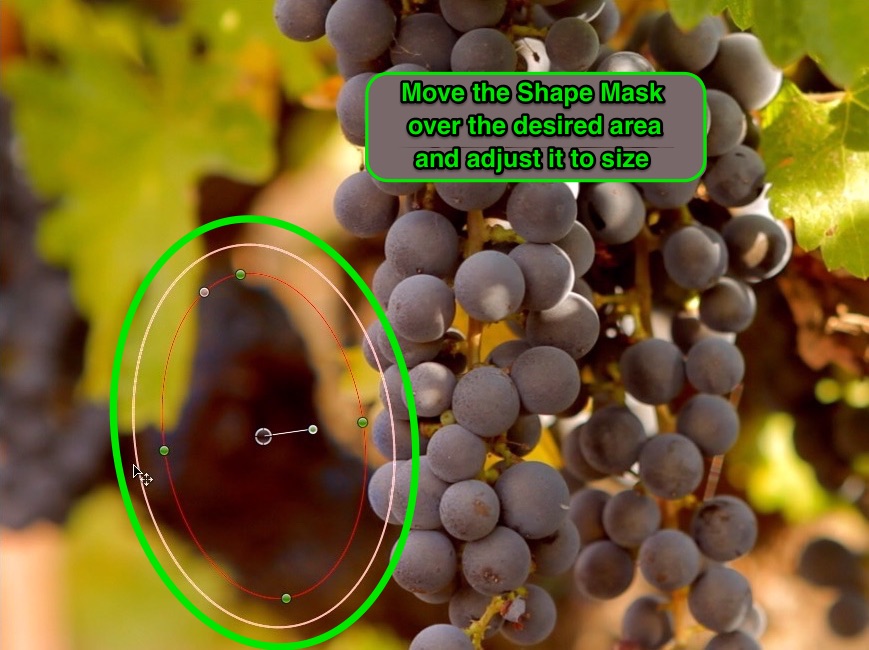
In the Inspector, drag the Shape Mask below the Color Mask, and set the layer menu to Subtract. Then click the mask icon to disable the on-screen controls.
Toggle both corrections off and on together by clicking the blue Effects box.

If you’re interested in learning Final Cut Pro, we have some great training that will make the entire experience easy and enjoyable. Check out our Final Cut Pro X learning path, where we have tutorials that work in a planned series working from beginner to advanced.

