How to use Ripple Bullets
Step 1: Apply
Once installed with the FxFactory application (FxFactory.com), Ripple Bullets appear in Final Cut Pro X’s Titles Browser. They comprise 12 bullet shapes and two background types.
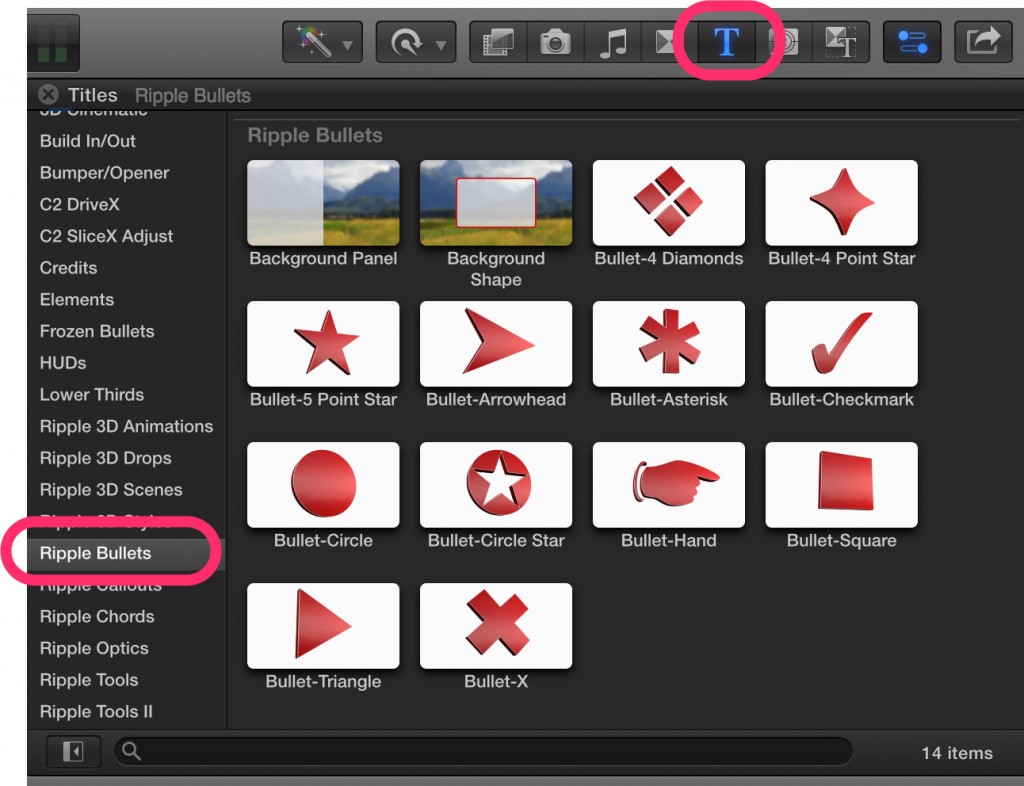
To add Ripple Bullets to your project, select one and drag it over a video clip or use the Q key to make a connect edit.
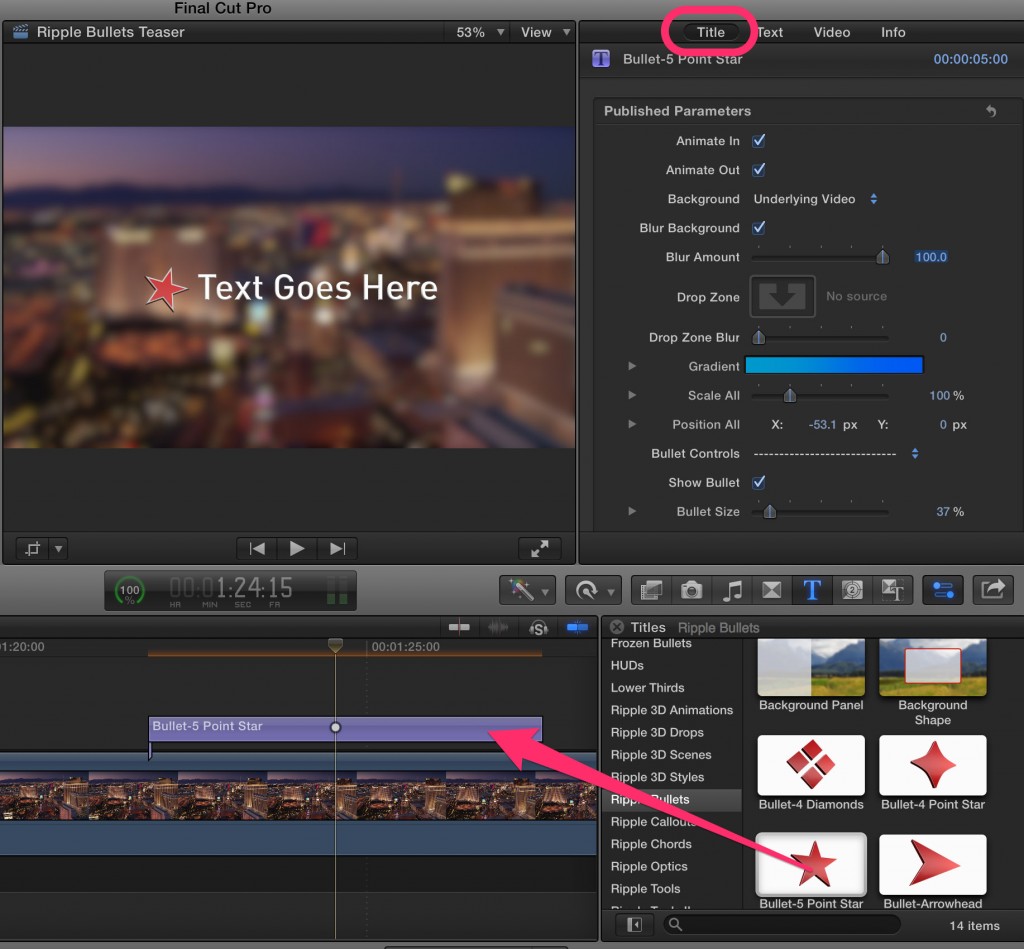
In fact, if you first set a range on a clip – by pressing I and O or use the X key to set the range on the full clip under the playhead – and then select the Ripple Bullet you want and press the Q key, the title will perfectly match your range.
Step 2: Style
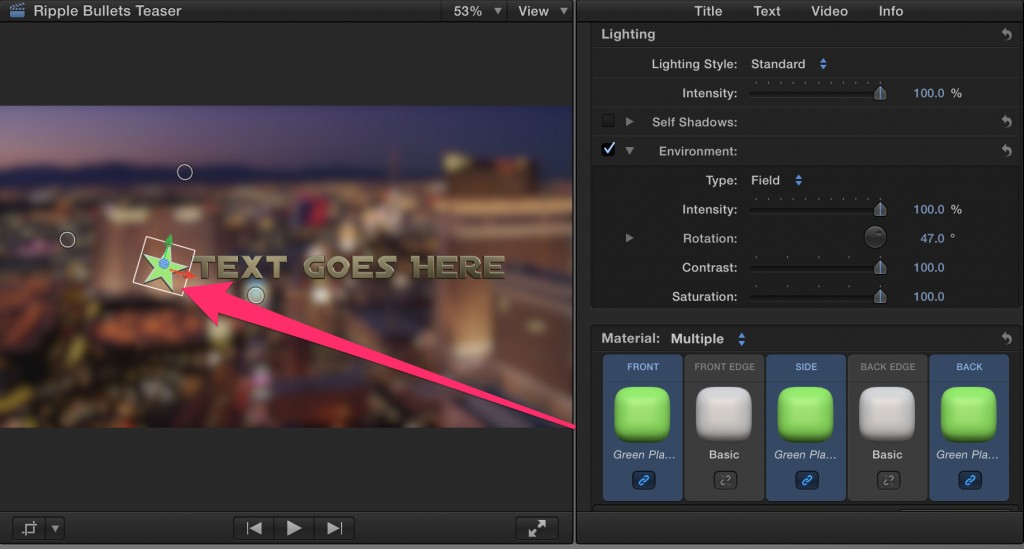
To modify the text, click it once to select it. This action automatically bring the Text Inspector forward where you can replace the default text with your own, choose a font, and more.
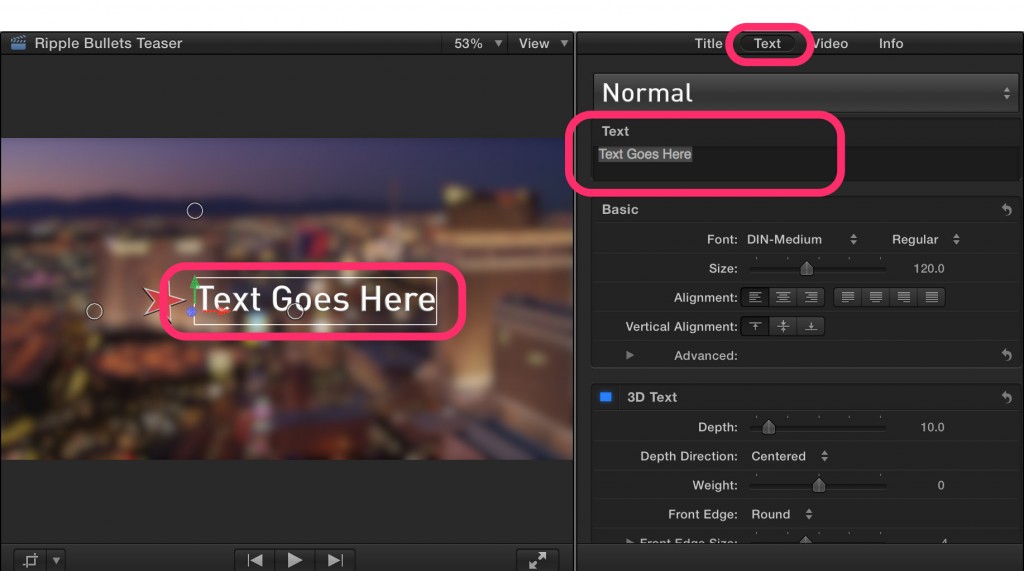
By default the text is 3D and you can use all the 3D features of Final Cut Pro X to style it as you like. Or click the blue 3D text box to make your text 2D.
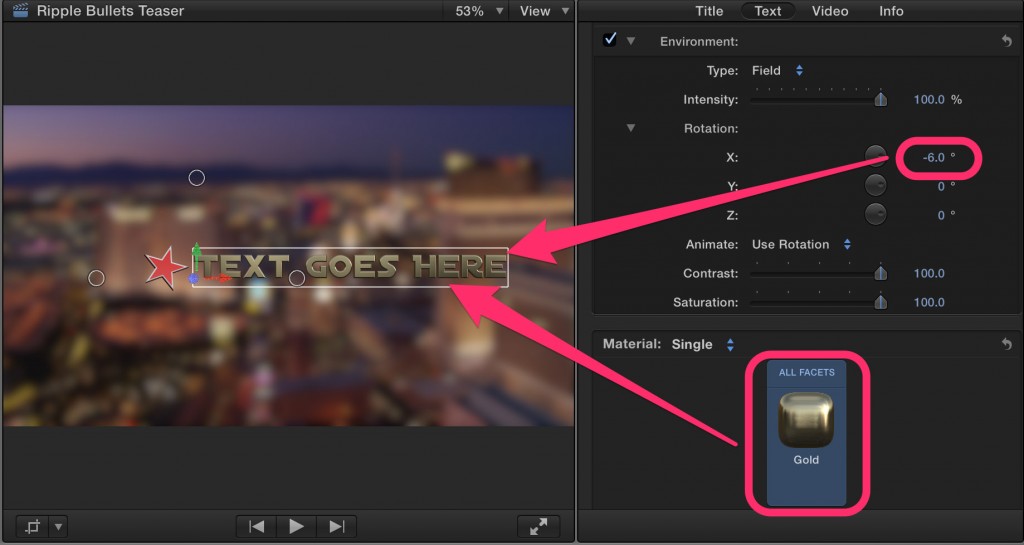
Click the bullet to modify it. It’s a 3D text object, so it has the 3D controls available.
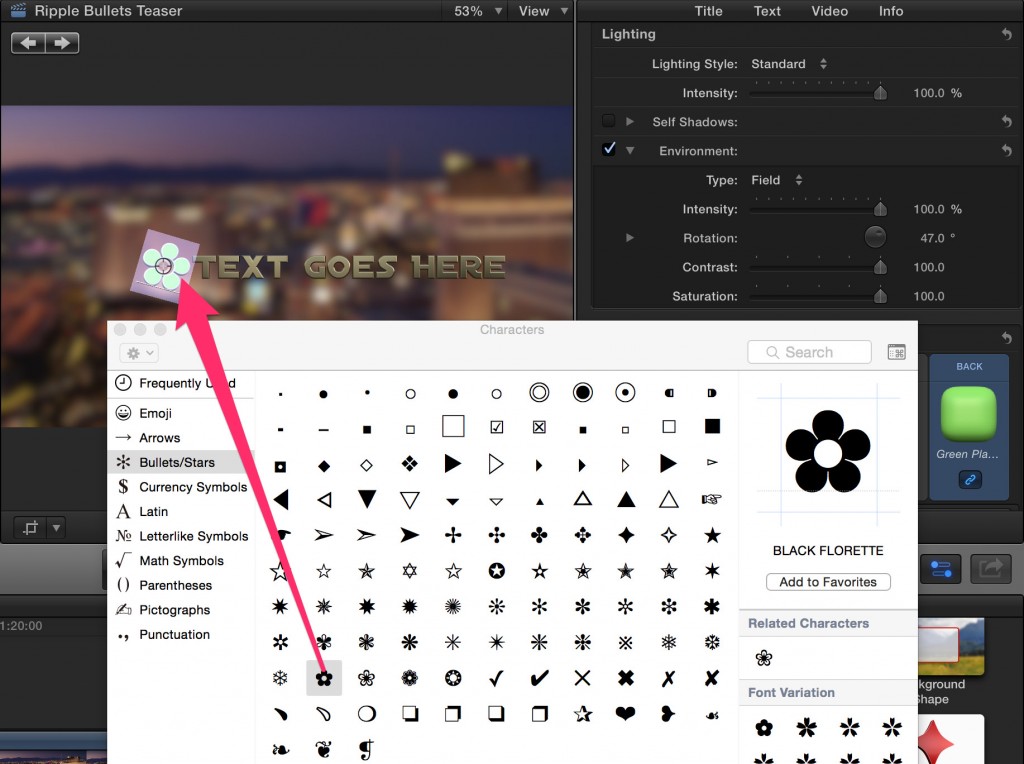
In fact, you aren’t limited to the 12 provided bullet designs. Double click the bullet to highlight it, then choose Edit > Emoji & Symbols, and choose any symbol you like (note: emoji won’t work)
Step 3: Animate
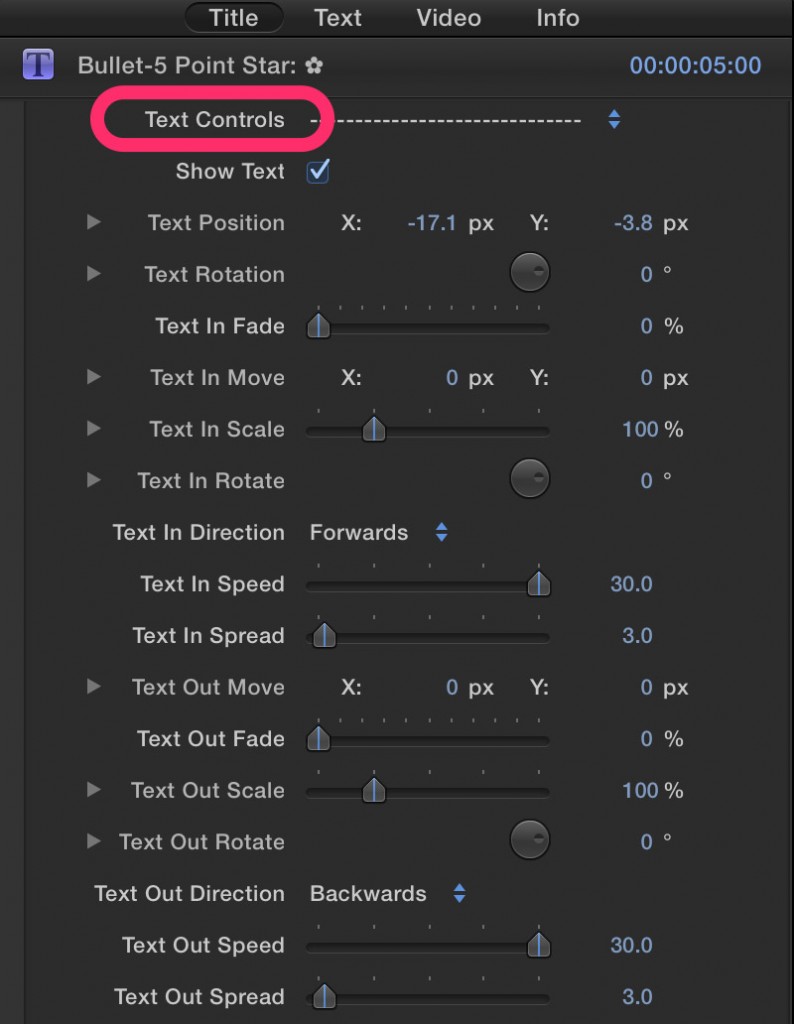
Both the bullet and the text are animated by default, but you have full control over this animation. In the Title inspector, all the Text parameters are grouped together in the Text Controls section.
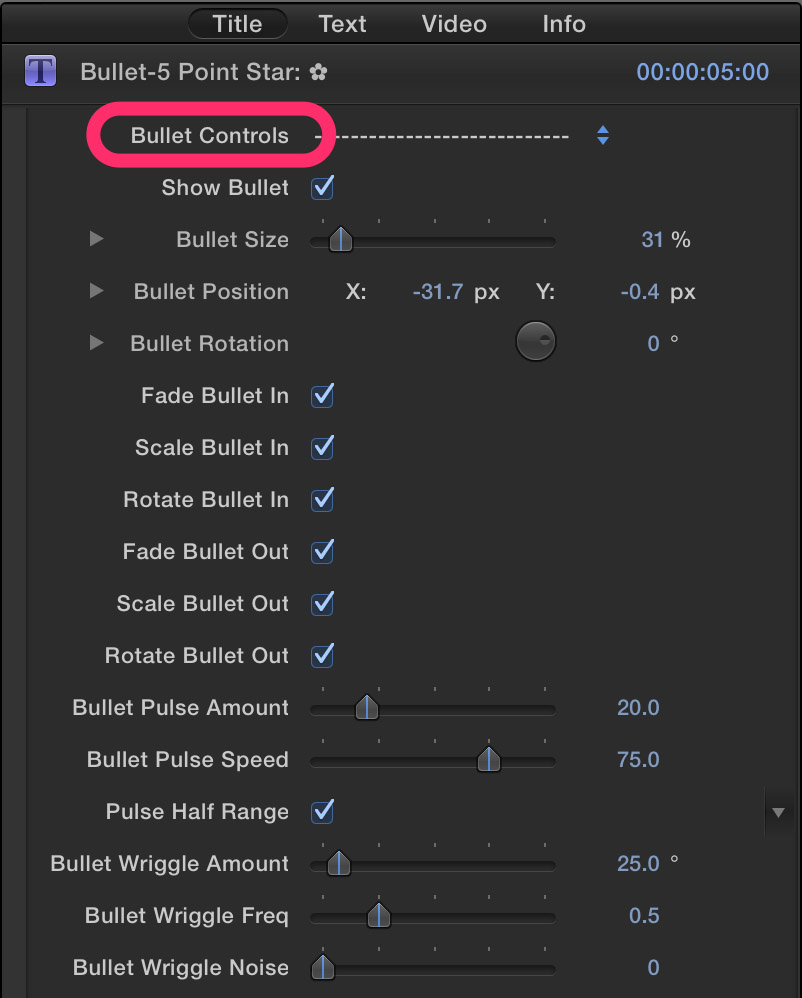
And all the bullet parameters are grouped together in the Bullet Controls section.
Once your bullet and text are styled and animated, you can turn on a grid to help with alignment.
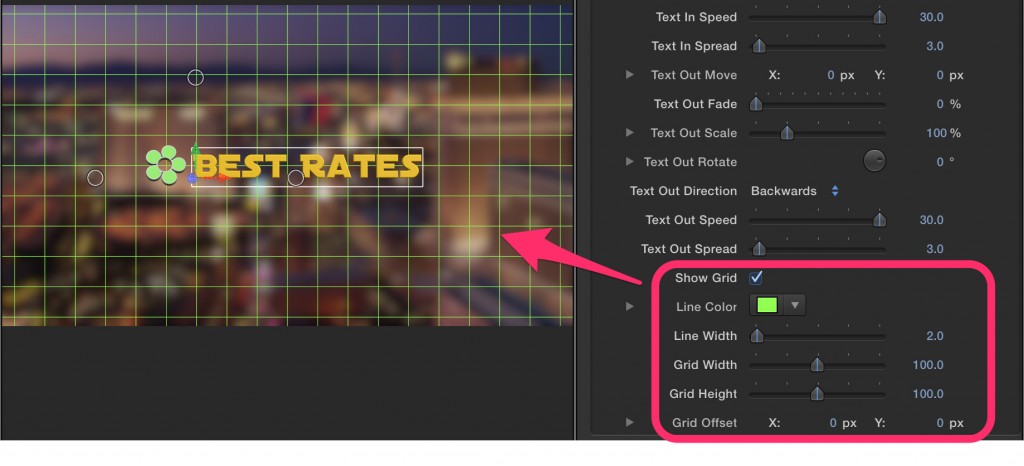
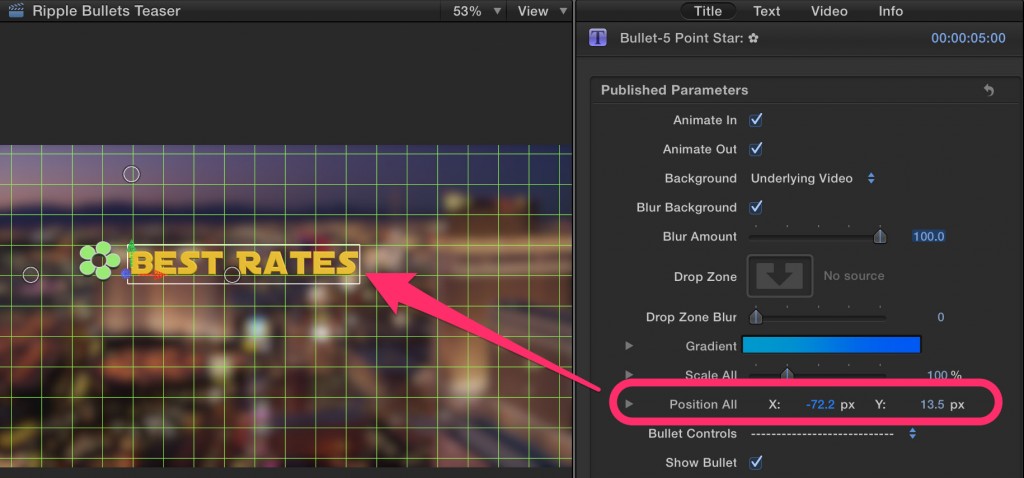
Use the Position All parameter to move the bullet and text together as a group.
Step 4: Stacking
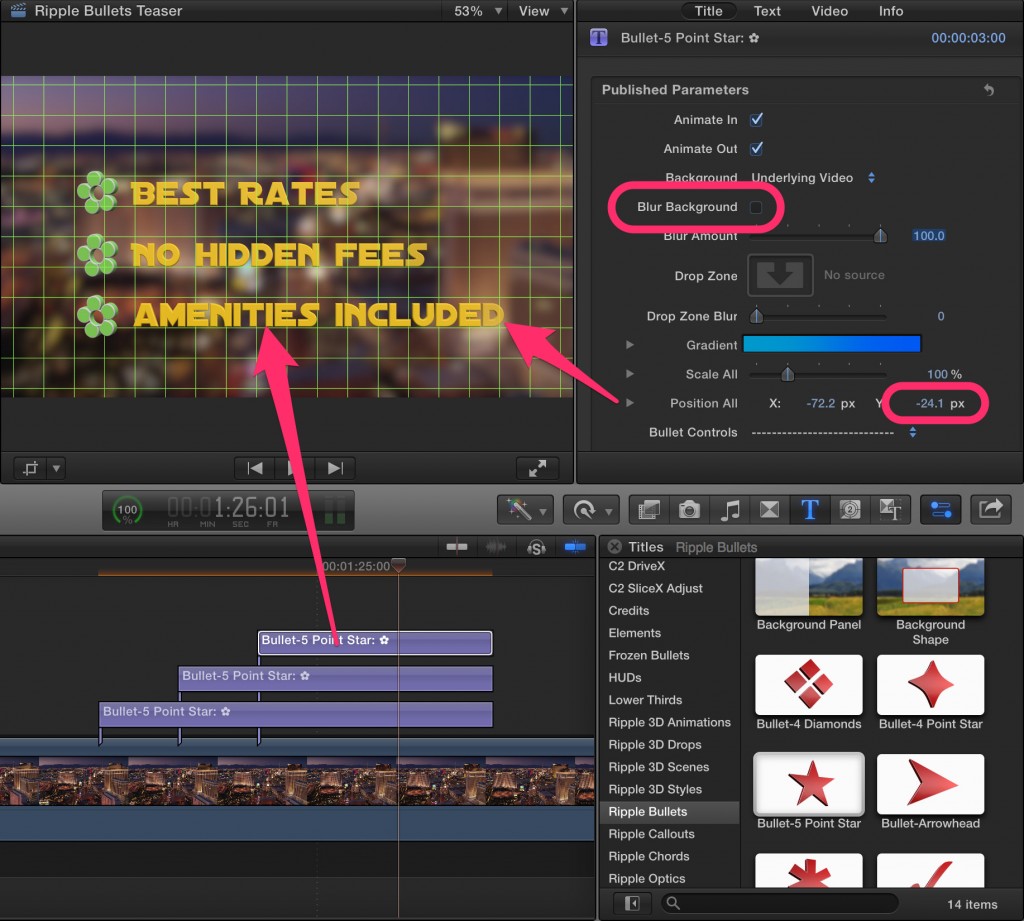
To create multiple lines of bullets, finish all your styling and animation first (this will save you a lot of time!), then simply copy-paste the title, a little later in time each time to stagger the animation timing. Then trim all the ends to match. Important: you’ll want to turn OFF “Blur Background” for all but the bottom bullet!
Step 5: Add a background
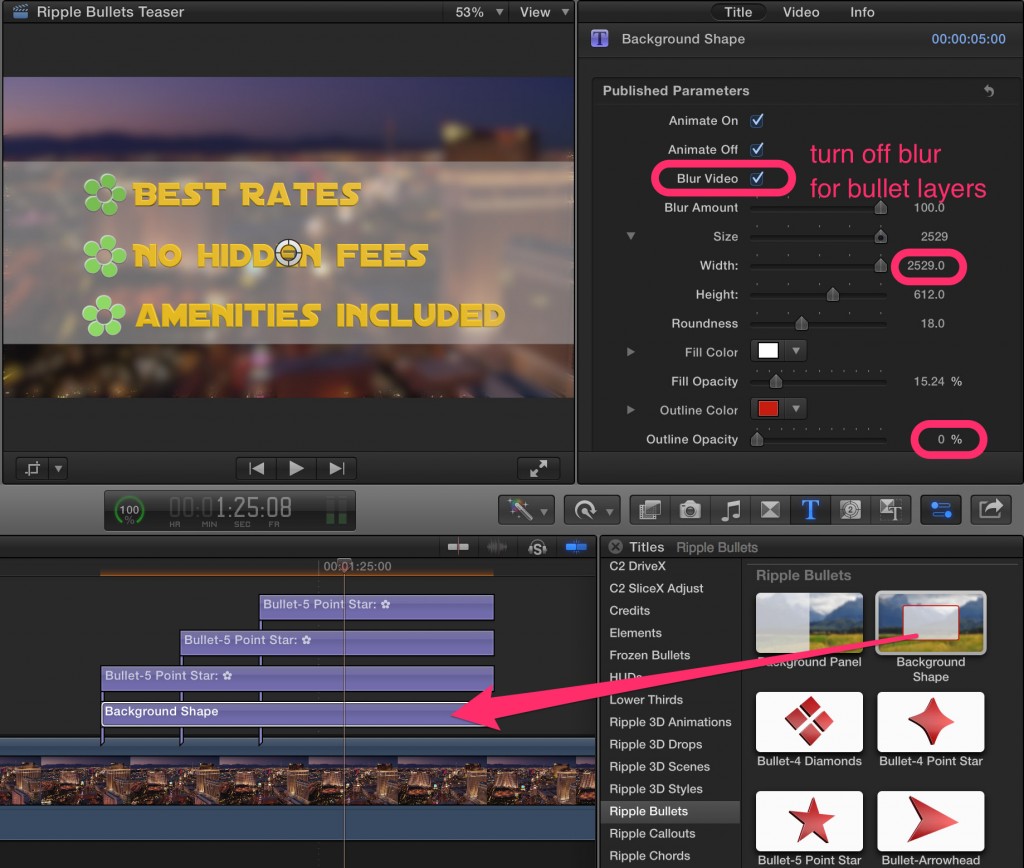
Optionally you can add one of the two animated background templates. Place it at the bottom of the stack hierarchy, and turn off Blur Background for ALL the bullet layers. Style and animate to taste.
That’s all there is to it! We hope you enjoy Ripple Bullets. If you have questions or feedback, please contact us at [email protected]. If you like Ripple Bullets, be sure to check out our other plugins for Final Cut Pro X, including Ripple Callouts – they are all distributed through FxFactory, and trial versions of each can be found in your Titles Browser and Transitions Browser.