Are you looking for updated movies for the lastest version of Final Cut Pro X?
Click here to see FCP 10.4
Final Cut Pro 10.3 Free Trial Tutorial


Favoriting & Adding Clips in Final Cut Pro X
Now that you’ve learned how to import media into Final Cut Pro X, let’s look at how to select sections from our clips and rate them so we can easily add and arrange your clips in the Final Cut Pro timeline.
Creating & Favoriting Selections
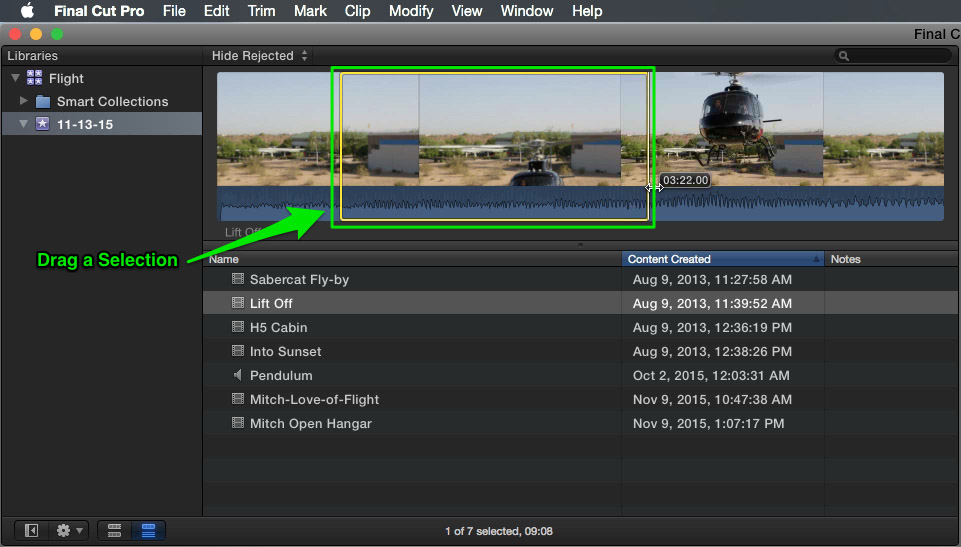
Dragging a Selection
Start by selecting the Lift Off clip in the media browser. Skim to the frame just before you see the helicopter rotors appear at bottom of the frame, then click and drag to the right. A yellow selection range appears on the clip. Keep dragging until the aircraft leaves at the top of frame.
Click the button on the toolbar with the Green Star. You’ll notice a Green bar appears over the clip thumbnail in the selection range. This indicates that only the selected portion of the clip has been favorited.
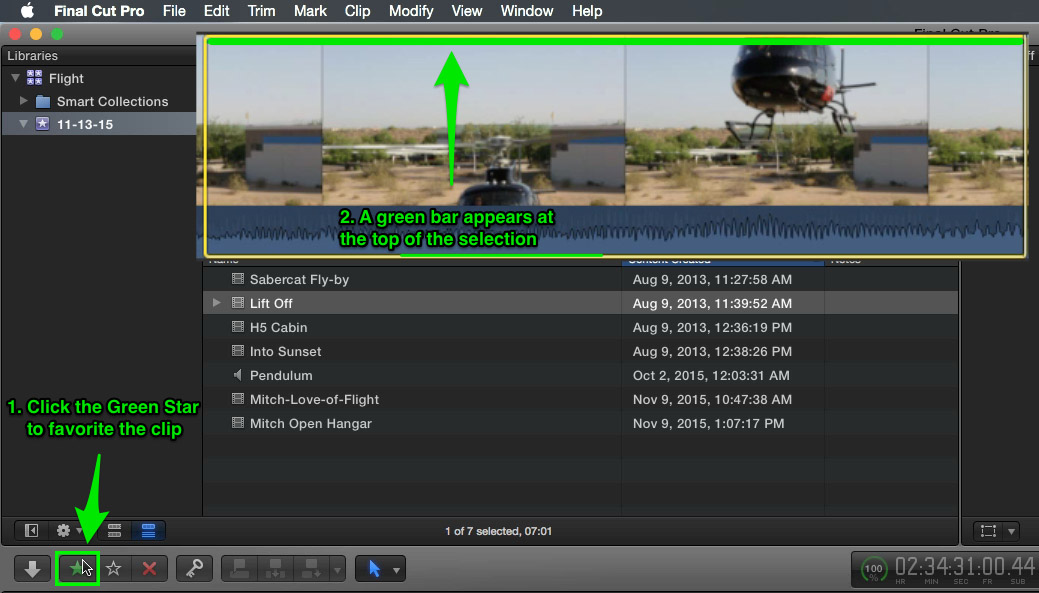
TIP: Favoriting clips is useful for selecting the portions of your clips that you want to use in your project later on.
Using I and O Keys to Make a Selection
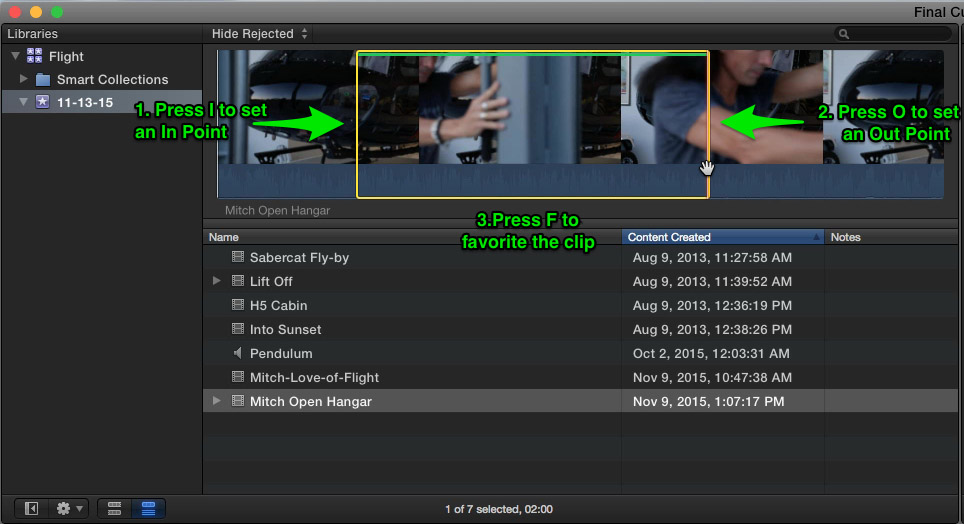
Next, locate the Mitch Open Hangar clip. Skim to the frame where the hangar door appears on the left and set a range in-point by pressing I on your keyboard. Skim to where Mitch crosses the copter nose, and set a range out point by pressing O. Press F on your Keyboard to favorite this selection.
Viewing your Favorites
If you want to view only your favorite clips in the Media Browser you can do so by clicking on the filter menu at the top of the browser and choosing Favorites or by pressing Control-F.
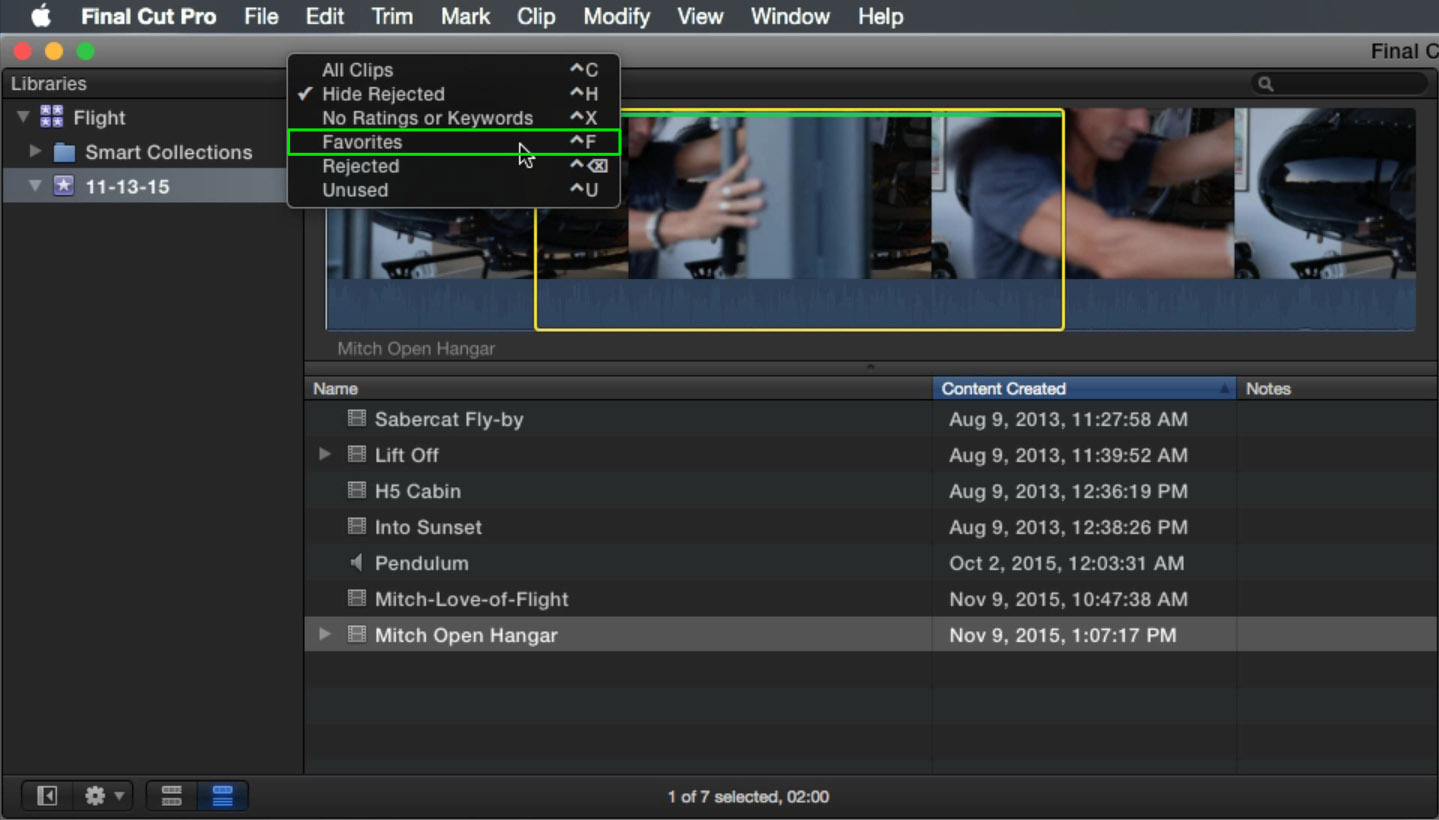
Note that the clips displayed in the favorites are only the portions of the clips that you’ve favorited, not the entire clip. To see all of your full clips again go back to the filter menu and choose Hide Rejected.
Creating a Project
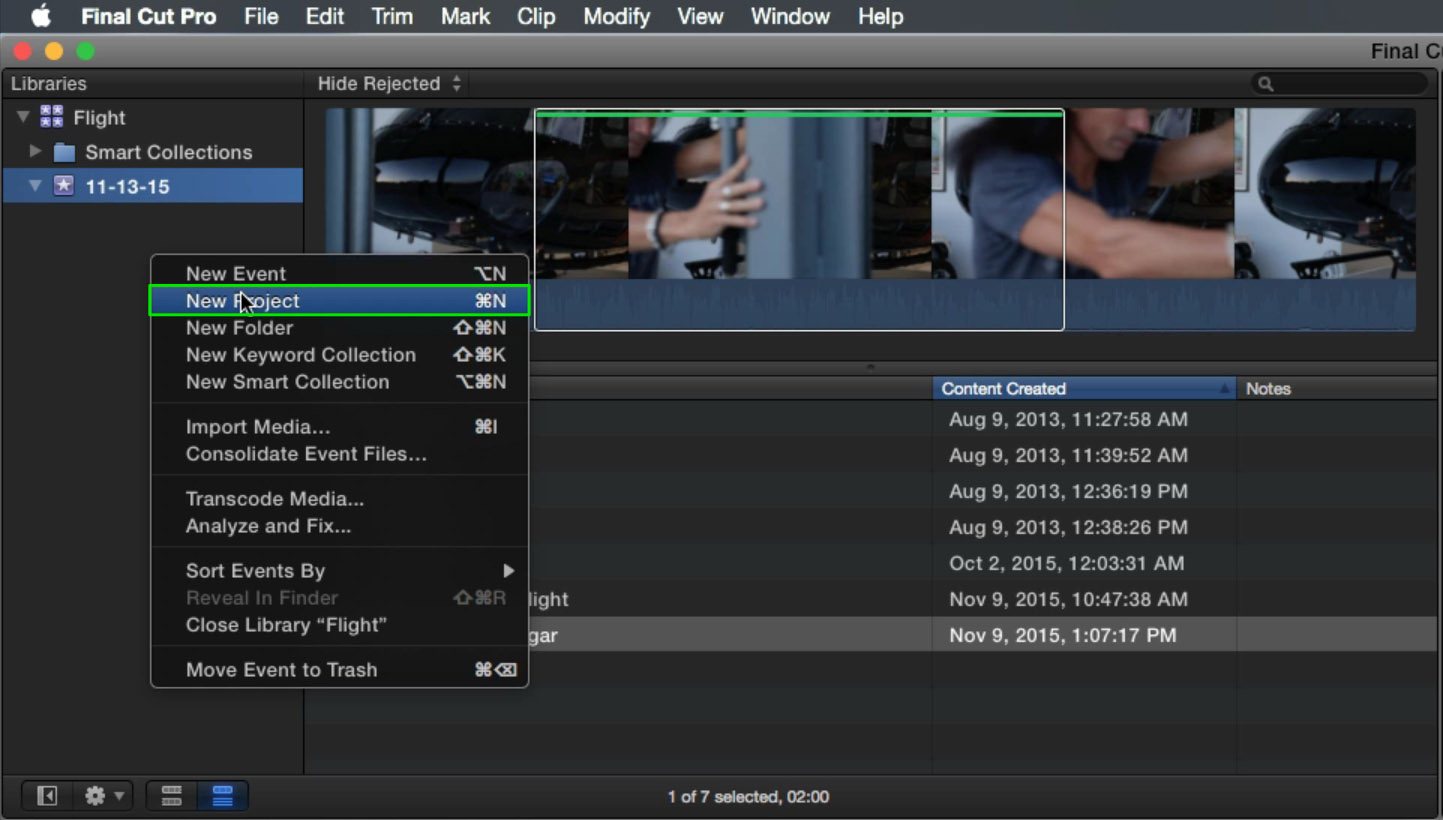
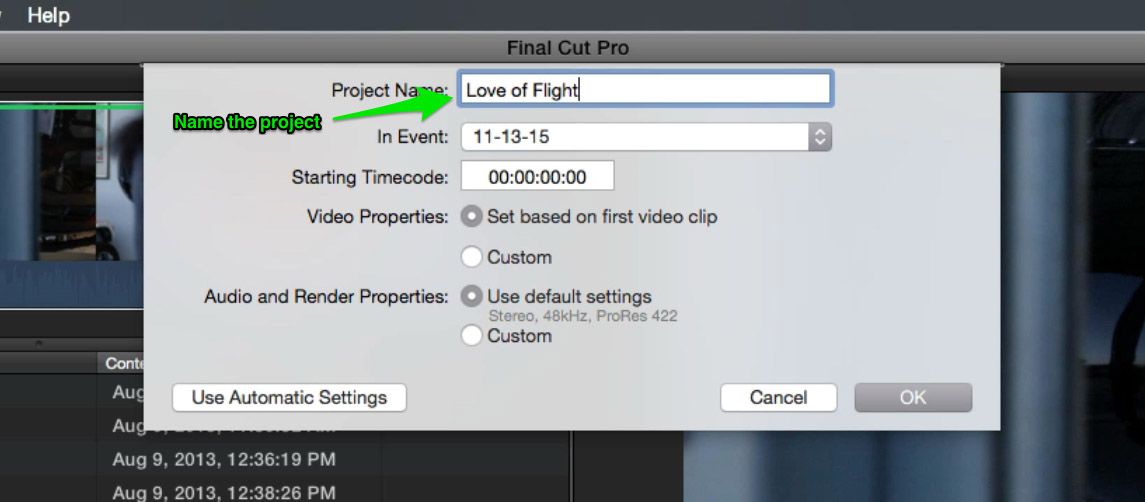
Now that we’ve selected our favorites let’s create a project to begin our movie. With the event selected in the libraries pane right-click and choose New Project. Name the Project Love of Flight and press return.
Adding Clips to the Timeline
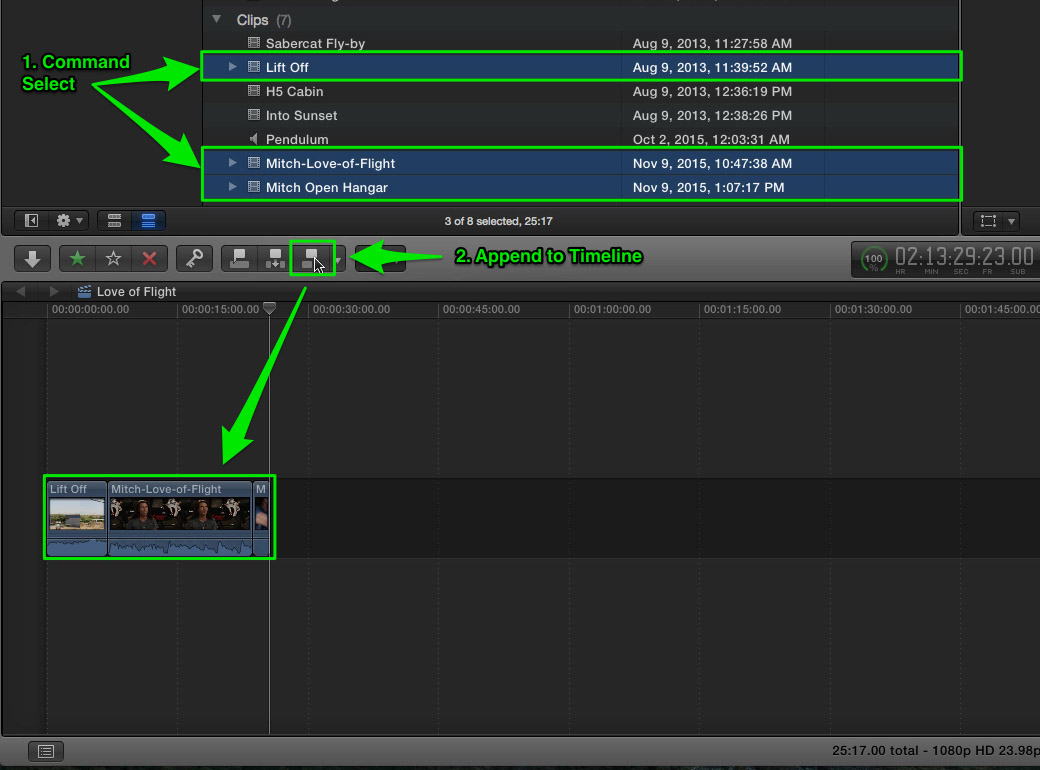
Let’s add 3 clips to the timeline by holding down the Command key and selecting the Lift Off, Mitch Love of Flight and Mitch Open Hangar clips, then click the Append button in the toolbar to edit these clips into the timeline.
Press Shift-Z to fit the timeline to the window so you can see all of your clips. Press the Home key, then press the spacebar to playback the sequence.
Arranging Clips in the Timeline
The clips are not in the correct order so let’s rearrange them. Click and drag the Mitch Open Hangar Clip to the left so that it’s at the beginning of the timeline. When you see a blue vertical bar appear, release your mouse.
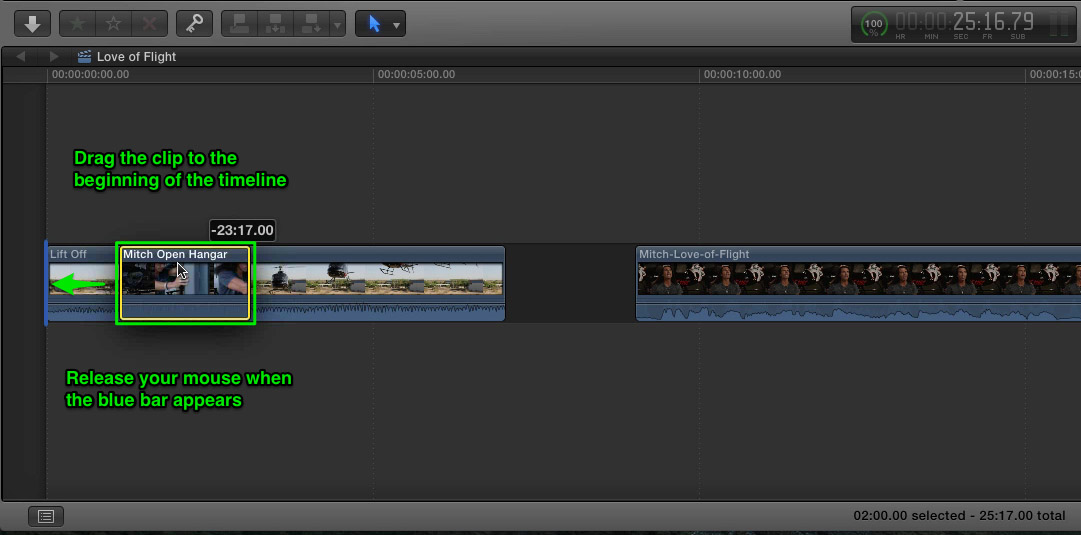
Before we move on make sure your clip order is as follows: Mitch Open Hangar, Lift Off, and Mitch Love of Flight. Press Home, then space to playback the edit.
Adding a Cutaway
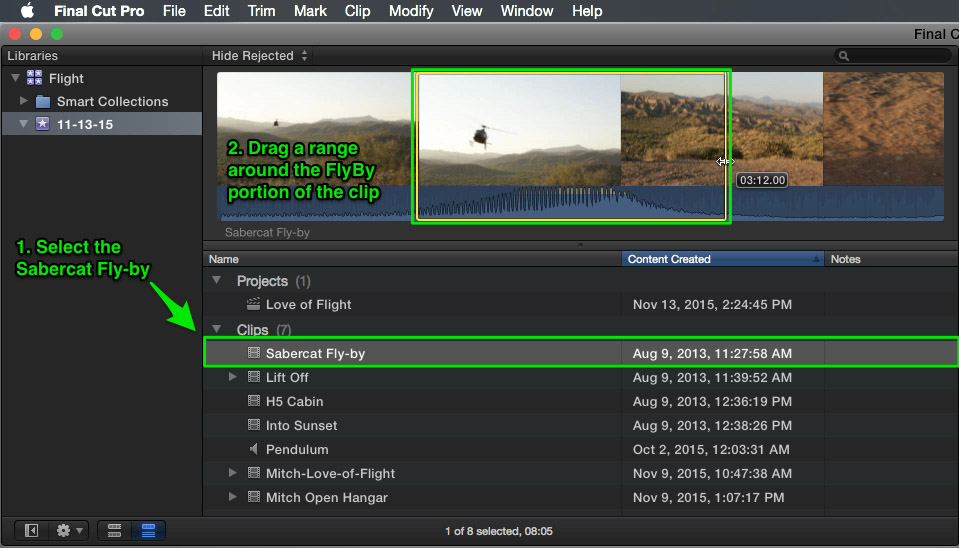
To make Mitch’s story more interesting let’s add some footage to reinforce what he is talking about. Skim to about 16 seconds in the timeline and click once to park the playhead just before Mitch says “…I looked to the sky…”. In the Browser, select the Sabercat Flyby clip and drag a selection around the “flyby” portion of the clip.
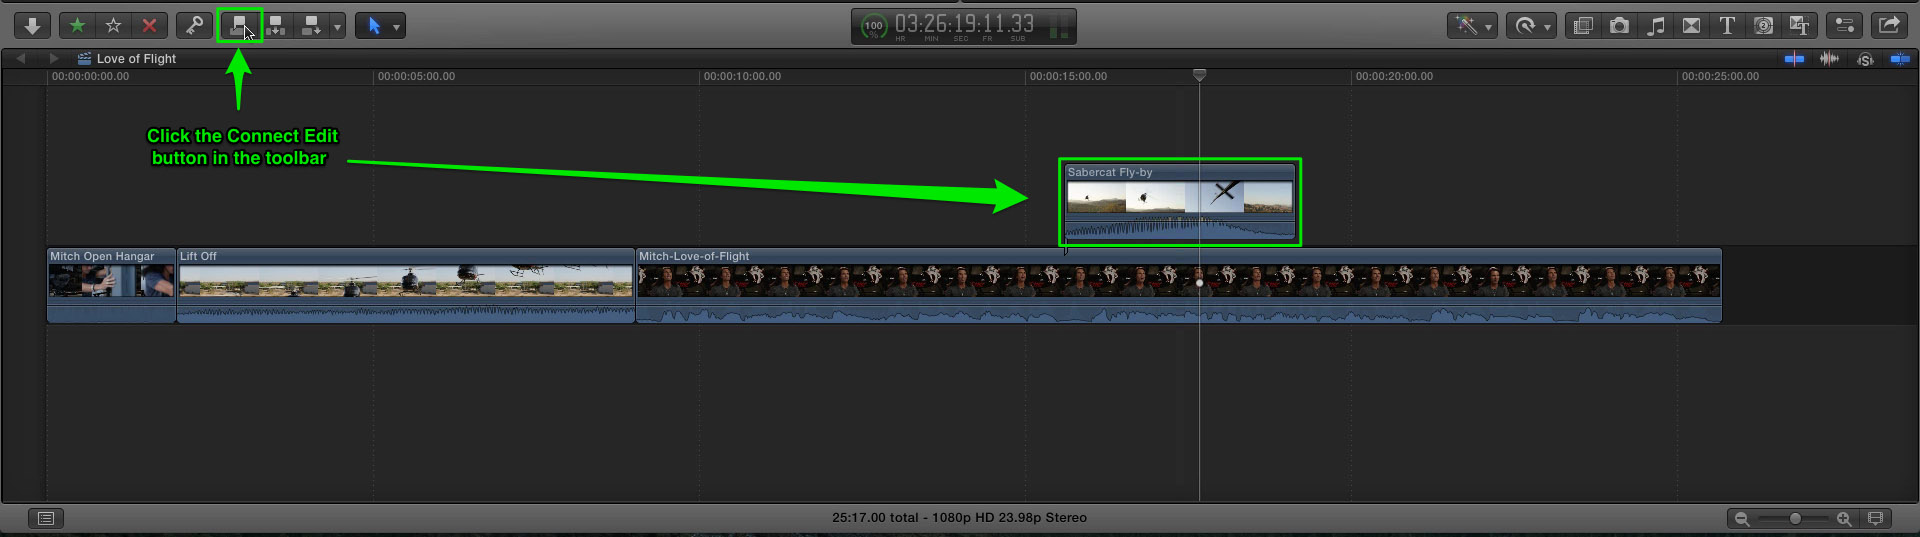
Press the Connect Edit button in the toolbar to connect this clip to the playhead position in the timeline. Press Home, then the spacebar to play back your edits. Don’t worry about the audio volume for now, we will take care of that in a another lesson.
This is Lesson 3 of our free Final Cut Pro X tutorial. If you are enjoying this tutorial, show us your appreciation by sharing!
- Lesson 1: Getting Started with the Final Cut Pro X Free Trial
- Lesson 2: Importing Media into Final Cut Pro X
- Lesson 3: Adding Clips in Final Cut Pro X
- Lesson 4: Trimming in Final Cut Pro X
- Lesson 5: Working with Sound in Final Cut Pro X
- Lesson 6: Adding Titles & Transitions in Final Cut Pro X
- Lesson 7: Adding Effects in Final Cut Pro X
- Lesson 8: Sharing your Movie in Final Cut Pro X

Thanks for sharing the entire thing, but this part is especially useful.