Today I’m going to show you a great technique for making black and white video in Premiere Pro using a workflow from my new “Color Correction in Premiere Pro” tutorial . And I want to point out that black and white is a lot more than just desaturating an image. It’s actually the way you blend the red, green, and blue color channels, to create the shading of black that you want. Now to do this you’re going to use a very specific effect.
Step 1 of 4
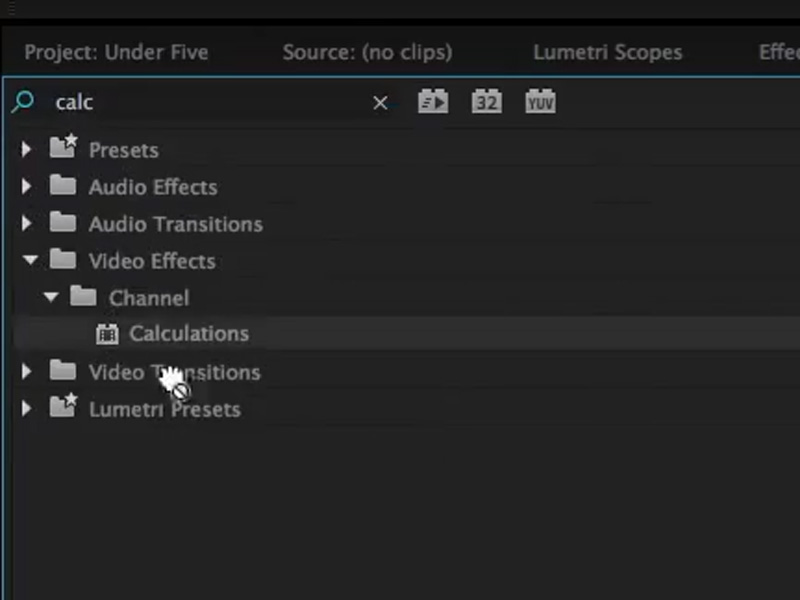
Apply the Calculations Effect
If you go to your Effects panel, and select calculations. Now calculations is located in your Channel Folder, but simply type c-a-l-c, and you’ll find it. I’m going to go ahead and throw it on this clip.

Step 2 of 4
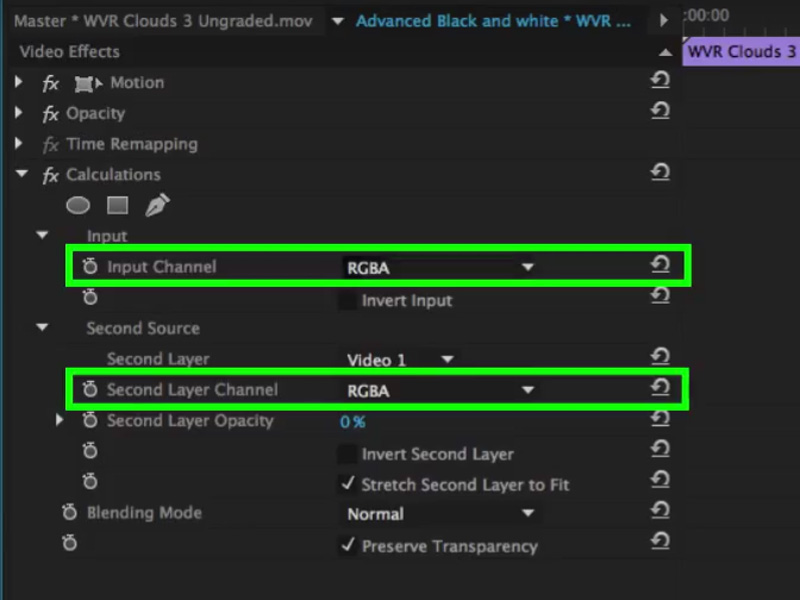
Choose a color channel for the Input Chanel
Now, nothing happens, when you go to your Effects control panel, you see there are controls for your Input channel, and your Second Layer channel. What you’re going to do in your input channel is choose whether you wanna use the red, green, or blue parts of your image. And we’re going to just arbitrarily choose red.

Step 3 of 4
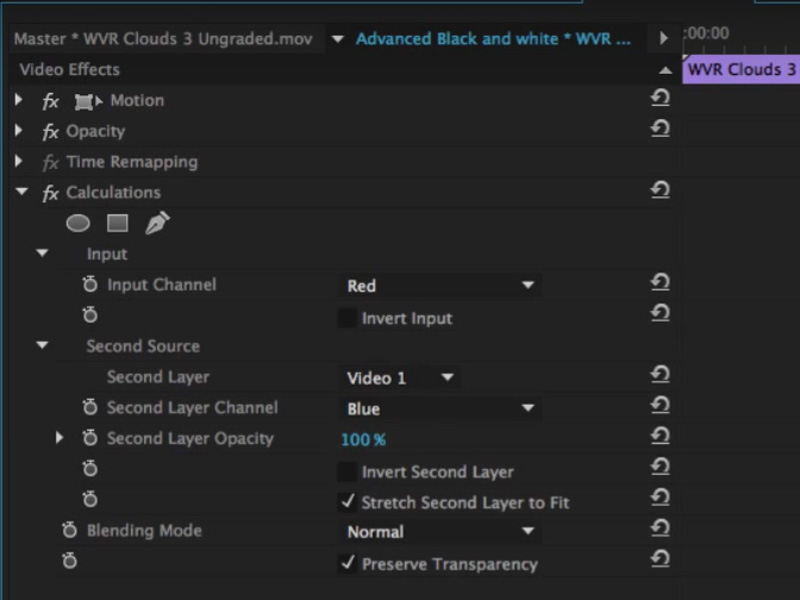
Choose a color channel for the Second Layer Channel
Then we’re going to go down to the second source, and I’m gonna go ahead and use blue.

Step 4 of 4
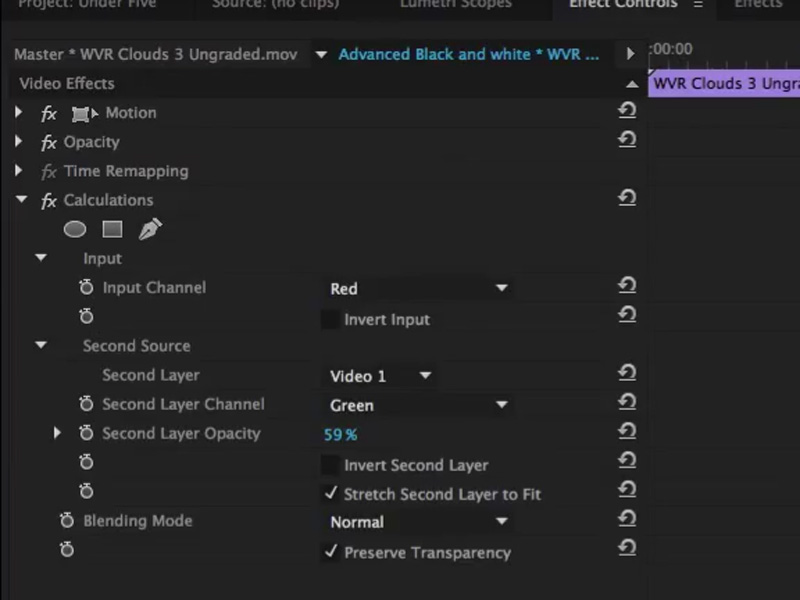
Change the Second Layer Opacity
This is where the magic happens: there’s a Second Layer opacity slider. And if I move it left and right, as we go from 0 to 100 percent, you see how the tonality of the blacks and the whites change. If I switched from say blue to green, I’ll get a slightly different black and white look.

Tips and Tricks
Now, there’s another great little trick that actually works in all the adjustments in Premiere Pro. And that is, if you go ahead and select the numerical value, the up and down arrow keys will actually move you by one tick with each up and down arrow movement. You can also hold down the shift key, a now you’ll be jumping in units of ten. And now if you want to fine-tune that, go ahead and jump back into your basic correction.


You can just choose the gray color channel